Introduction
This deployment guide assumes that the end user has the appropriate level of permissions to access and add/remove solution (.wsp files) from the root site collection. If you do not have these levels of permissions, please contact your farm administrator and ask for Root site collection Administrator access. Please also make sure that Microsoft SharePoint Foundation Sandboxed Code Service is enabled and running on the server. Please see our pre-requisite documentation for more info.
This guide is meant to cover the deployment process of the netDocShare Visual WebParts Solution, specifically for designed for SharePoint 2013 On-Premises. If you would like further assistance with using and configuring the individual WebParts, please see our documentation entitled “netDocShare WebParts – Power User Guide”.
Note: netDocShare Visual WebParts are not compatible with SharePoint Online or SharePoint On-Prem 2016 and later. We provide a more up to date SPFx (SharePoint Framework) package for these environments. Site Collection Libraries MUST be able to host JSON and js files or else deployment will fail. Any security measures that block Popups or iFrames must be turned off as our authentication uses these resources.
Supported Browsers
Supported Browsers:
- Microsoft Edge
- Google Chrome (latest released version)
- Mozilla Firefox (latest released version plus immediate previous version)
- Apple Safari (latest released version)
- Internet Explorer 11 (limited support only. IE11 Protected Mode is not supported)
Not Supported Browsers:
- Internet Explorer 10
- Internet Explorer 9
- Internet Explorer 8
- Internet Explorer 7
- Internet Explorer 6
Note: Please ensure that both your site collection and Farm server are using HTTPS to serve site collection pages and also retrieve content from the server. If there is a discrepancy between HTTP and HTTPS, our webpart asset retrieval will not work as the network requests will be blocked by default.
Farm Solution vs Sandbox Solution
We offer two different solution types for our deployment: a farm solution and a sandbox solution. There is no difference in the functionality of the two solutions; The main difference lies in how and where our app will be deployed.
Farm solution will deploy our code assets to the file system of the server that it is deployed on. A typical deploy location may look something like this:
https://{your-SharePoint-Tenant}/_layouts/15/netDocShareFarm/assets/images/folderIcons
You may recognize the _layouts designation which will be the source of the app code. From there it will be deployed across all the site collections that you need to use it through the SharePoint Central Administration deployment process.
In contrast, the sandbox solution will deploy assets to a direct location inside a SharePoint library of the site collection you plan to use netDocShare. The deploy location will look something like this:
https://{your-SharePoint-Tenant}/SiteAssets/netDocShare/CDN/assets/images/folderIcons/
We generally recommend using the Farm Solution as it avoids many permission-related issues during usage. For example, users will require permission to view the site collection where netDocShare is deployed but will ALSO need permission to access the library where our SiteAssets are deployed. The farm solution does not require additional permission as the Assets are loaded from a _layouts directory.
Deploying the Solution to your Site Collection
Our Visual Webpart solution is to be deployed using the SharePoint Management Shell. Simply navigate to the location where our netDocShareFarm.wsp file and Install.ps1 file are located.
Firstly, please edit the install.ps1 file which specifies the absolute path where the WSP file can be found. Replace the path with your own. Run the install.ps1 file and this will deploy and activate the solution. Now, open up SharePoint Central Administration where you can view and confirm the deployment. Navigate to Site Settings > Site Collection Features where you can see the netDocShare feature that has been deployed. You must activate the feature on all site collections where you would like to use netDocShare. After the feature has been activated, the process of adding / removing webparts should be the same across both solution types.
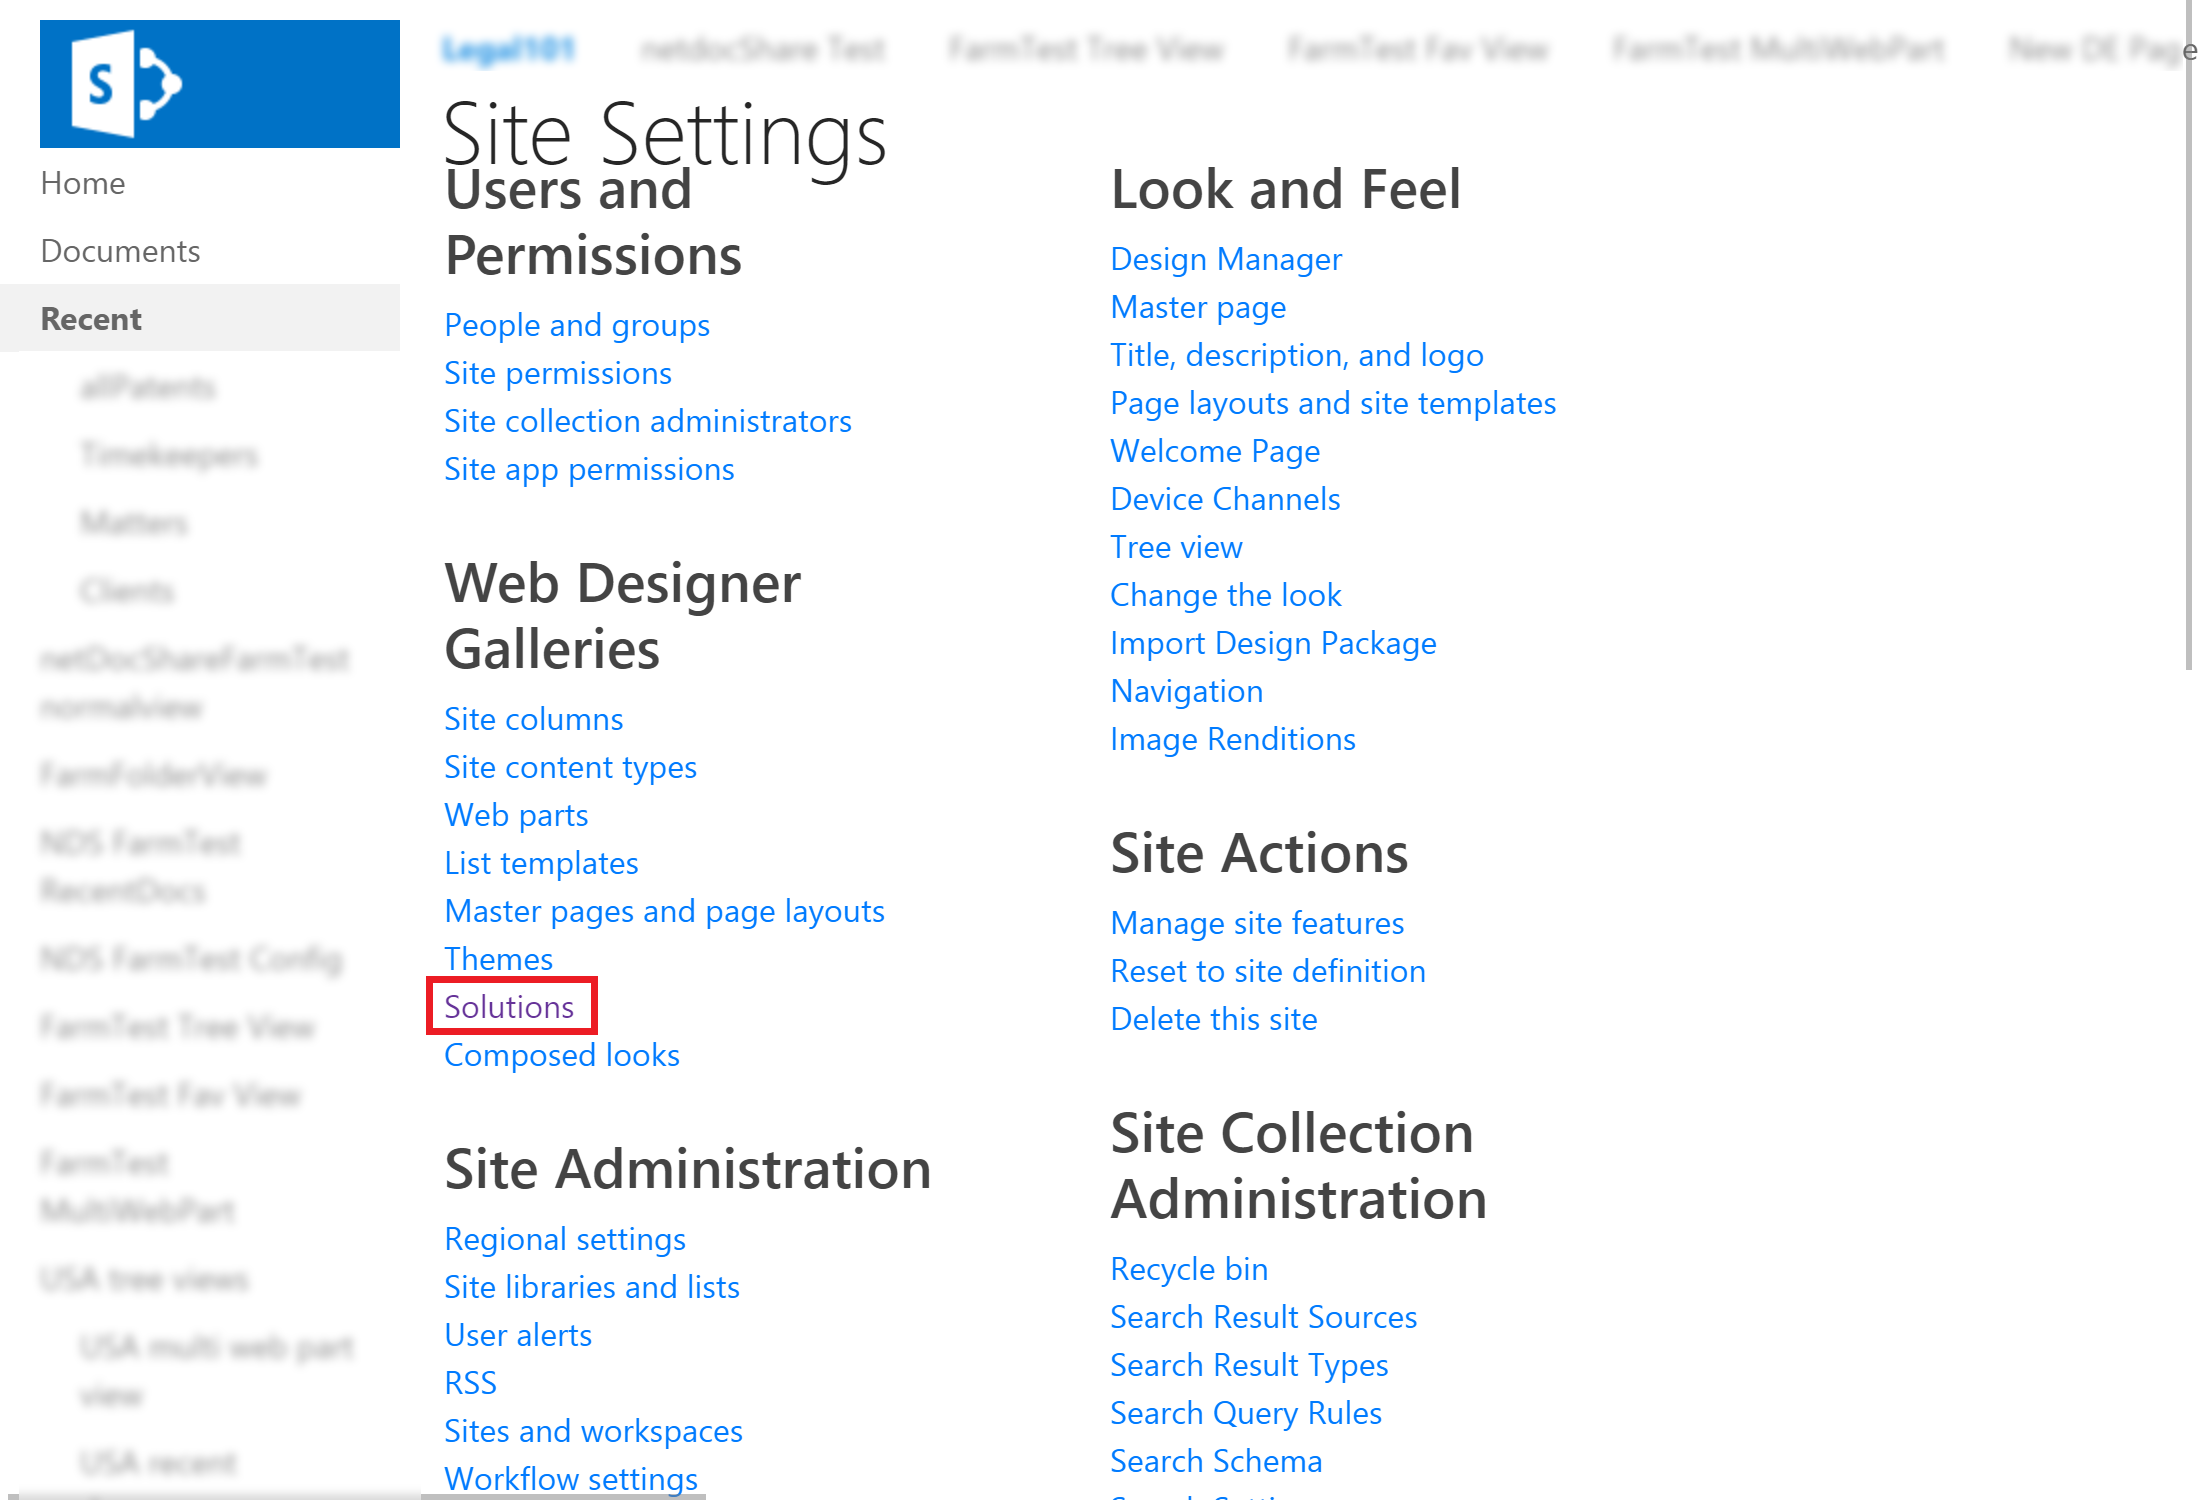
Our Visual Webpart solution is to be deployed via the Solution manager in the site collection where you are aiming to load the webparts. Once you are logged in as an Admin user (must have permission to deploy and activate solution files), navigate to the Site Settings page of the site collection. Click on Solutions as indicated below.
You can navigate to the Site Settings page by clicking the Cog icon at the top right-hand corner of the browser
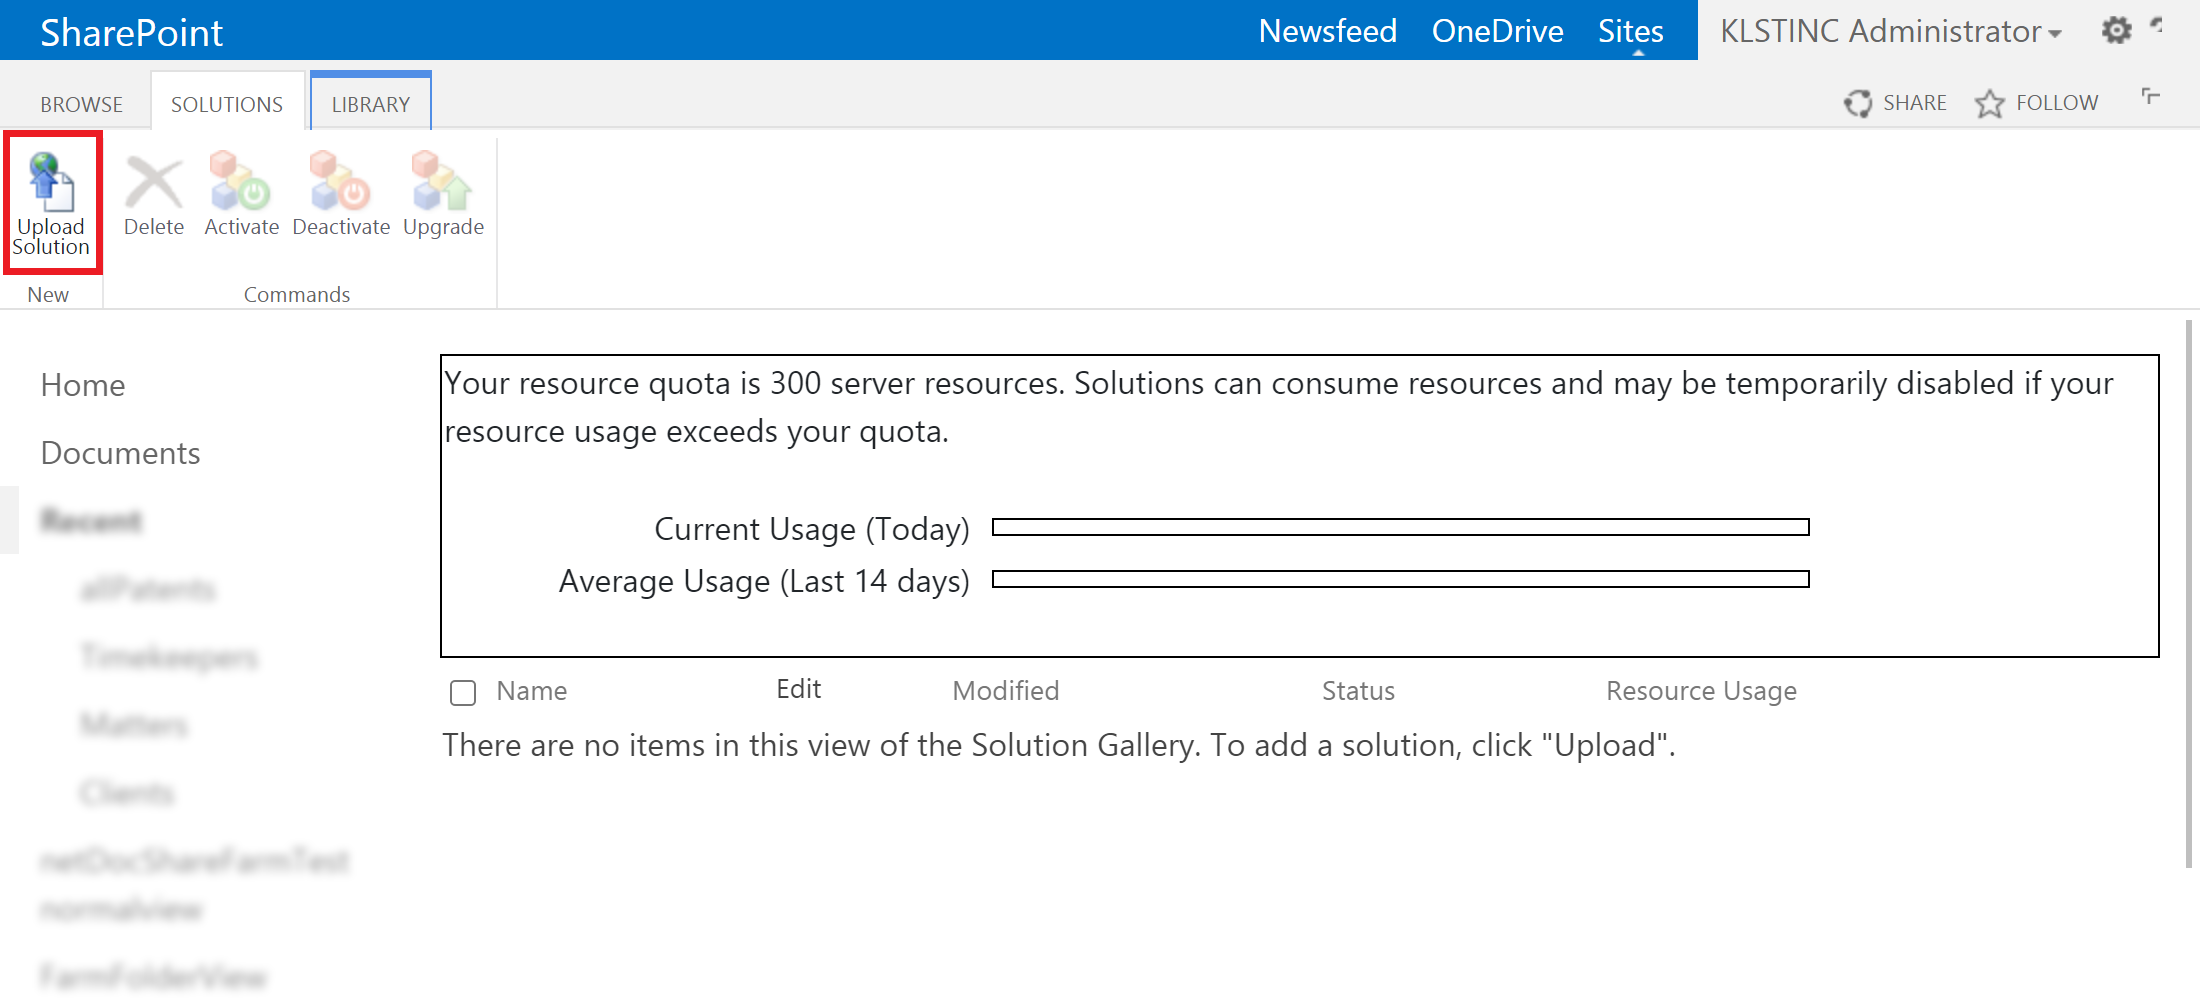
On the solution page, you will see the option to “Upload Solution” in the top left part of the ribbon. Please click this and navigate to where our netDocShare.wsp file is located on your system. When the upload completes, you will receive a dialog where you can “Activate” the solution. Please click activate to automatically activate all the Webpart features.
Now, netDocShare has been deployed. You will be able to create a new page in this site collection and add a netDocShare webpart. Once deployment is complete, the process of adding / removing webparts should be the same across both solution types.
Licensing Note
C:\Program Files\Common Files\Microsoft Shared\Web Server
Extensions\15\TEMPLATE\LAYOUTS\netDocShareFarm\assets\images\folderIcons
Note: Site Collection Libraries MUST be able to host JSON and JS files or else deployment will fail.
Note: Our Authentication uses iFrame popups by default. Any security measures that block Popups or iFrames must be turned off as our authentication uses these resources. However, if this is an issue, we do have a configuration option that can change the redirect behavior to full-page redirect instead of popup. Please see our “Power User Guide” in the Authentication section for more information.
Adding the WebParts
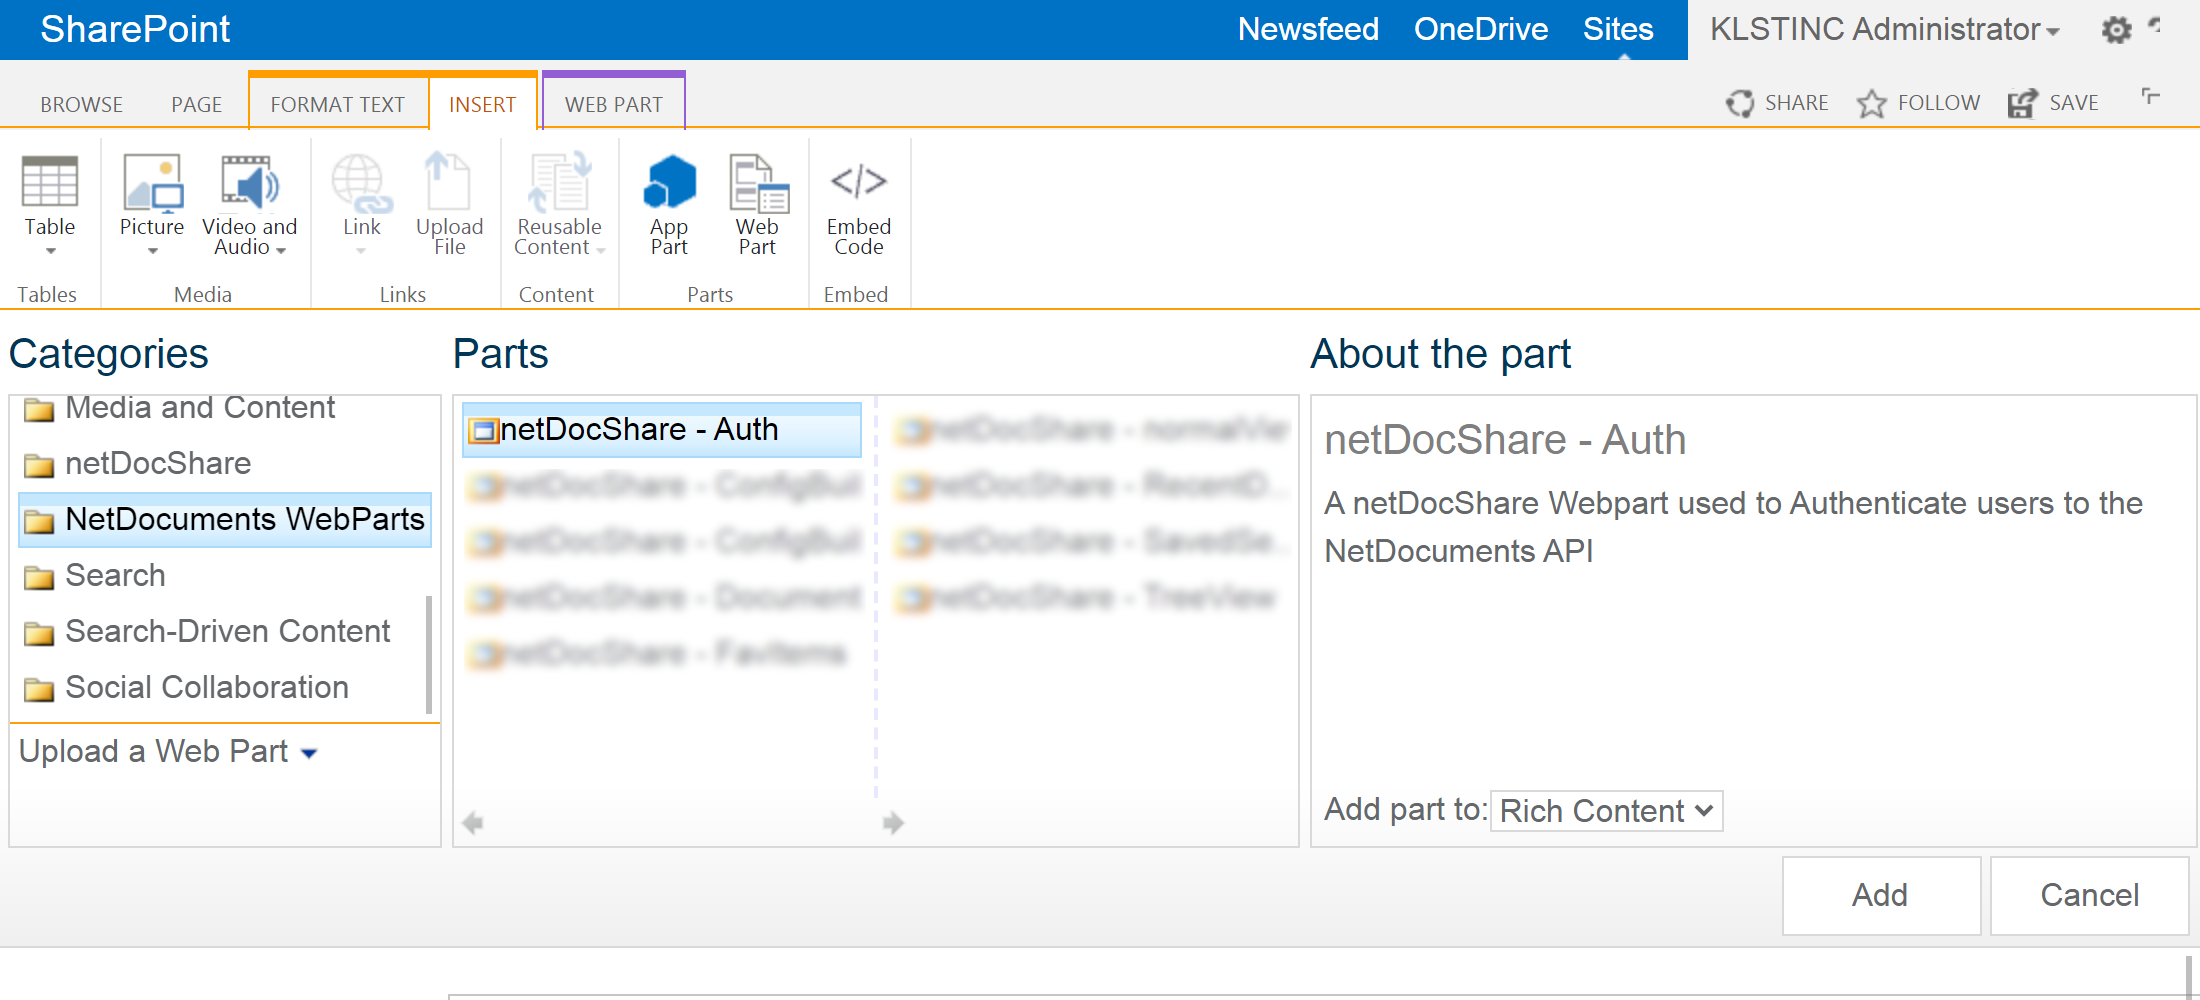
Note: Make sure that the page created for the webpart is specifically a “webpart page” instead of “wiki page,” which is the default option. Clicking “new” to create a new page will default to wiki page. Using wiki pages to host webparts may yield some unintended issues which we cannot control.
Note for Farm Solution: You may notice that the farm Solution has less types of webparts compared to the Sandbox solution. The farm solution has only 3 webpart types while the Sandbox solution may have 4-6. However, the farm solution is not missing any features.
In the Farm solution, we have consolidated all viewer webparts into a universal viewer that can be converted to any other view such as Treeview or RecentDocs view. Simply change
CollabSpaces: Sharing content with external users
Our webparts support the usage of CollabSpaces from NetDocuments.com. CollabSpaces are like workspaces and ShareSpaces; The major difference is that CollabSpaces can allow users external to netdocuments to have access to the documents inside the CollabSpace.
CollabSpaces can be displayed in normal or treeview using the “primarySource” value in the configs and inputting the ID and using “collabspace” as type. You can read more about this in the documentation named “netDocShare Webparts – Power User Guide”. To give access to external users, a few SharePoint-based permission tasks need to be done.
- Firstly, the external user must be added to the group that the CollabSpace is shared with on netdocuments.com. This will send an email to the user and allow them access the netdocuments website through a special external user login.
- In order to view the content on SharePoint, the user must first be added to the site collection where the webpart is located.
- Finally, the external user must ALSO be added to the App Catalog site collection where the App is deployed. This is because they need permission for our code (retrieved from that location)
Upon giving the correct permissions, external users will have access to a specific webpart where they can see and interact with CollabSpace contents. The external users should be locked out of every other view except for the CollabSpace that we have allowed them to view. If the external user is removed from the group, they will continue to have access to the CollabSpace until their access token expires, which should generally be 30-40 minutes.
Updating your Deployment Package
Occasionally, we may provide an update package that improves functionality or adds new features to the netDocShare product. In this case, users will need to re-deploy their solution file (WSP) using the same steps as deploying it for the first time. Note that this process should not disturb webparts that have already been set up using our previous build. However, if you are switching between our Sandbox and Farm solution, this will, unfortunately, render your previous webparts non-operational.
Please be aware that there may be invisible webparts on existing page webpart pages. These invisible web parts are created when a user does not finish the set-up process of a new webpart. This may cause authorization issues because invisible webparts are also loading code. You can delete these webparts by navigating to Site contents → Site Pages → and click on the page that you wish to check. Once there, go to properties, and click the link “open webpart page in maintenance view”.
Navigate to Site Settings > Solutions page as you have during the initial deploy. Simply deactivate and then delete the previous .wsp file from your list of deployed solutions. Then, upload the newest WSP file that we have provided. Please be sure to click activate when the option is available. No other action needs to be taken.
Note: Site Collection Libraries MUST be able to host JSON and js files or else deployment will fail. Any security measures that block Popups or iFrames must be turned off as our authentication uses these resources.
Open SharePoint Central Administration and navigate to Site Settings > Manage Farm Solutions on this server. On this page you will see a list of all installed solution files. Select netDocShare and you will be able to see an option to “Retract” the solution. Once you confirm the retraction, you may have to wait several minutes depending on how many site collections that it has been applied to. Once it is confirmed that the solution was successfully retracted, then you will have the option to delete it.
Now, you can follow the same steps for deploying a farm solution earlier in this document to deploy the updated files.
New Authentication introduced in v2.4.1
Starting from version 2.4.1, we are introducing a new method of authentication which will make it easier for both administrators and users to authenticate with the NetDocuments API. As mentioned above, we have taken steps to ensure that webparts using the previous system are NOT affected.
The major change includes the removal of reliance on having an auth page created on your SharePoint site collection. For the foreseeable future, you may continue to use the auth-page-based authentication system but please be aware that a much easier system can be implemented with minimal time and complexity. Please see the new authentication section in our Power user guide for more information.