Introduction
This user guide is a general overview of how to use and access the netDocShare Admin App designed for netDocShare Admin Users. In this Admin app, Admins can have the ability to control the Global settings that can reflect in the configs of each webpart or tab implementation of netDocShare.
In This documentation we will cover the below mentioned parts.
- What is the Admin App and how to access it
- Why to use the admin app and common use cases
- A Walkthrough of the admin App interface
- Global Defaults, overrides and how they will affect your webparts
Note: netDocShare Admin App is introduced in netDocShare version 3.2.0.2503. Using the admin app with a version of netDocShare earlier than 3.2 may cause issues as older versions of netDocShare do not support the processing of global Configs.
What is the Admin App?
The admin app is specially created for netDocShare admin users to view and manage global Configurations for netDocShare config settings. As you may know, netDocShare uses config options to control every aspect of what the users can view and interact with, as well as many default settings that are required for the netDocShare to function.
Using this app, administrators can control the config settings by restricting the override options for certain settings or by applying the pre-defined defaults which will be customized for your environment and replace the factory default settings. This system is applicable for SharePoint, Teams Custom Tabs and WebApps.
The admin app is a service hosted by KLST which can be reached with this url:
Who can use Admin App?
netDocShare Admins can use this Admin app. Admins are automatically set to primary contact user emails when a client creates an account with our company. Admins are also be able to manage this list to add or remove user emails. Navigate to Admin Users page and add valid users’ Email IDs or remove them and click “save” to persist.

Why use the Admin App?
By default, we allow users to edit all config settings. We also provide some factory defaults that may or may not be fitting for your specific environment. Typically, users will have to change these settings on each webpart or tab that they wish to customize.
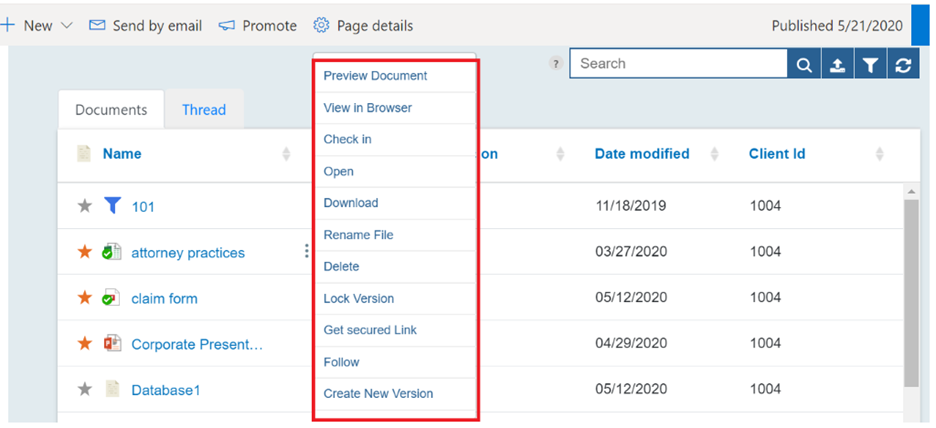
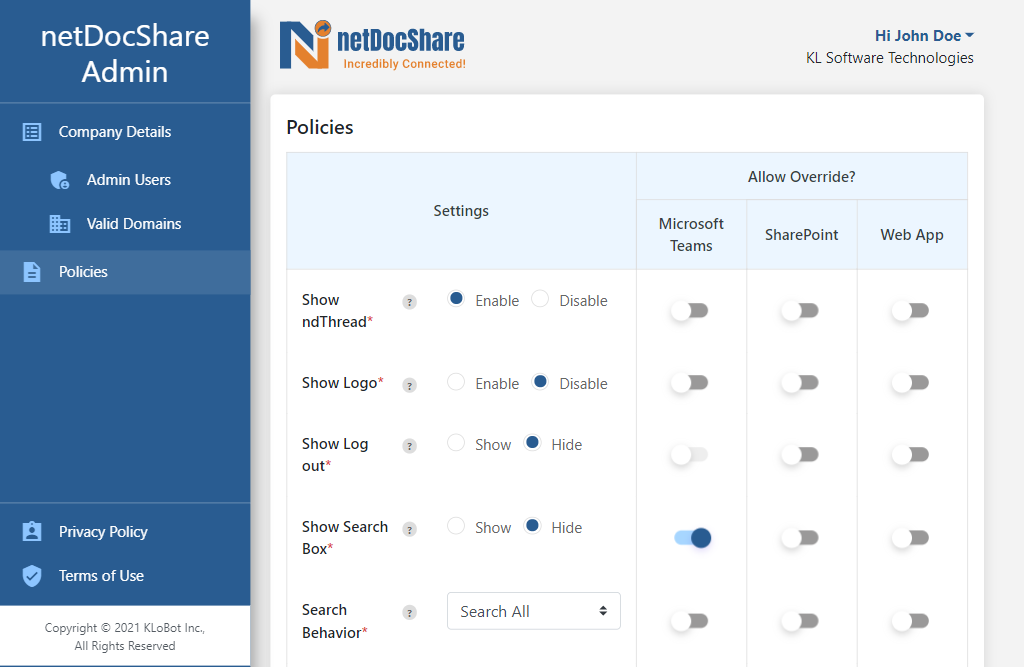
However, using this Admin app provides a solution which allows administrators to set up trusted defaults that will be applied across ALL SharePoint webparts or ALL Teams tabs. Admins can also override specific settings only, the experience can be as general or as granular as desired. As shown in below image Admins can allow whatever the settings that user can edit override.
Overall, there are 2 main questions that an Administrator must decide when setting up configurations globally:
- Does this setting need to have a default value that is different that the factory default?
- If yes, then picking an option in the admin app will globally provide your selection as default in all environments
- If no, then not picking an option will set the app to use individual user-defined values or factory defaults for that config option
- Should users be able to change from the setting that is provided to them?
- If yes, then turning off “Allow override” in its respective environment will disallow users from changing this setting
- If no, then turning on “Allow override” will let users change the setting
Using the system above there can be 4 different results for each setting:
- Default setting is provided via global config and user is NOT able to change it
- Default setting is not provided, user is NOT able to change it (this means the setting is effectively disabled or forced to use factory default)
- Default setting is provided via global config but user is able to change it
- Default setting is NOT provided and user is able to change it (the setting will use factory default but user is able to change it. This is the state that existed before Admin App)
Example Use Cases
Let us get through some examples to understand the Admin app more clearly.
Case 1: Defaulting display options to “off” and hiding them
In the example below, we have disabled override options for some settings which will restrict users from overriding in SharePoint. We have disabled Show Logo, Show Logout and Show Search Box with the pre-defined settings.
Show Logo : – Disable
Show Logout :- Hide
Show Search Box :- Hide
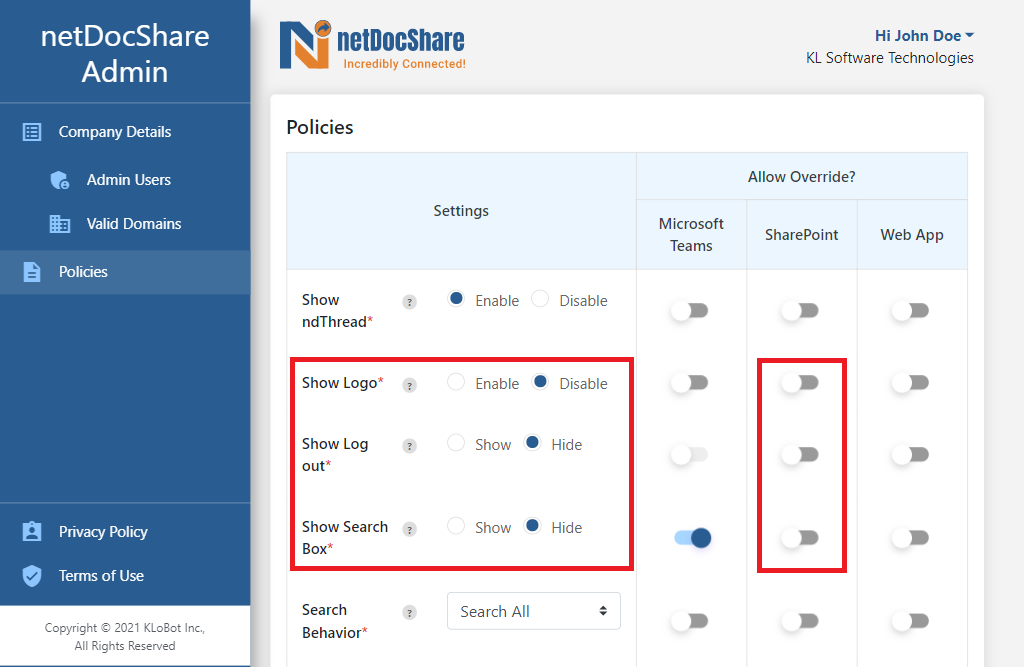
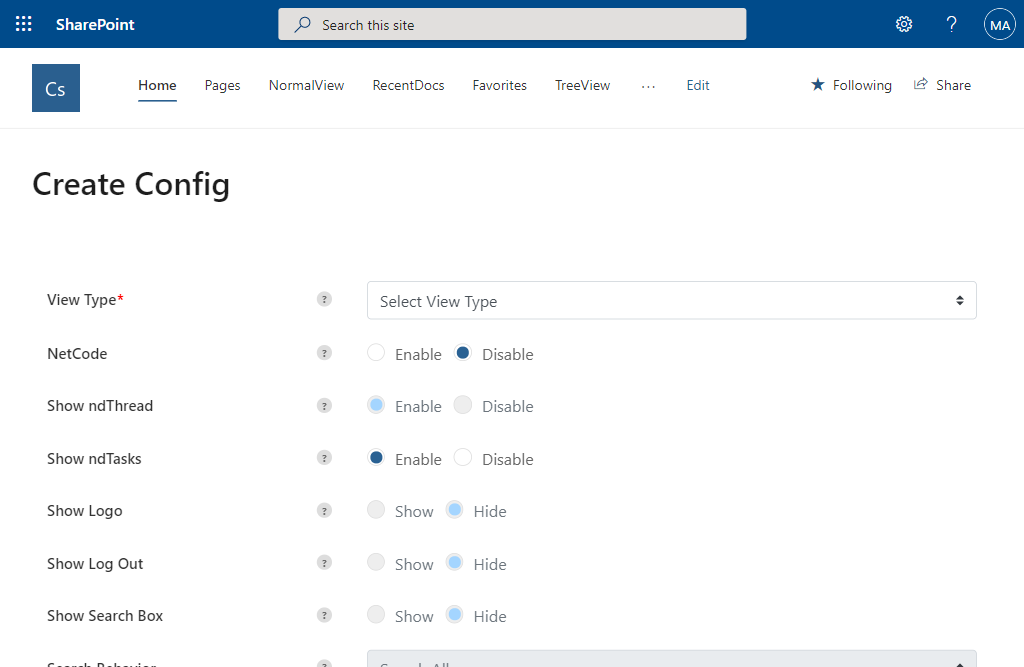
Now if the user navigates to a Config page or attempts to edit an existing webpart using config builder, they will be unable to edit these settings. They will see prompt message in the tooltip that states “This setting cannot be overridden!”.
In this state, all users across SharePoint & Teams will no longer be able to edit these 3 properties and also they will be provided default values which will disable and hide these display options.
Case 2: Removing undesired behaviors
In this case, we would like to remove “delete” from the list of available context menu options and disallow it in Teams only. This means that SharePoint users will still be able to add the “delete” option but now, Teams users will no longer be able see or select this option. To achieve this, simply de-select the ‘delete’ item from the list of context menu items and “allow override” in SharePoint only.
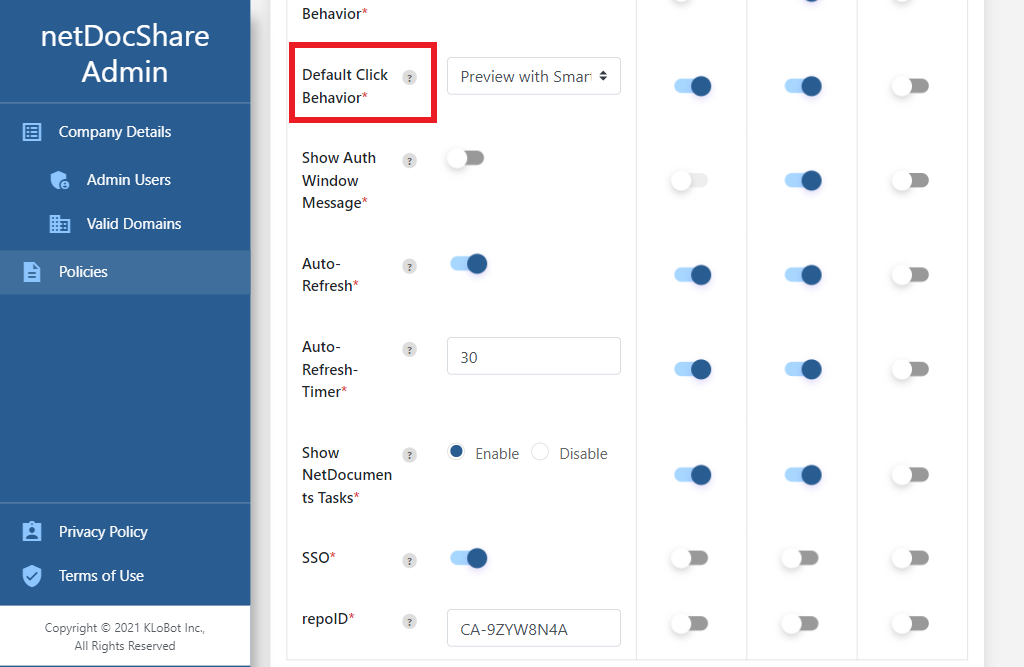
Case 3: Providing global defaults
In the final example case, we are setting up global defaults for settings that should rarely be changed. For example, in this case, we are setting default click Behavior to “Preview with Smart Previewer system”. Setting override to false for all environments should disallow users from deviating from this option on all environments.
Walkthrough
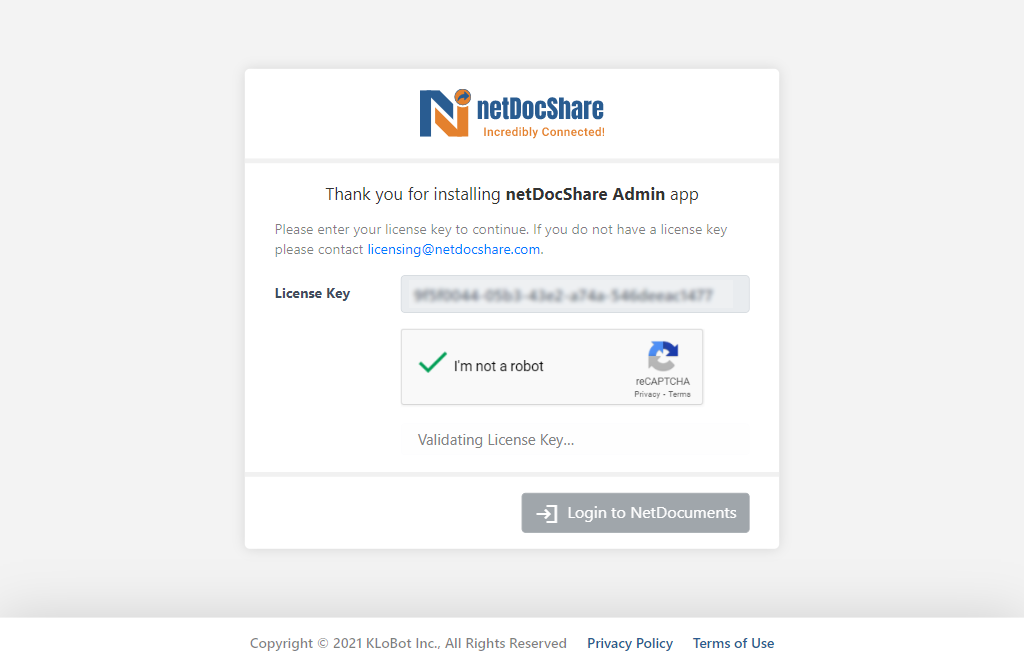
Here is a detailed walkthrough that goes through every step of accessing and manipulating the configs. To enter the netDocShare Admin App panel, the client will need to providde a valid License key. This license key is typically provided by KLST when netDocShare is purchased.
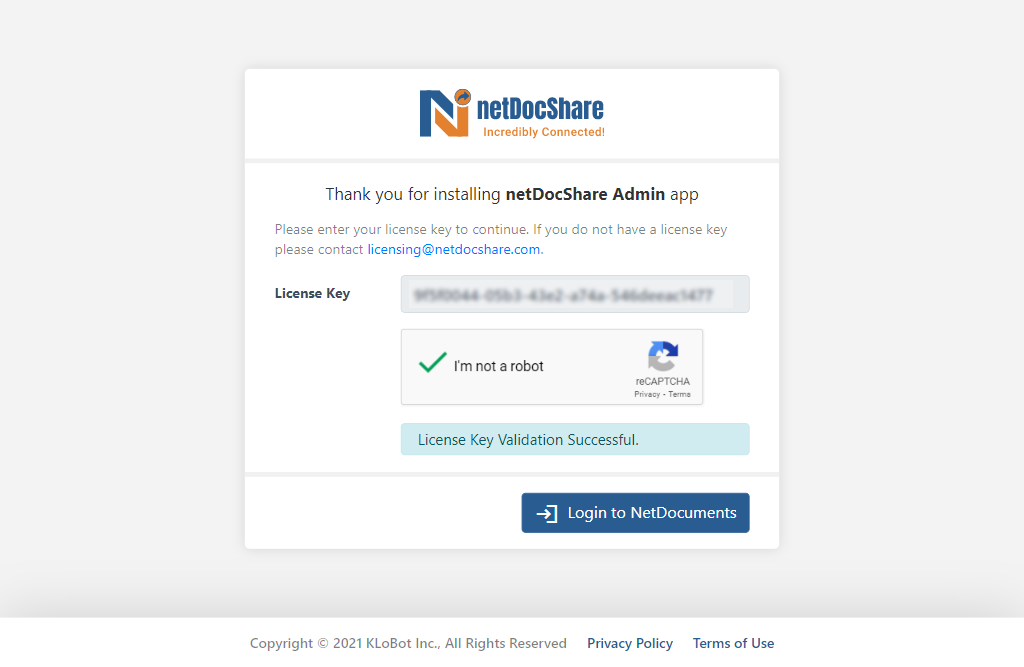
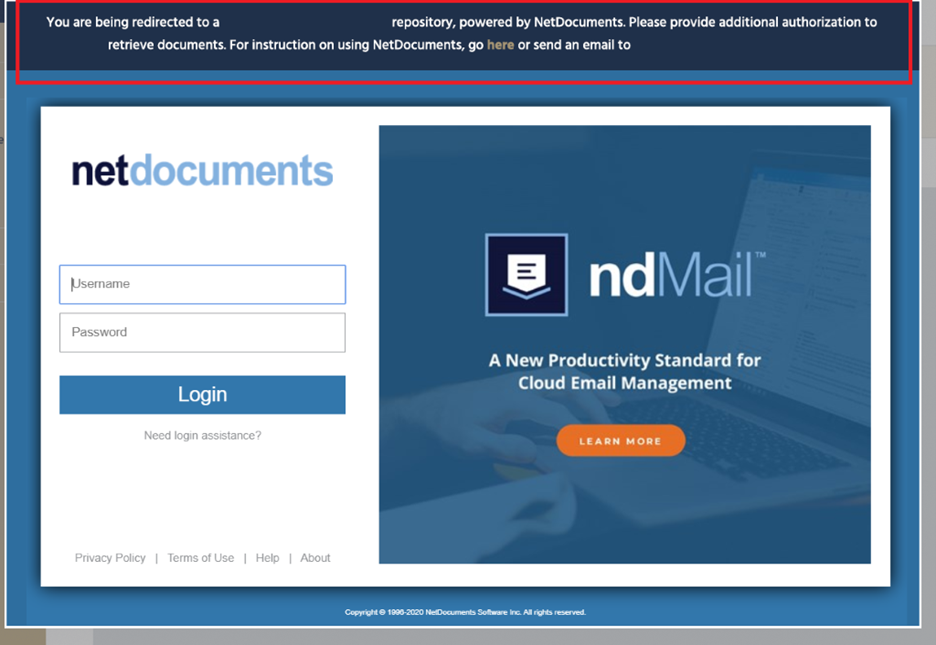
After entering the License key, it will start validation. Once that is successfully completed, it will allow the user to authenticate with NetDocuments.
Now click on Login to NetDocuments button.
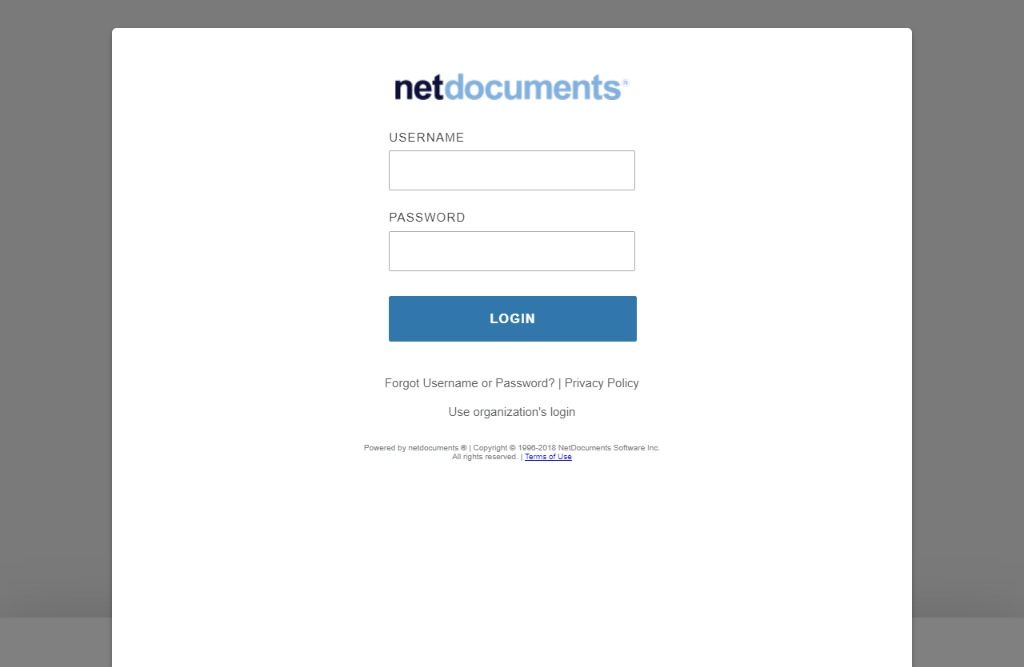
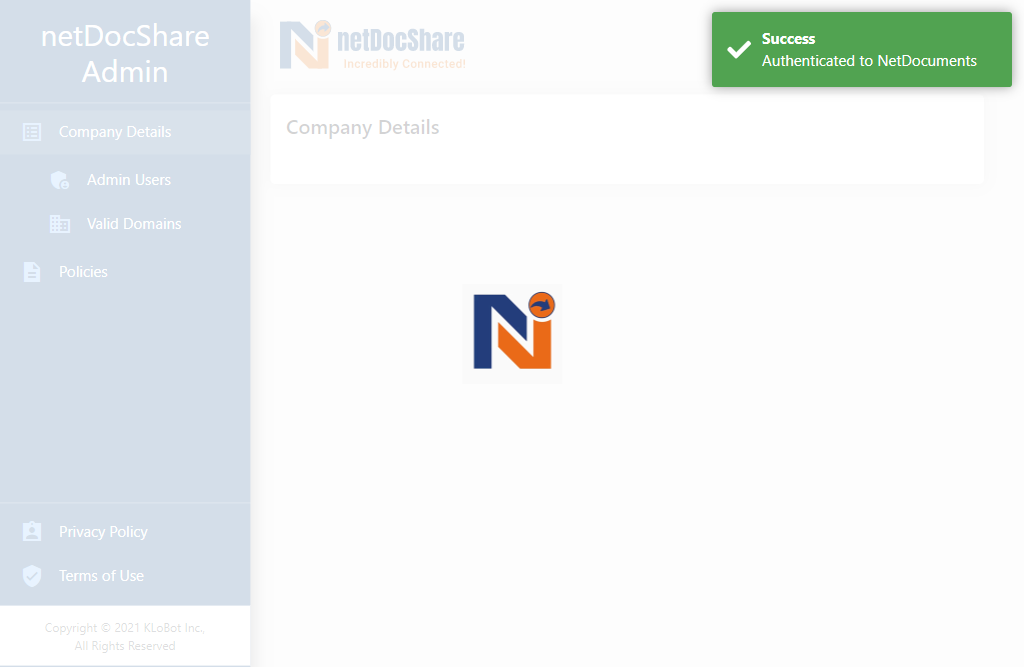
Enter valid netdocuments credentials to complete the auth process. After completion of the auth process it will lead to Admin app home page with success message.
Navigate to the Admin Users page to add or remove administrator emails.
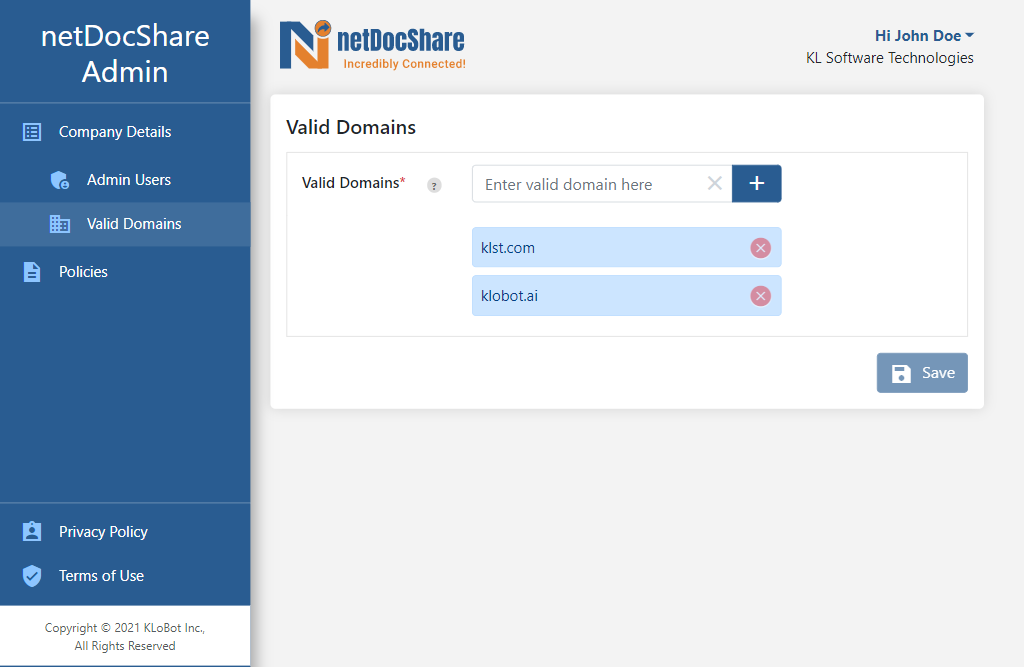
Navigate to Valid domains page to add or remove domains which have permission to edit the Admin settings.
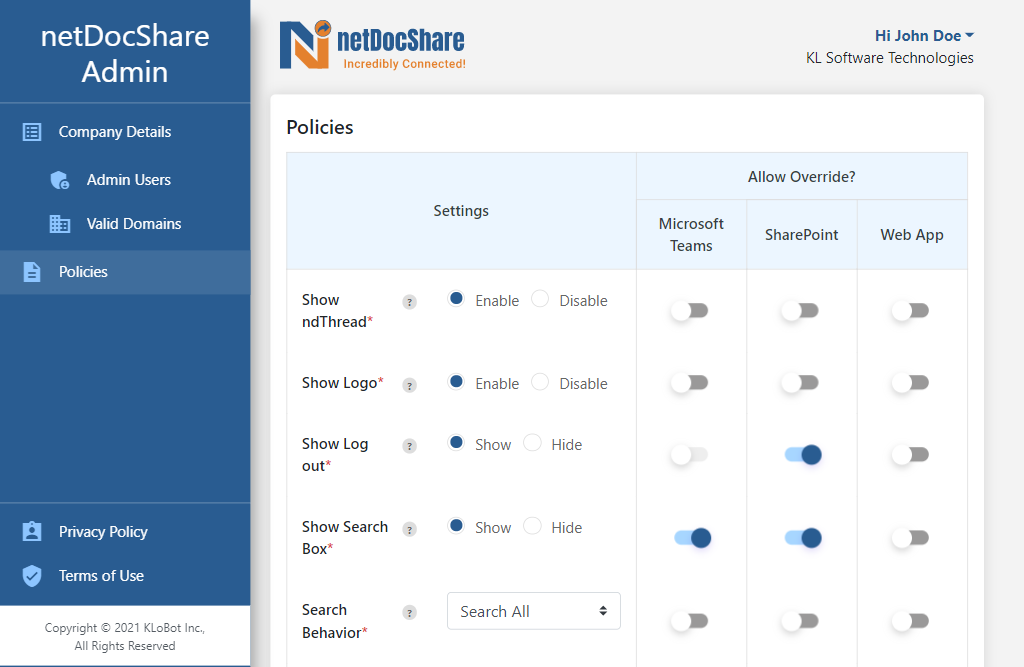
On the Policies page, admins can provide custom defaults for all the values in the form and allow or deny the option to override that setting. If the admin allows override then the user will be able to change the setting, otherwise the global setting that the admin has chosen will be applied. If no global Setting is chosen, a factory default setting will be applied.
Authentication
Admin Users can access the Admin App by entering a Valid License key.
Enter Valid License Key
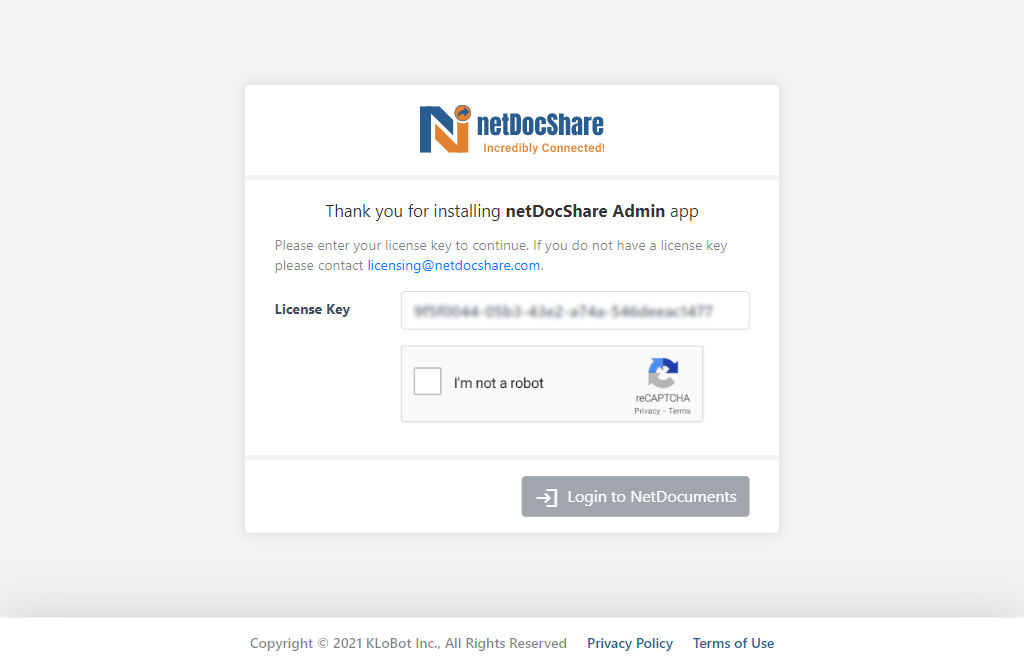
After entering valid license key user need to verify captcha.
Once the captcha is successfully verified the license validation will start. If the License key is successfully verified, it will enable the Login to NetDocuments Button.
Users need to authenticate with NetDocuments login credentials.
After completion of all the authentications user will be navigated to Admin App home page.
Main Settings Screen
In the main settings screen, we will cover Company Details, Admin Users and Valid Domain details.
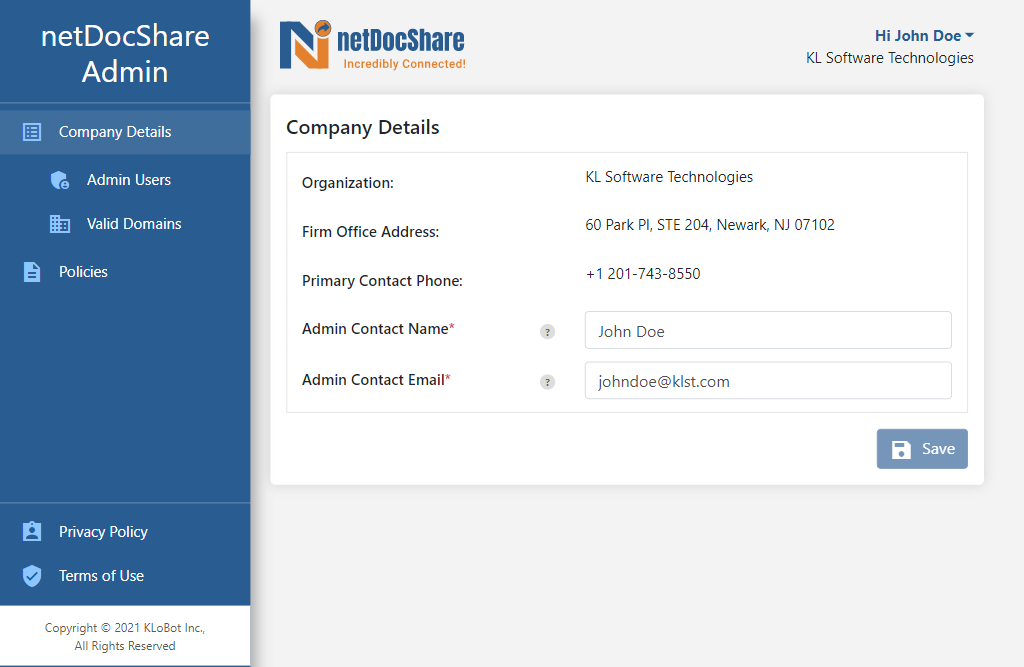
Company Details: Here we will get the Organization details along with Office address and Primary contact number which are derived from the license info that is stored in the KLST client database. You may change any settings here to update your firm’s information.
Also, we have additional settings of Admin Contact Name and Email ID which can be editable. These are the details end users can directly contact for any assistance.
Admin Users: As we can see below, we can add or remove admin users who can have the ability to access the admin app. These allowed users can manage all the settings in the admin app.
Valid Domains: In a single firm we may have multiple domains. By using this Valid domains we are able to control which domain user can able to access the Admin App.
Global Config
The Global config is the main part in the Admin app. Here only the Admin can restrict the settings that can be controlled by the users. As we can see in the screenshot below, Admins can Allow Override or not. Based on these settings only the config screens will be updated accordingly.
Note: Admin must select the Pre-defined setting to restrict the override option. Otherwise, users may end up with trying to select the setting.
Allowing Override
Admins will have almost all the settings to control except settings that are specific to particular web part view. For example, we are not allowing the compact mode options to be changed in admin settings because it is specific to normal view. Similarly, there is an option for treeview which determines whether the table shows only documents or documents AND containers, this option is also not available in the Admin interface.
If the Admin allows override, then users will be able to change the settings using the config builder or by manually editing the JSON. If admin does not allow the override, then users will get whatever the setting provided by Admin.
Config Appendix
NetDocShare uses a JSON-formatted config object to customize views and webparts to suit a user’s needs. In the admin app, Admins can restrict the settings that can be overridable. Below you will find a list of possible properties admin can restrict.
Base Properties
https://{yourSharepointTenant}/SitePages/auth.aspx
NEW: Starting from version 2.4.1, users may input a Universal Authentication URL instead of one which leads to the auth page. Please see our Service-Based Authentication section for more info.
If you are in SharePoint online (currently included in the config above) your asset path may look like the following:
https://{yourSharepointTenant}/sites/AppCatalog/ClientSideAssets/23dea53d-fbee-49c3-8b16-c6b586b0422f/
If you are on Share Point on Prem Your asset Path might look like the following:
https://{yourSharepointTenant}/SiteAssets/netDocShare/CDN/assets/images/folderIcons/
We recommend using iFrame as it tends to have a better user experience, however, we understand that many of our clients may work in environments which block iFrames by default.
In that case, please be sure to include this “authPage” config in ALL webparts intending to use this system and set to ‘redirect’. If this config is NOT included, the webpart will default to ‘iFrame’ behavior.
Optional Display Properties
Note: On the Microsoft Teams implementation of our app, logout is required on every page, therefore this property is set to true and will not be editable by users
Example: “showSearchBox” : true, //Accepts Boolean
Example: “showLogo” : true //Accepts Boolean
Example: “autoRefreshTimer”: 15 //Accepts int that is bigger than 1
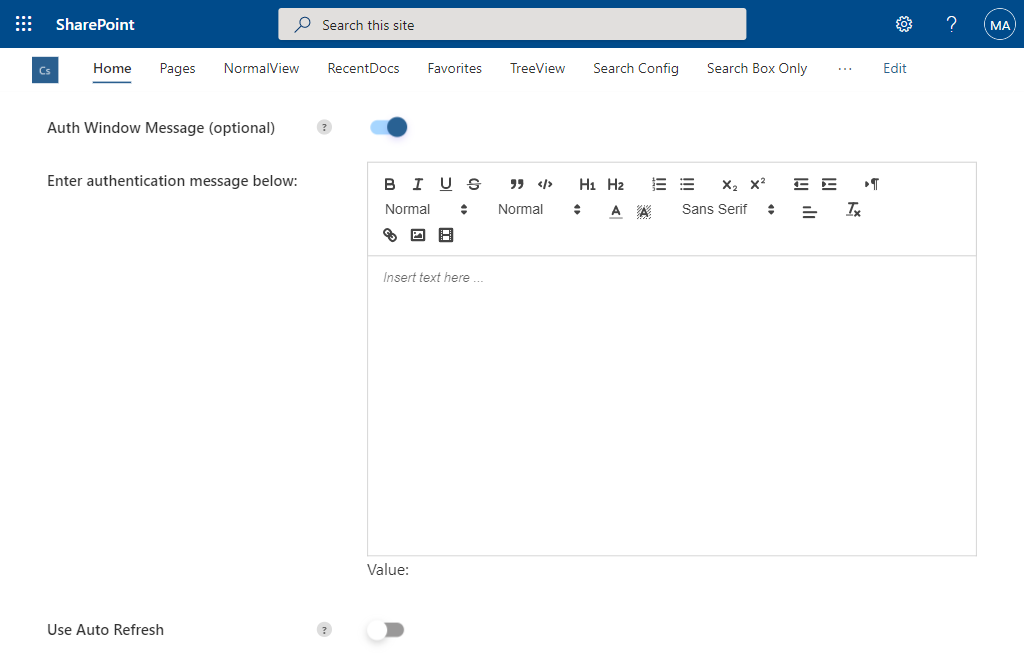
If you are editing JSON manually, you may insert html and css elements as a string to display a customized message. For users editing using the JSON config Builder, we have provided a rich-text editor as seen below:
Note: NetDocuments Configuration Properties are case-sensitive, follow the official spelling and character case as shown above.
Search Current View: Will execute a search on NetDocuments with the current container as the search scope (including sub-containers). It will return all results matching the metadata columns of the existing view.
Search All: Will execute a search on NetDocuments with the current container as the search scope (including sub-containers). It will search across all metadata including keyword searching the content of the document.
Note: Search All cannot expand the search scope beyond the original source container.