Settings
After a user navigates to the netDocShare Provisioning Tool Home Page, they can select the gear icon to navigate to the Settings page.
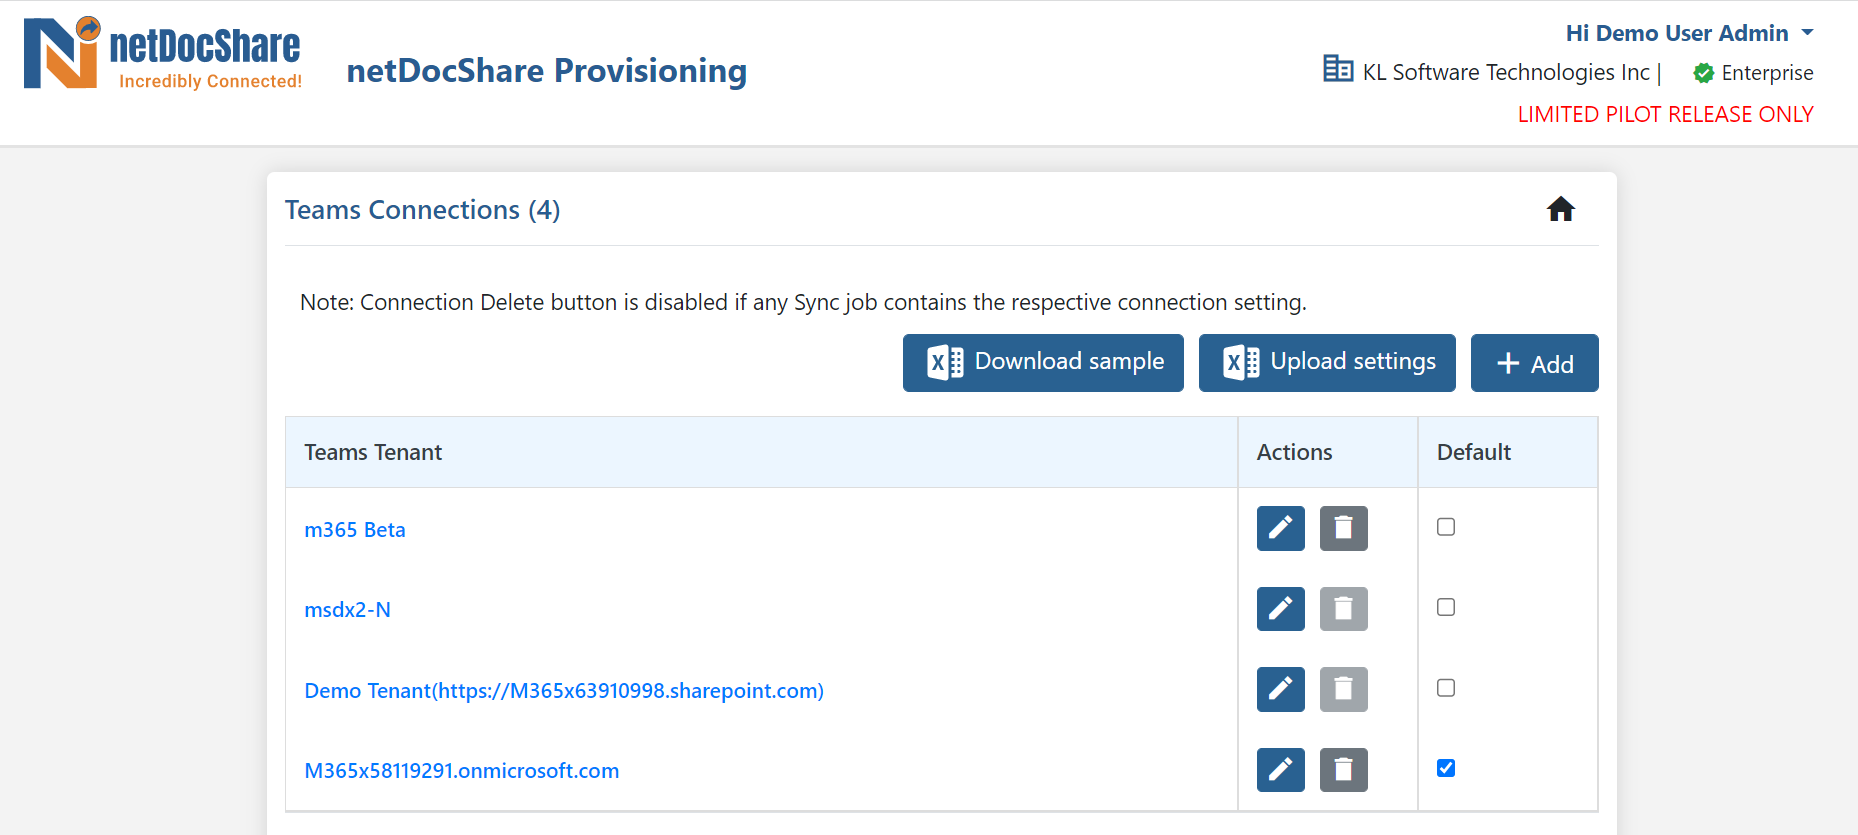
Here the User can select the +Add button to add a tenant or multiple tenants to the provisioning tool. A User can select a default tenant if there are multiple tenants.
Selecting the +Add button opens up the Teams Connection pop-up form where the User can create a tenant.
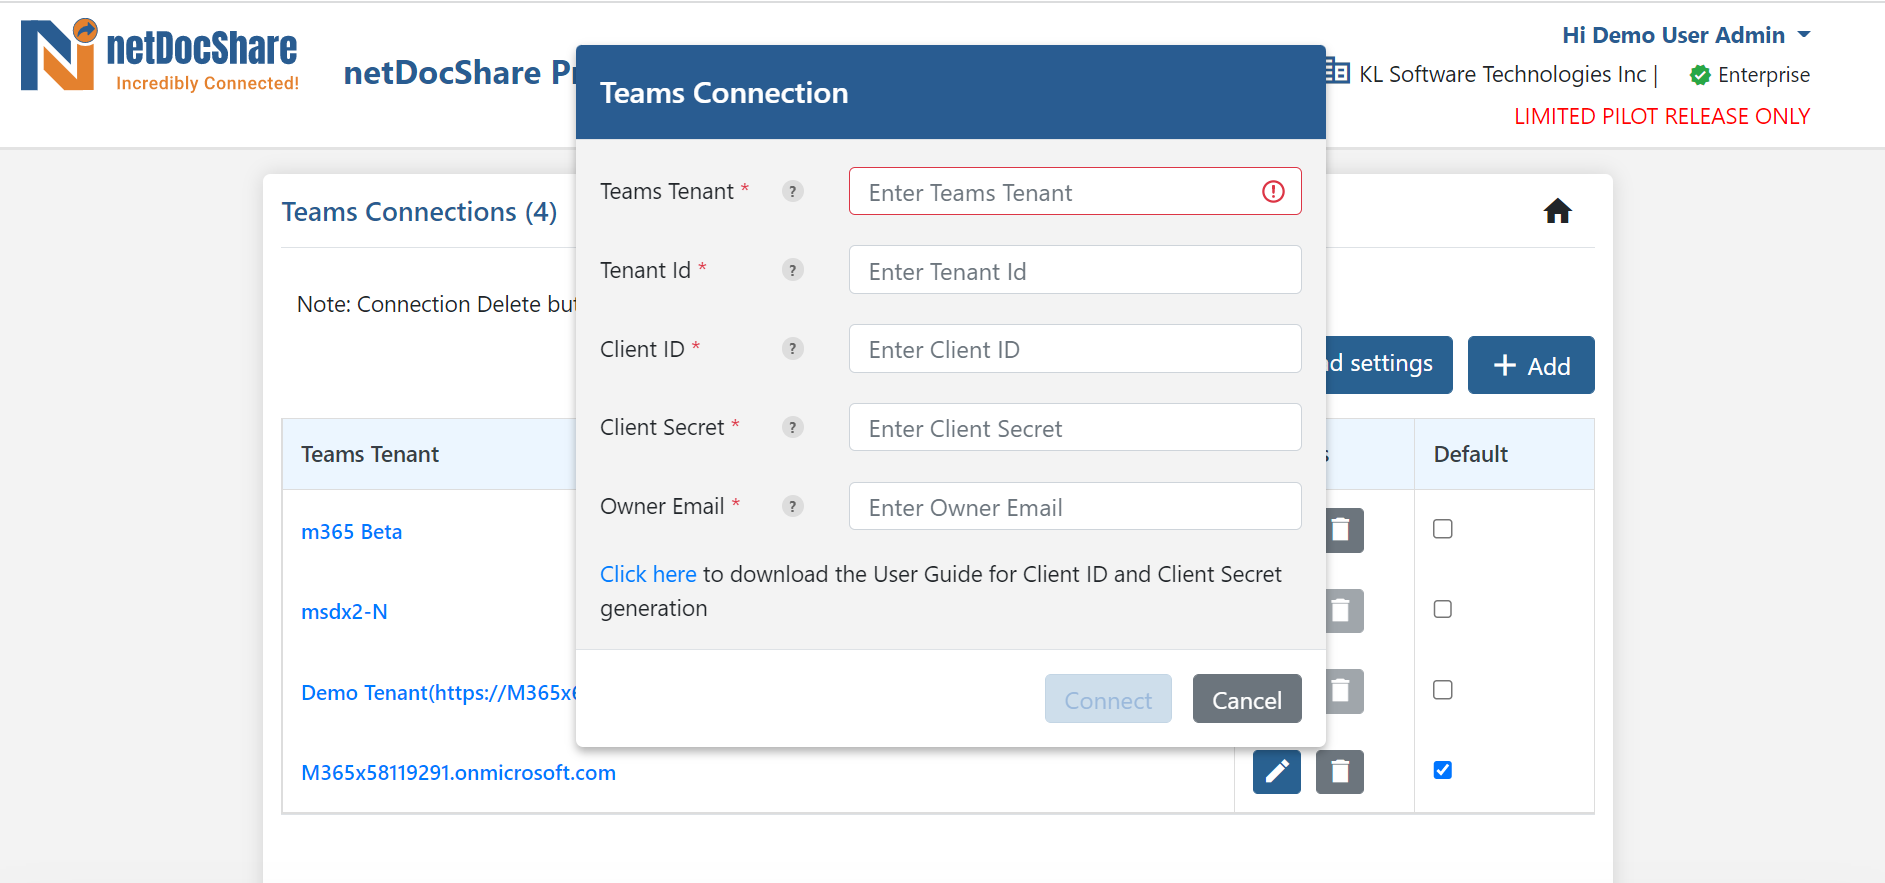
The User can click on ‘Click here’ to download the User Guide on how to generate Client ID and Client Secret.
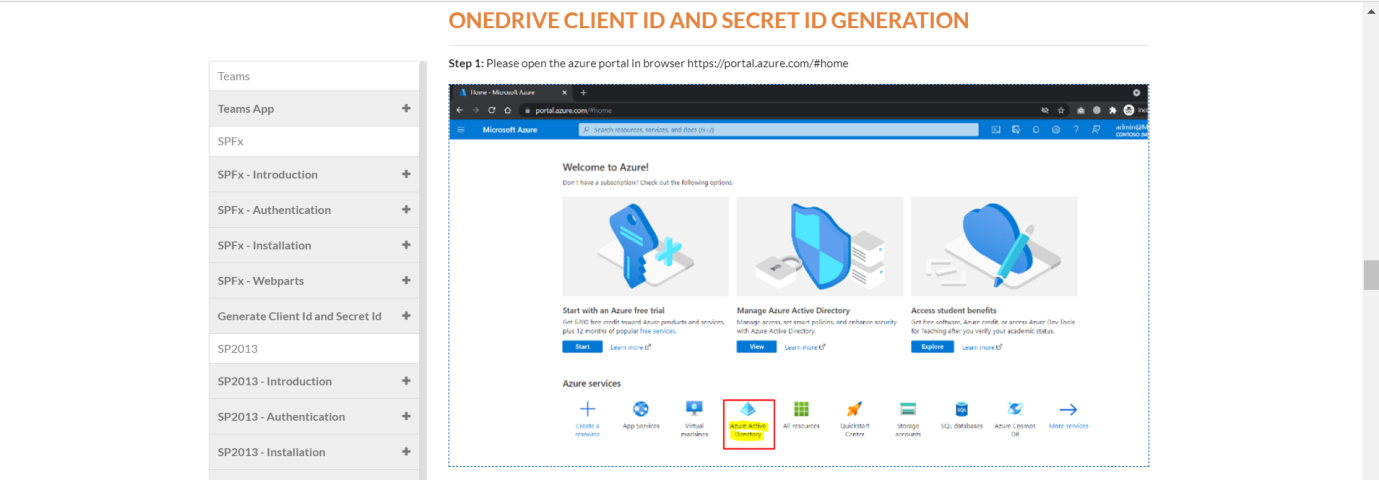
Once Client ID and Client Secret is generated then the User can add it to the Teams connection pop-up form to add a tenant.
Clicking on Download sample allows the User to download a sample of Teams connections.
Clicking on Upload Settings User can upload Bulk a Setting Bulk upload whereby you can select or drag and drop a folder of Settings.
Clicking on the Home button will take you back to the Home Page.
Create a Team
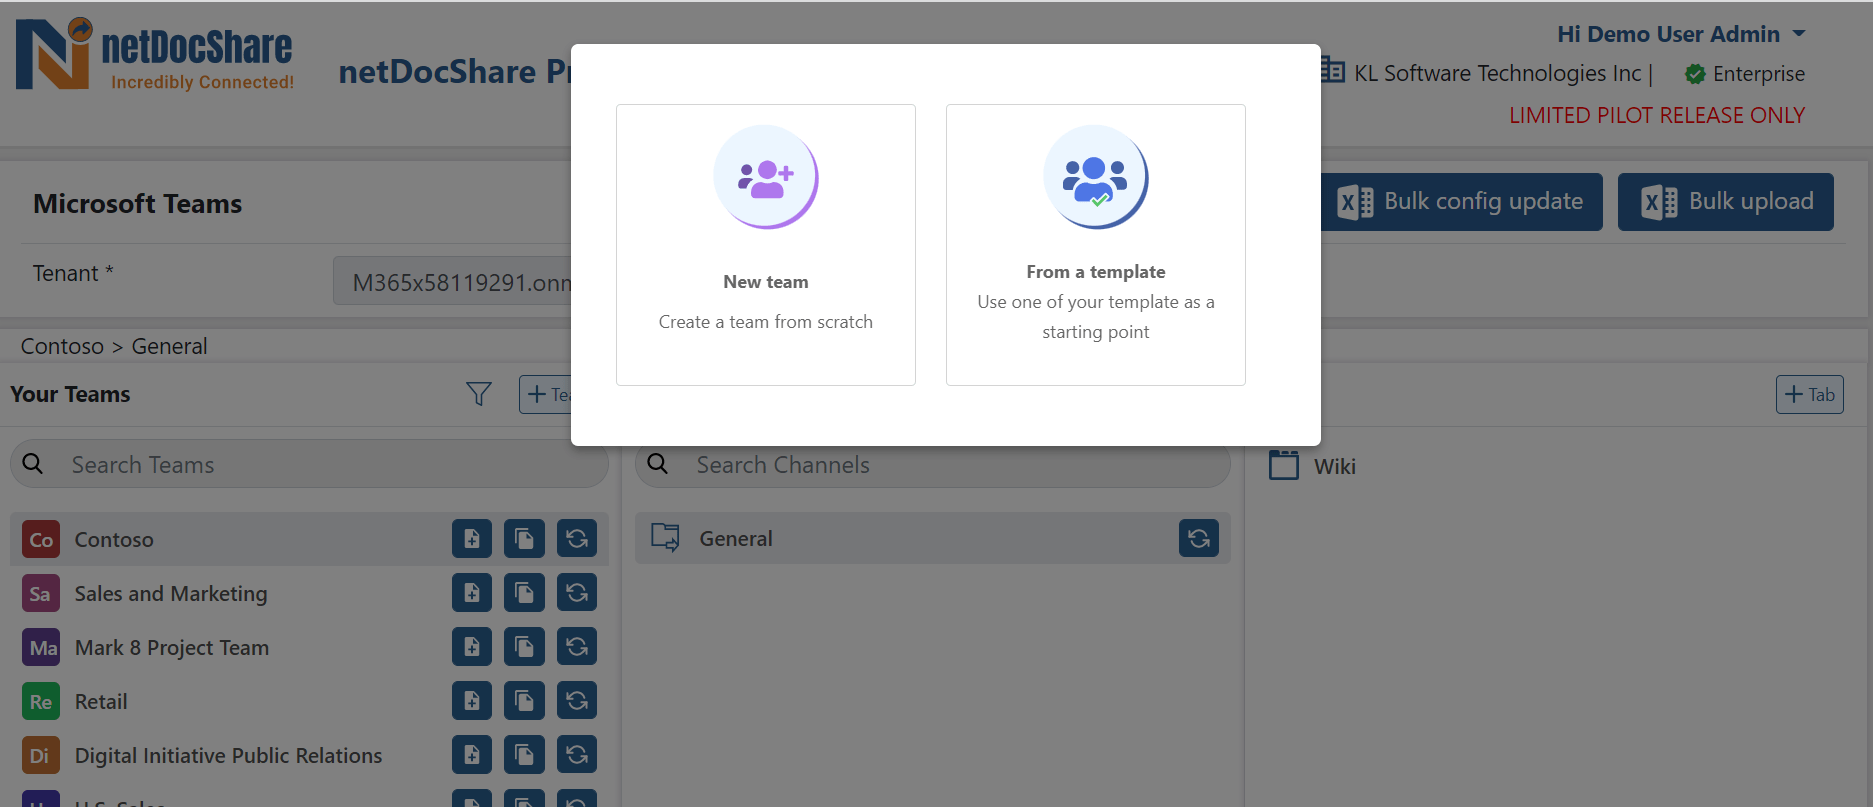
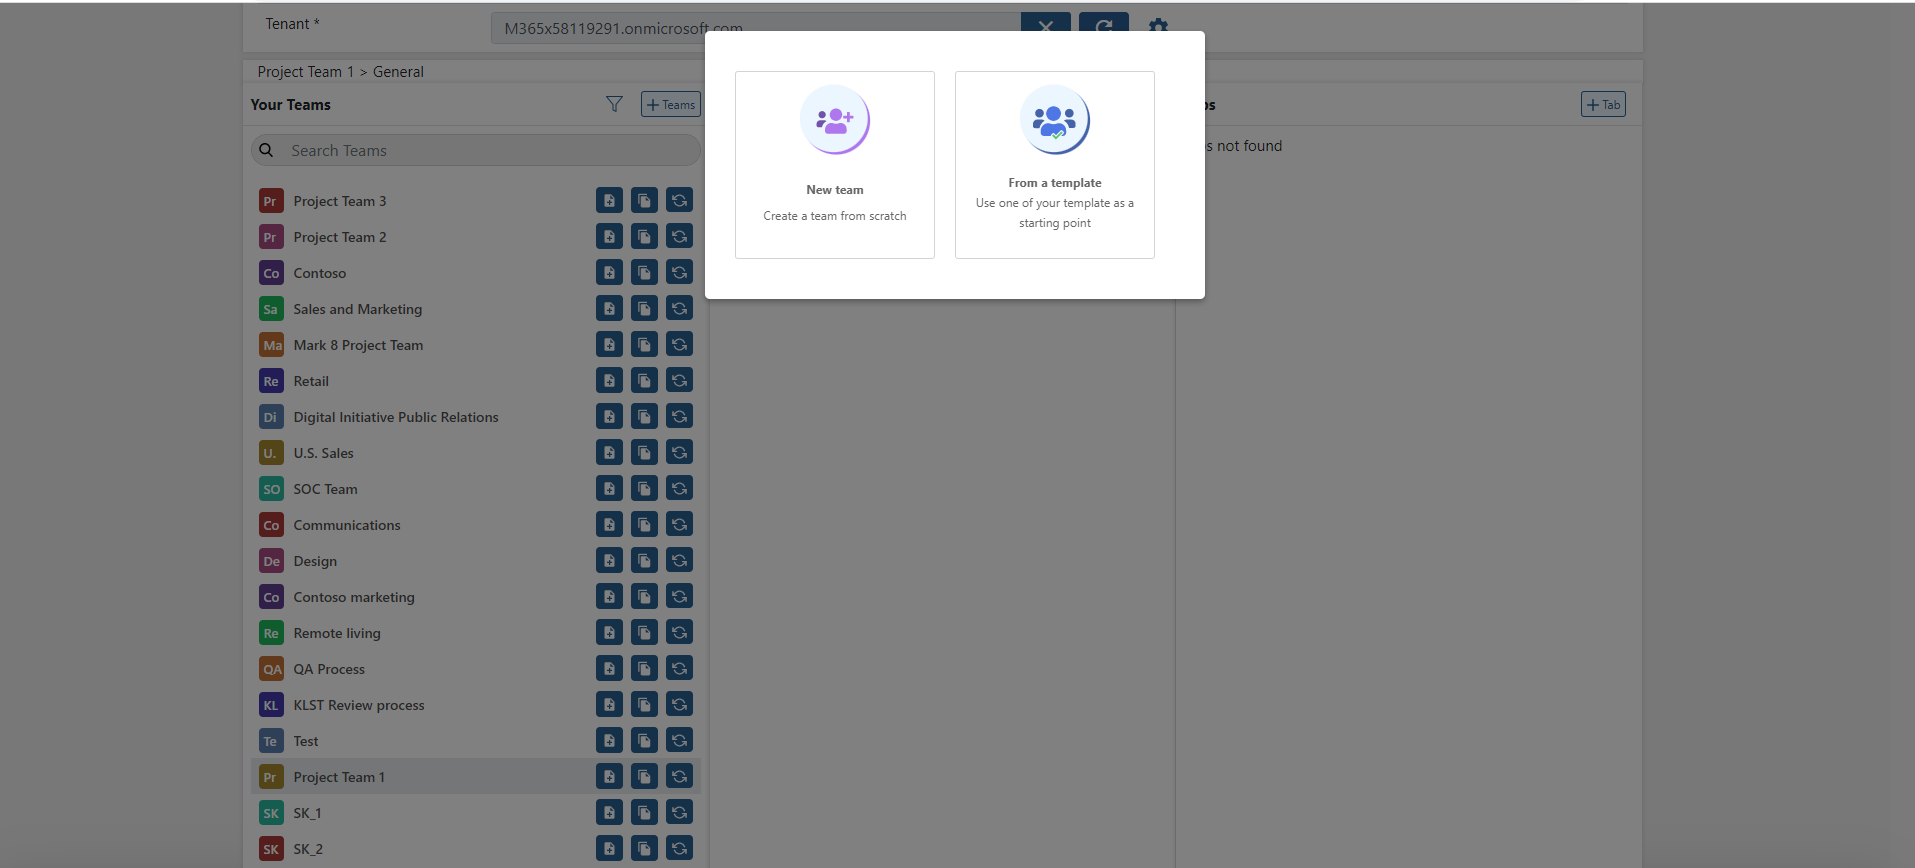
User can add a Team by clicking on +Team button.
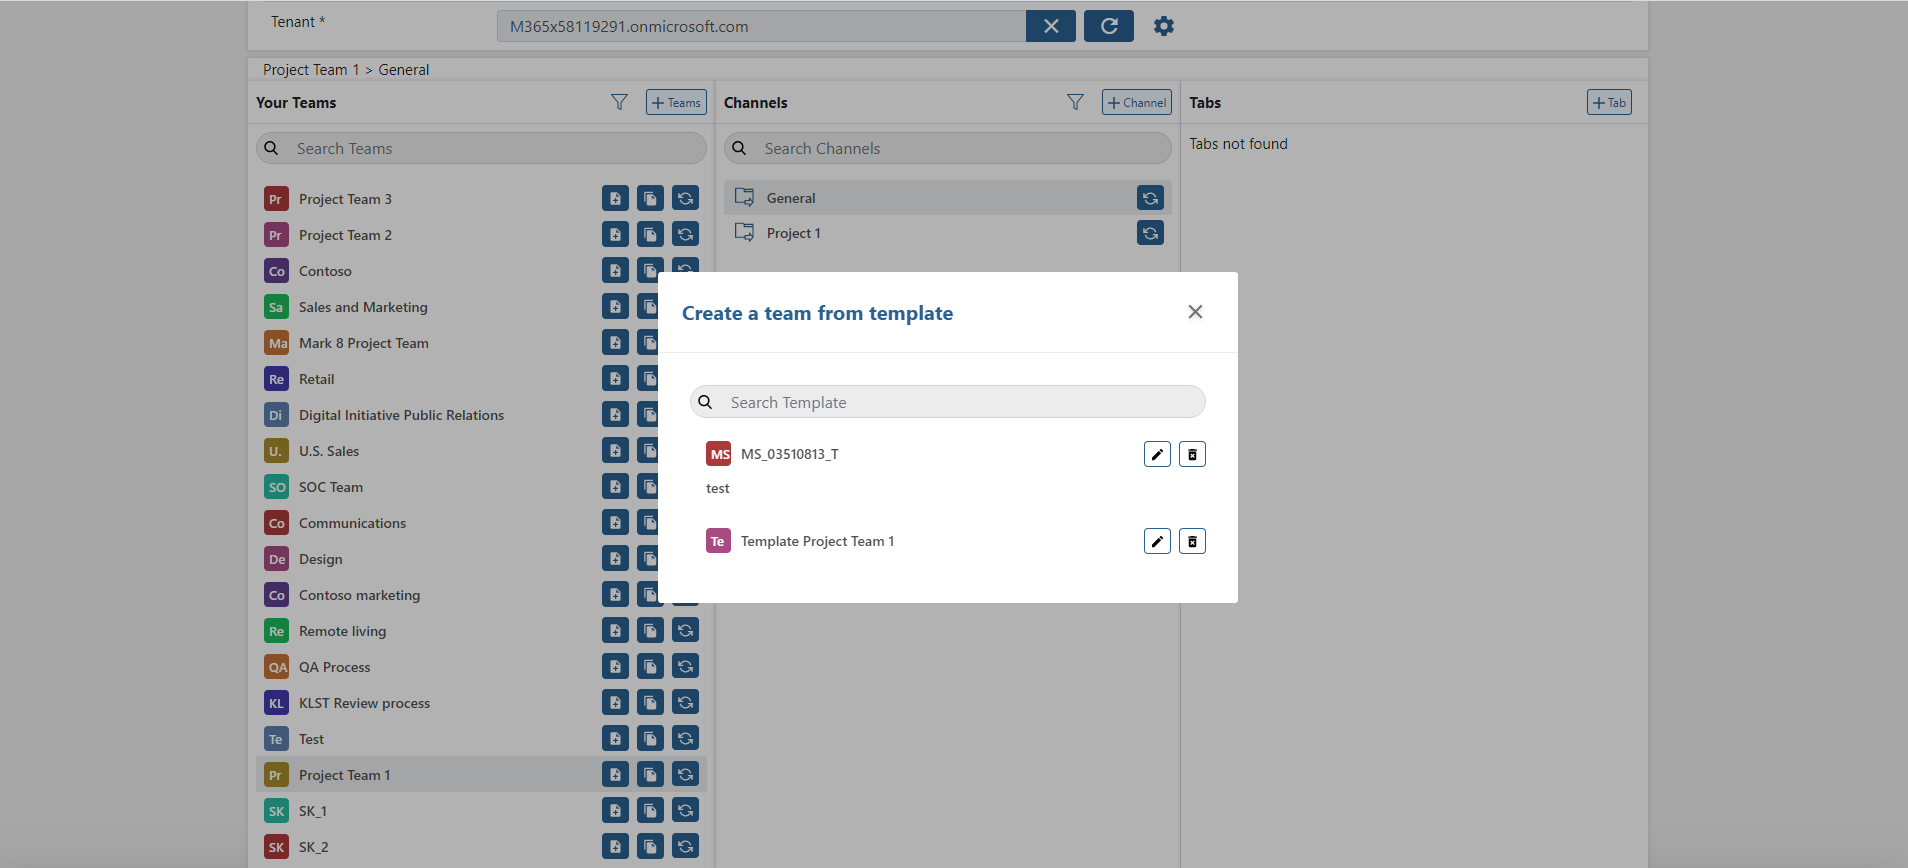
This will open a New Teams pop-up form where a User can choose the option of either creating a new team from scratch or a new team from a template.
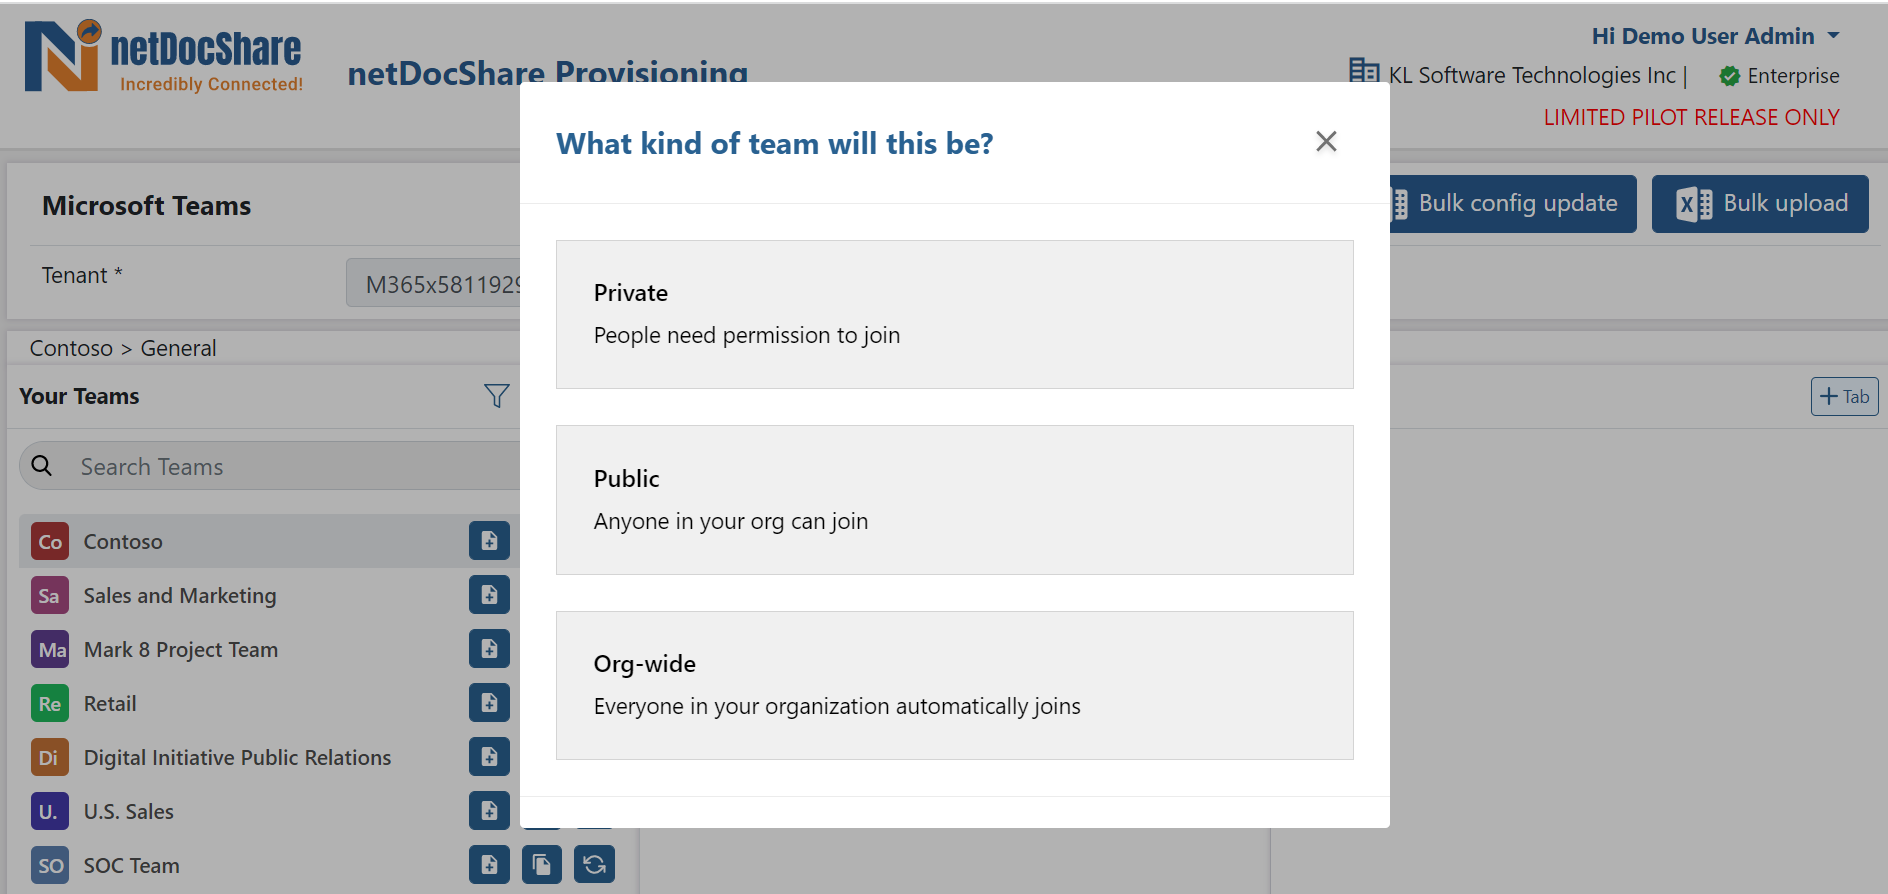
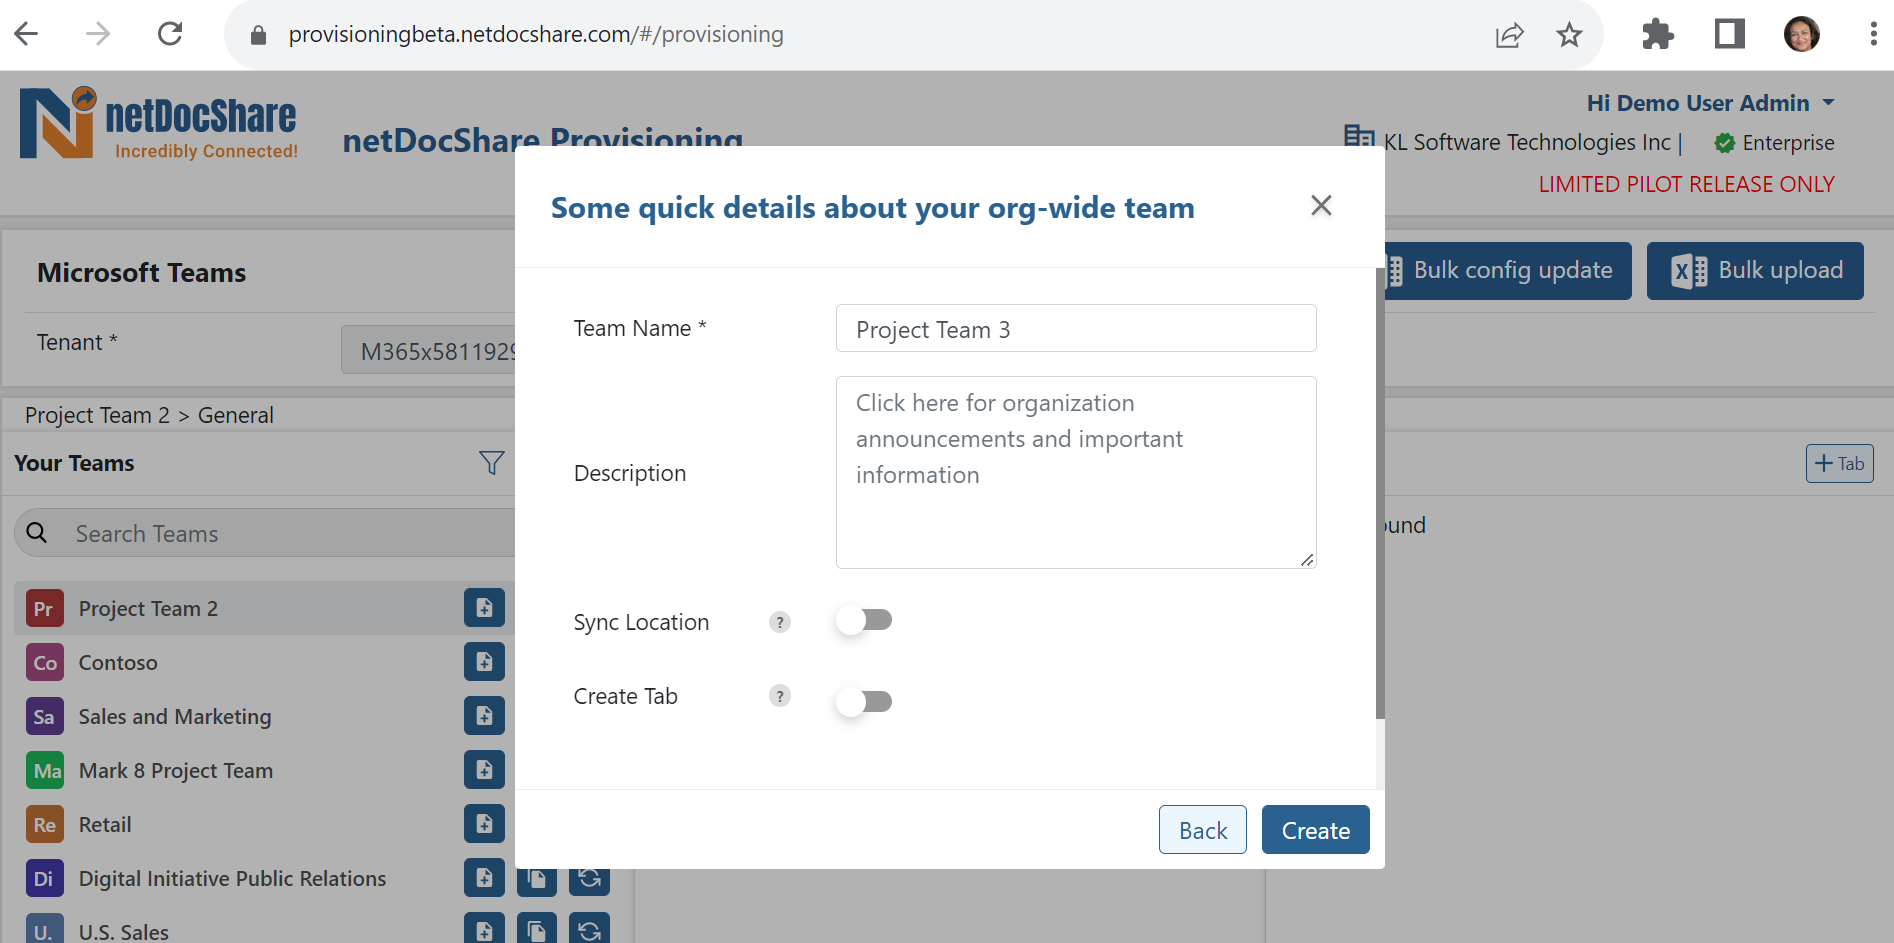
When the User selects to create a New team, there is a pop up where User can select if a team can be Private, Public or Organization-wide
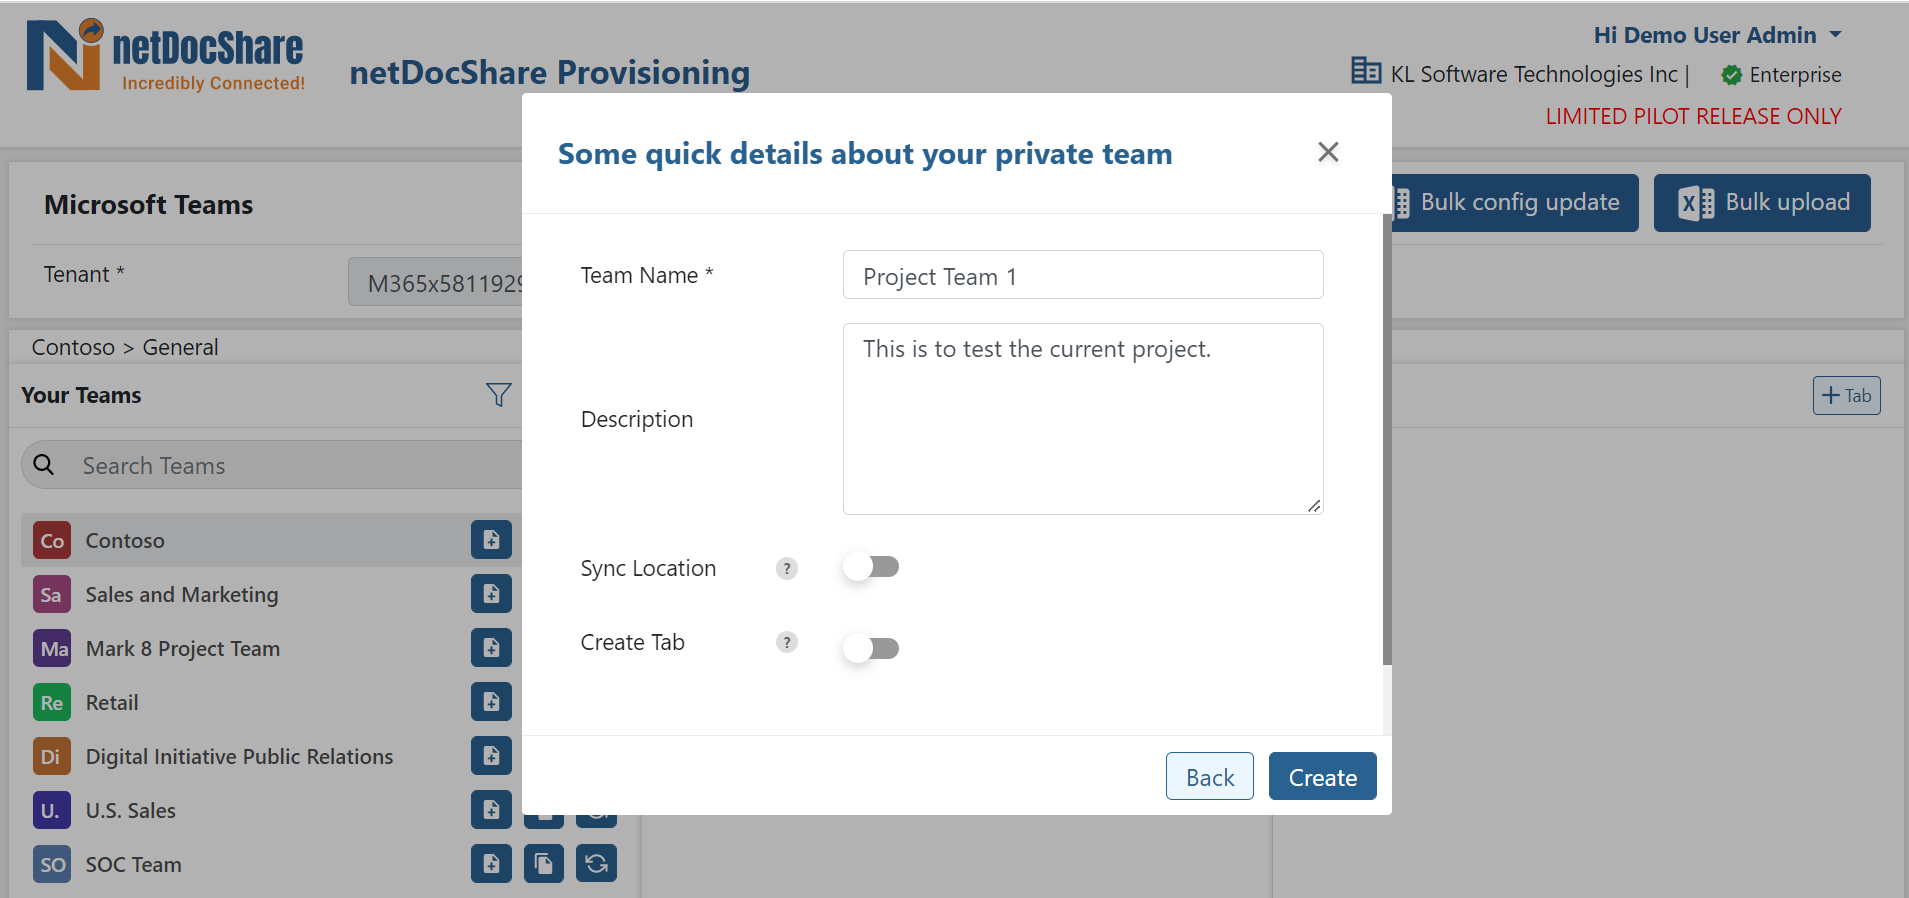
When User selects Private, a pop-up will open where a user can name the team and write a description. Then User can click on ‘Create’ to create a team.
You can add members to the Team and only they can see the changes.
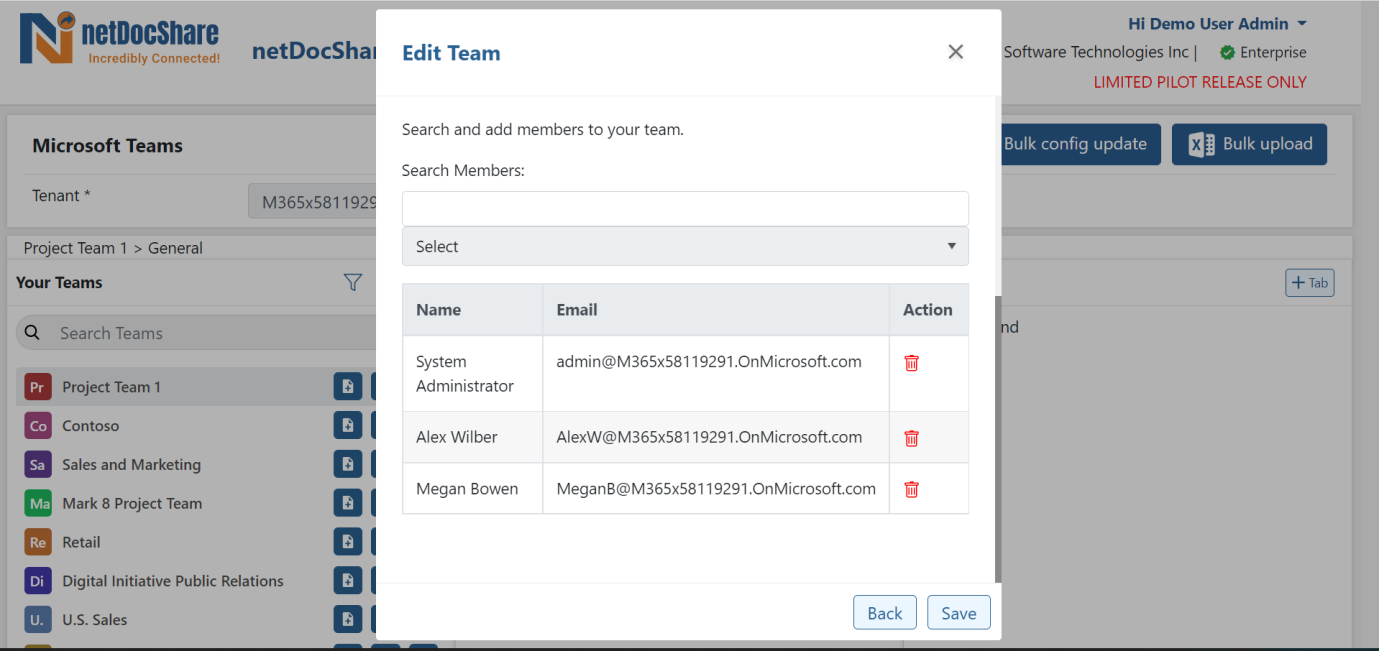
You can also Edit Team to add and delete members
You can also select Public and add members to your team
You can also Edit and change the Privacy settings of your Teams to Private/Public and also add/delete Team members, and Search for existing members
You can also create Org-wide teams which is also Public.
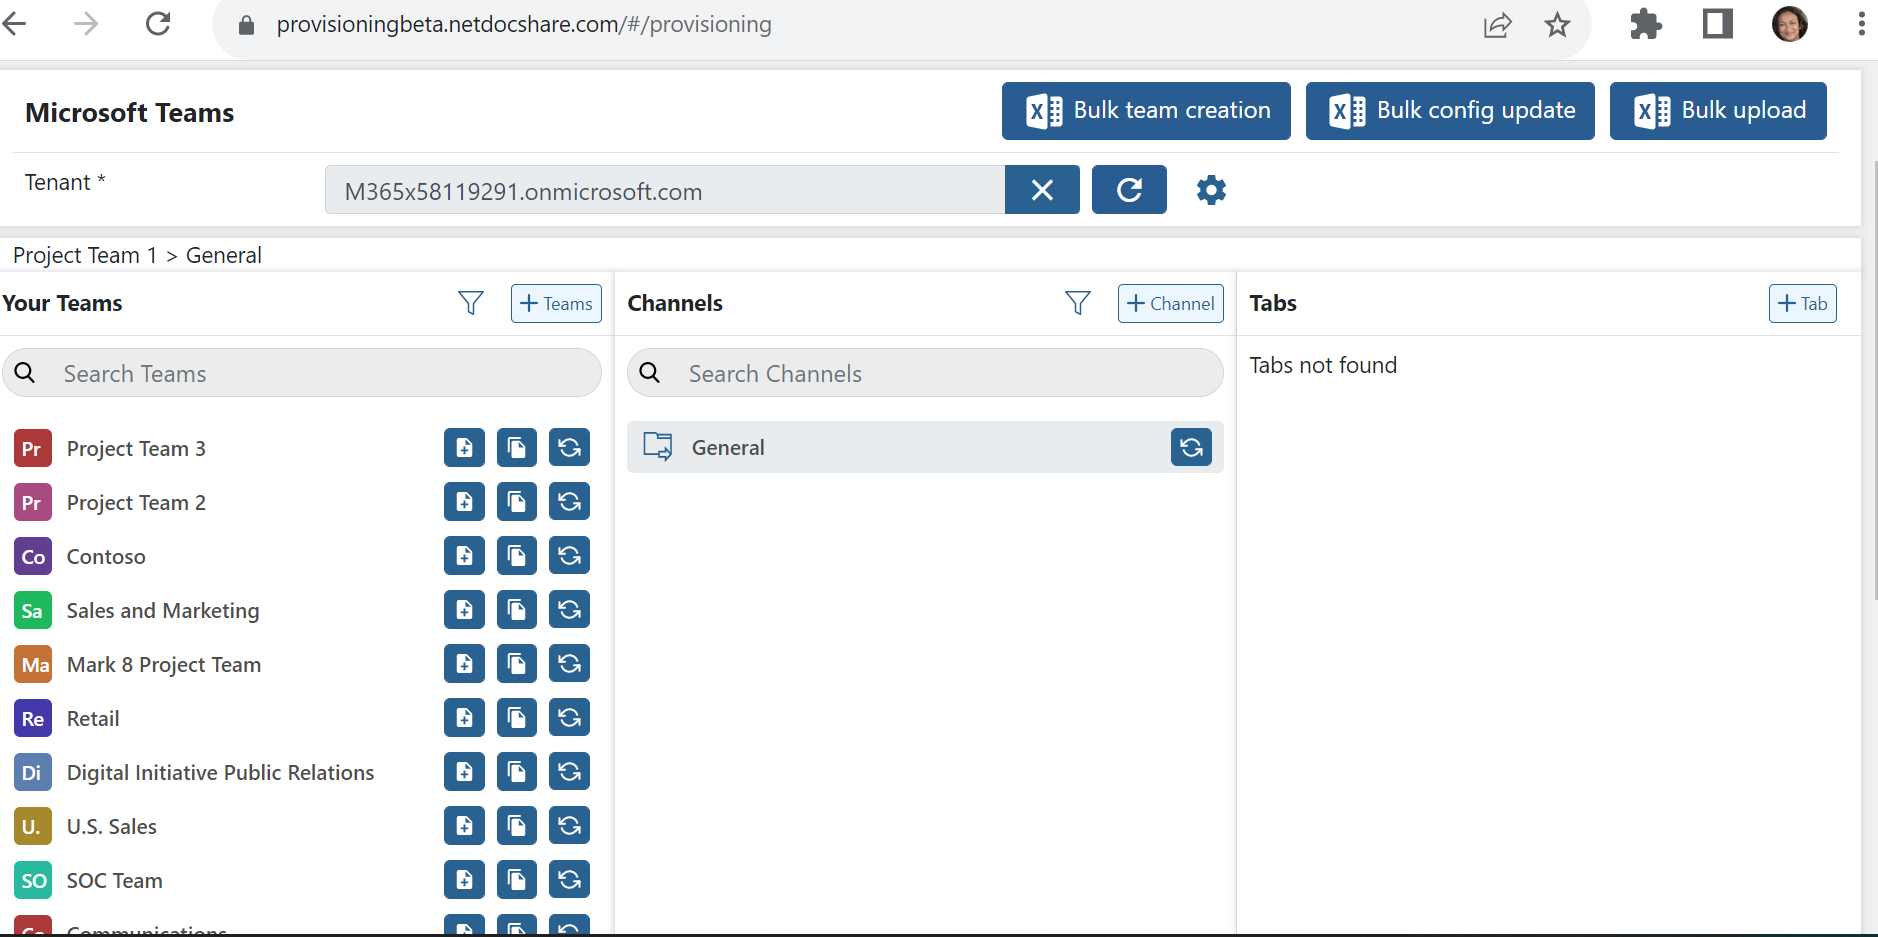
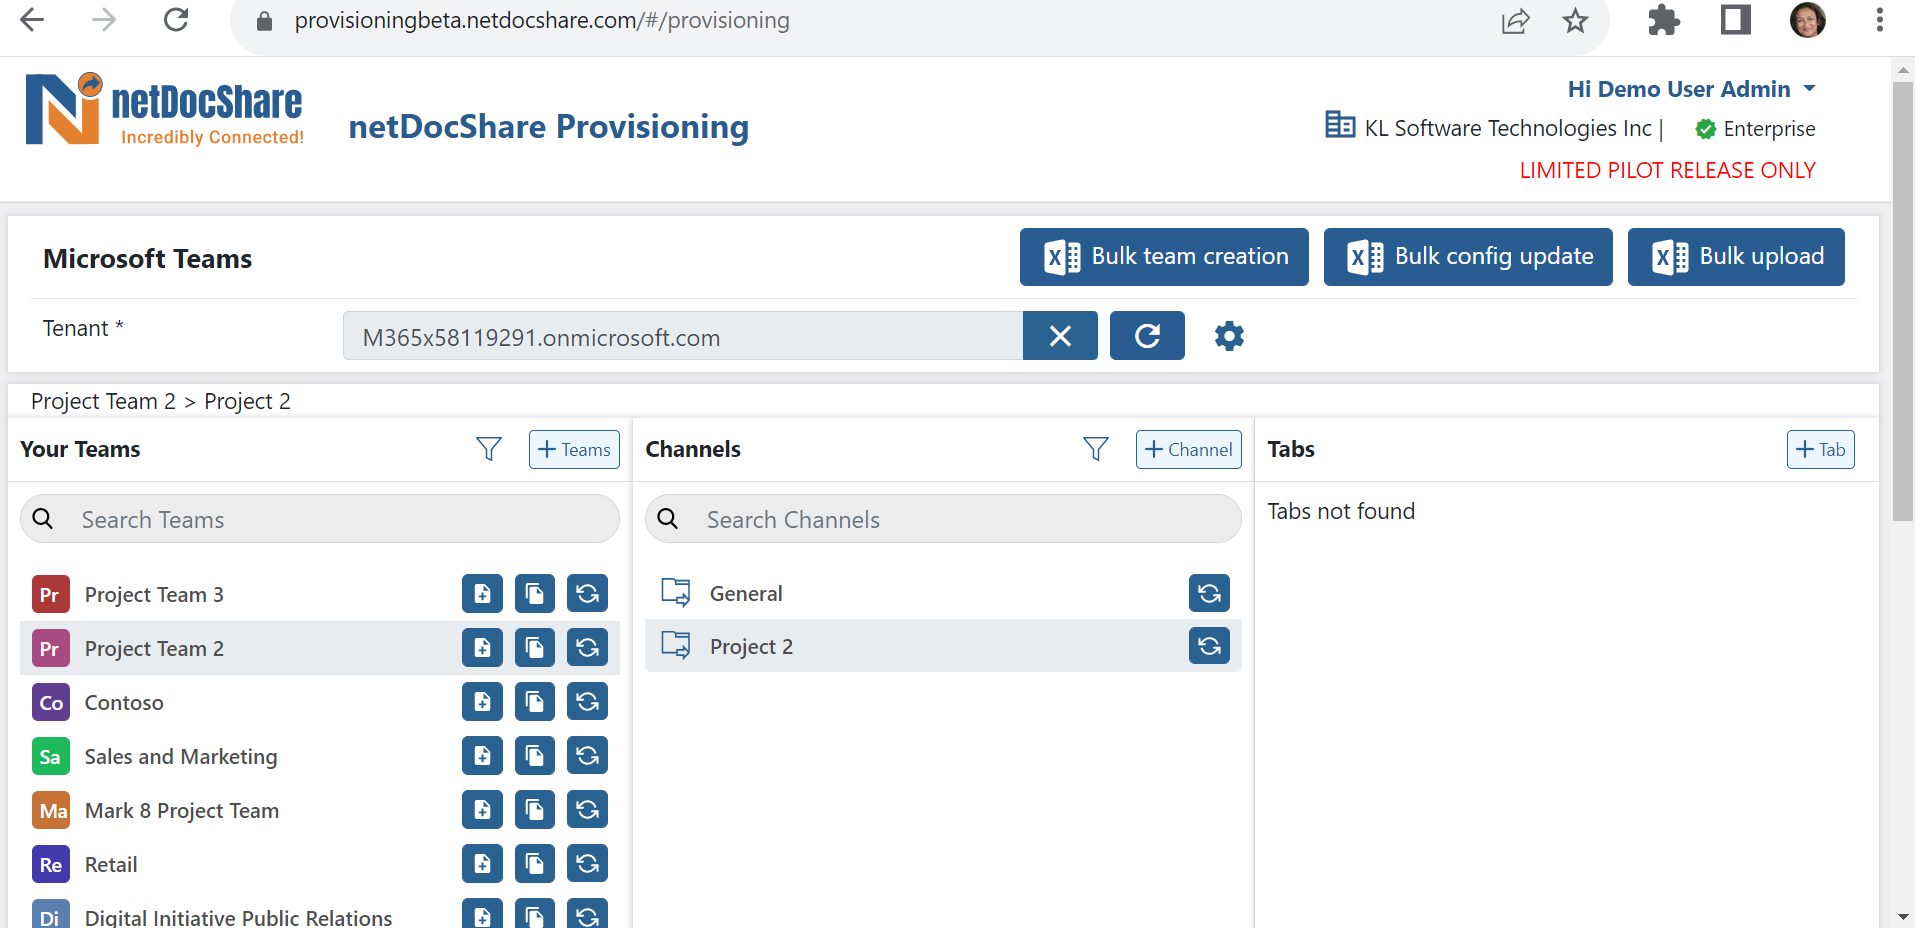
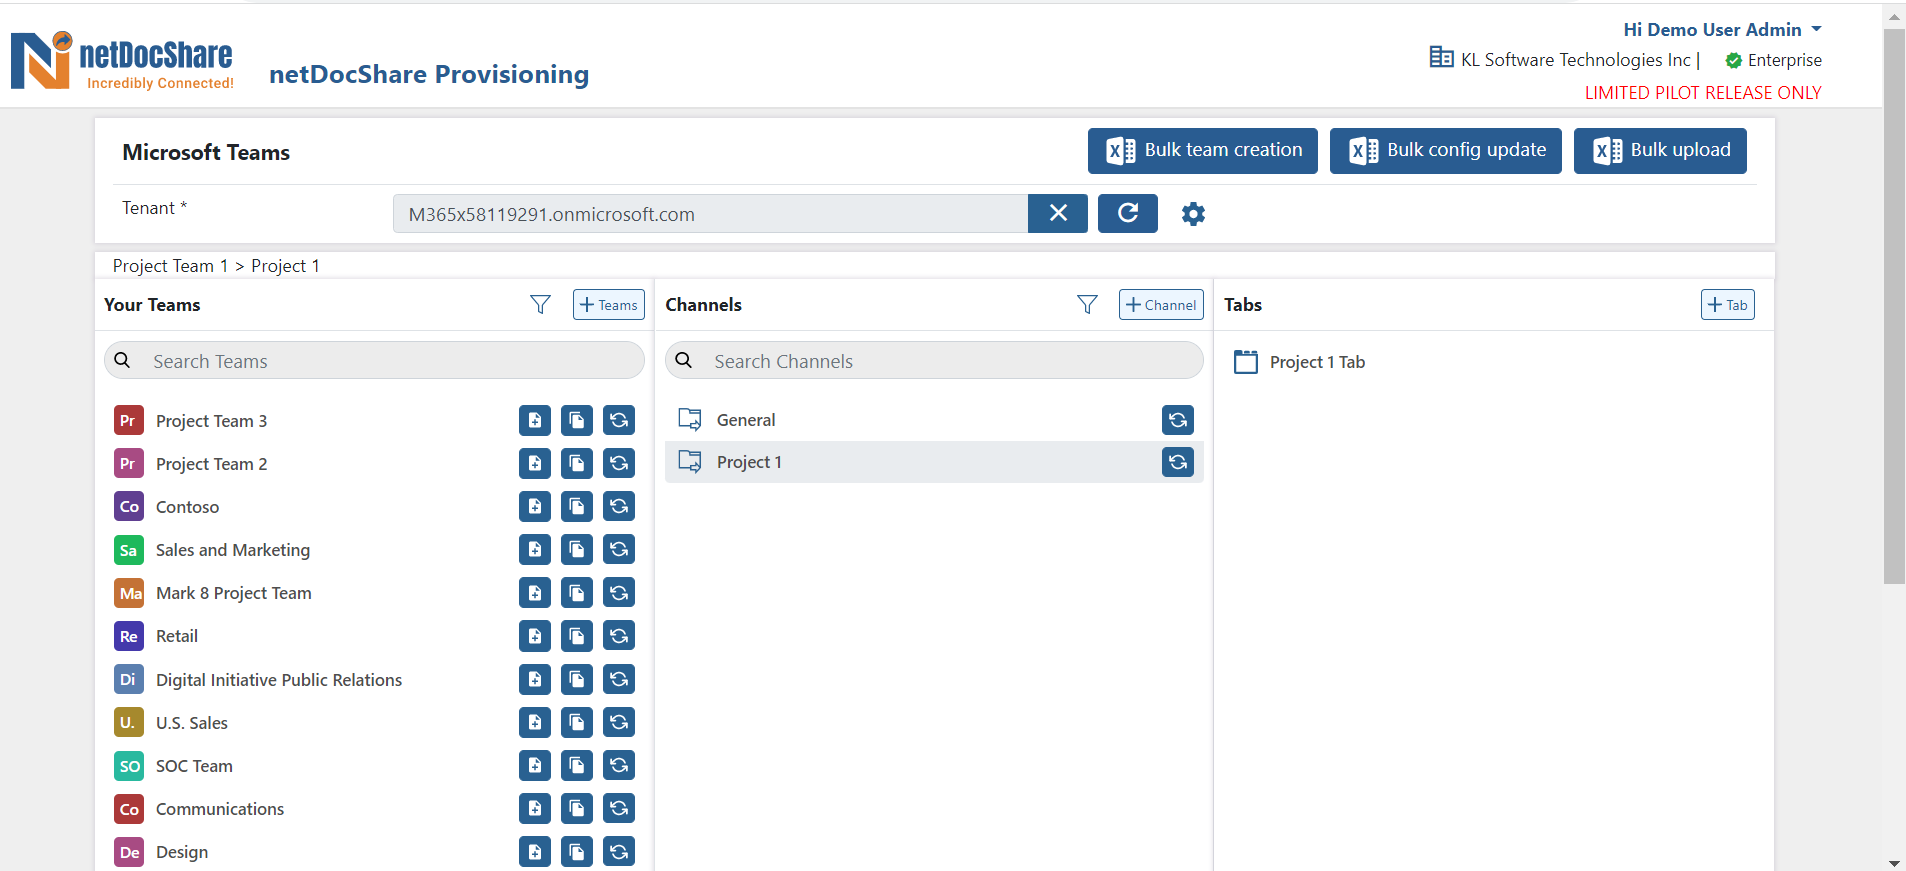
In all cases you get a General tab in the Teams channel by default
Create a Channel
A User can also create their own Channel by selecting + Channel button
Selecting the + Channel button opens a pop-up form where a user can Add a Channel name, provide a description, and set privacy to Standard or Private
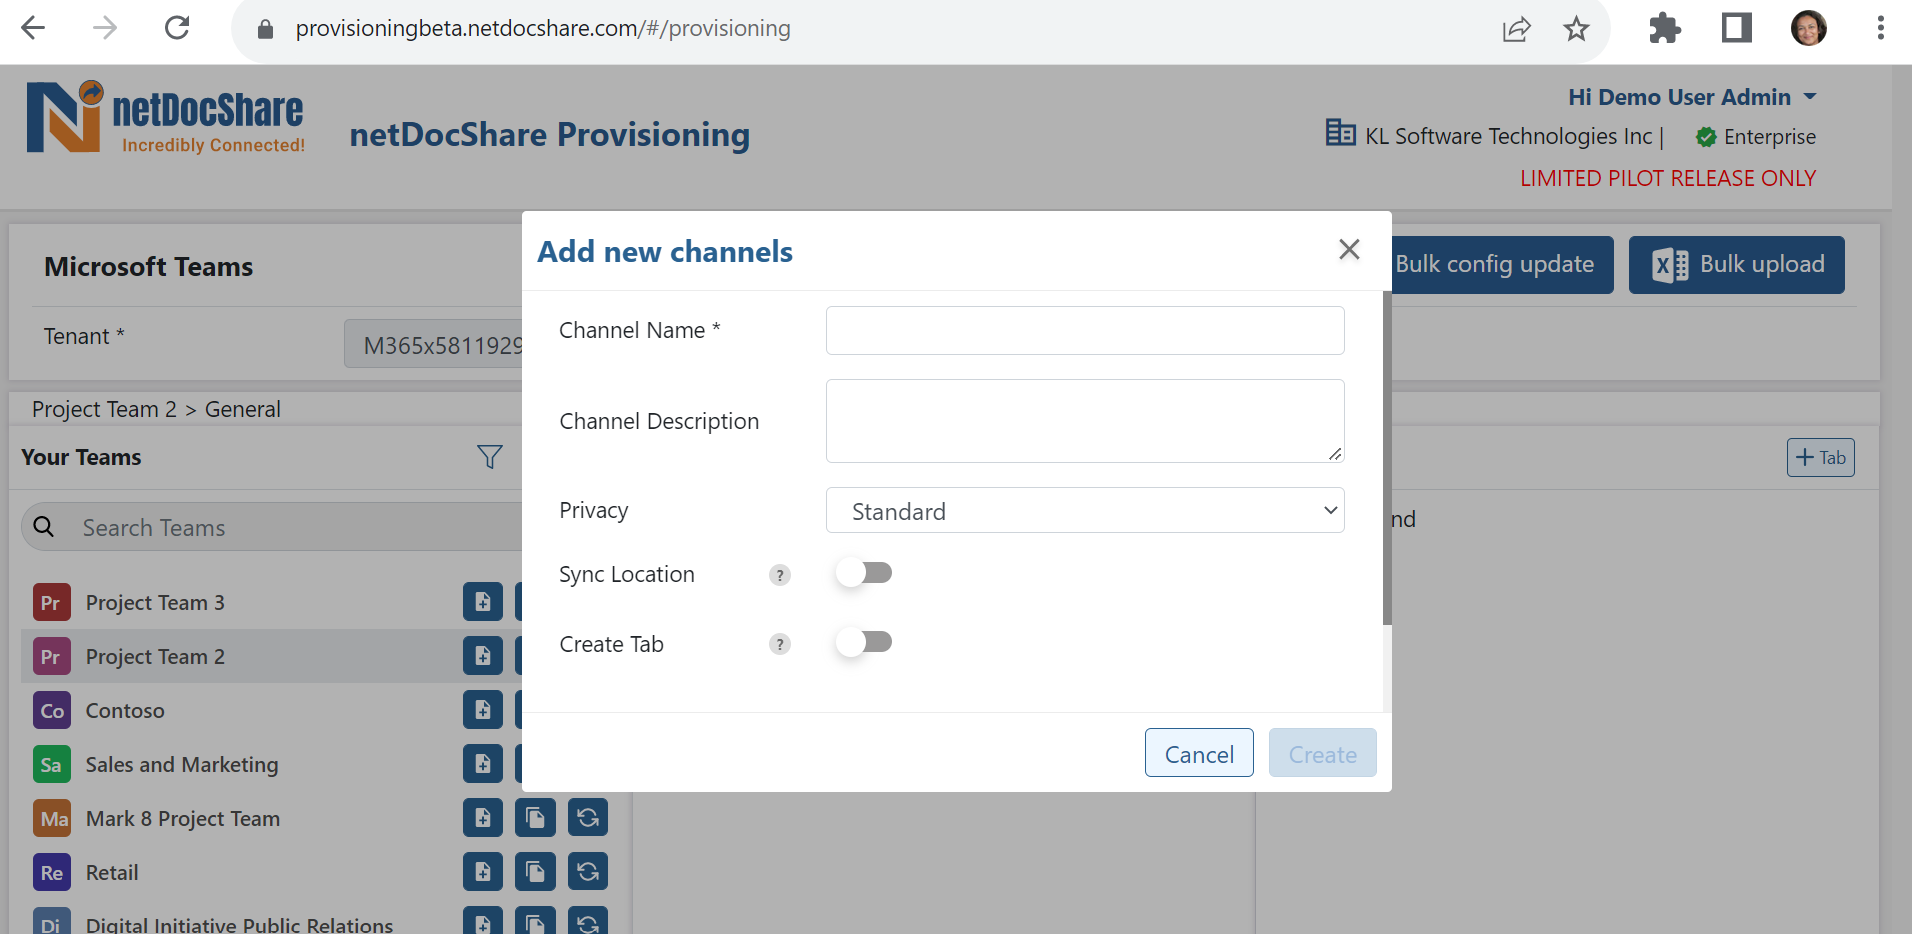
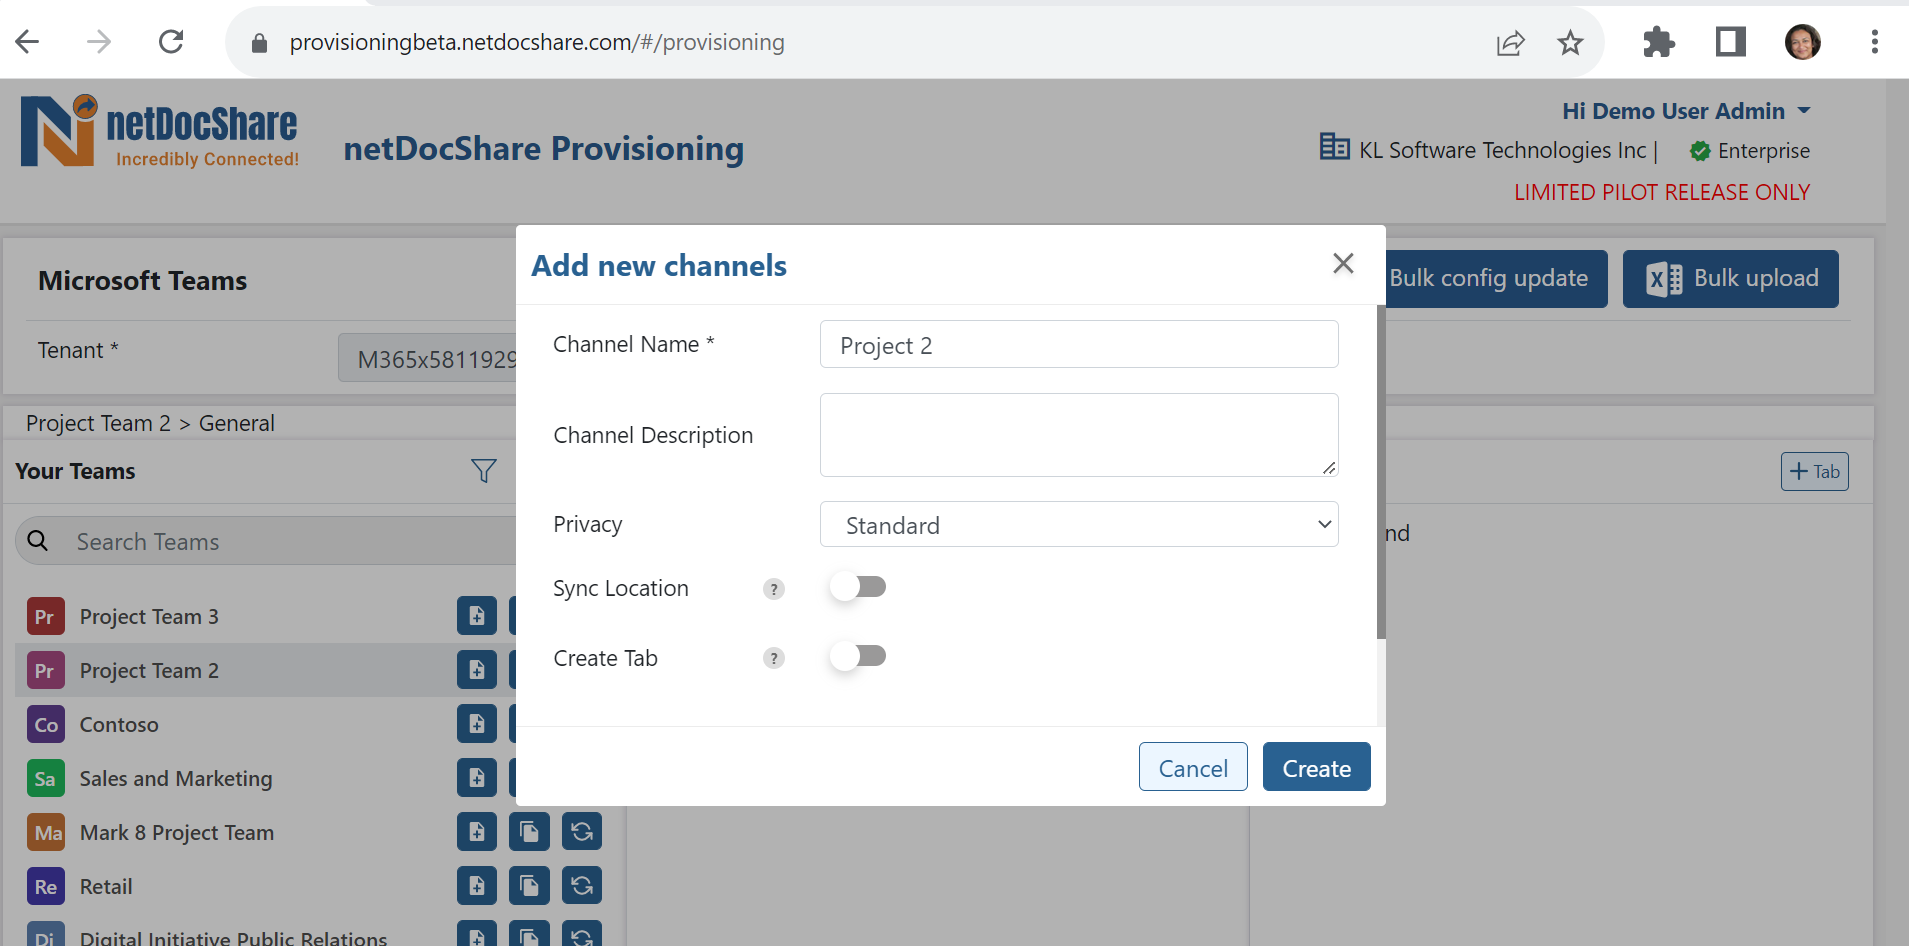
Selecting Create post adding a Channel name adds a Channel to the Team selected
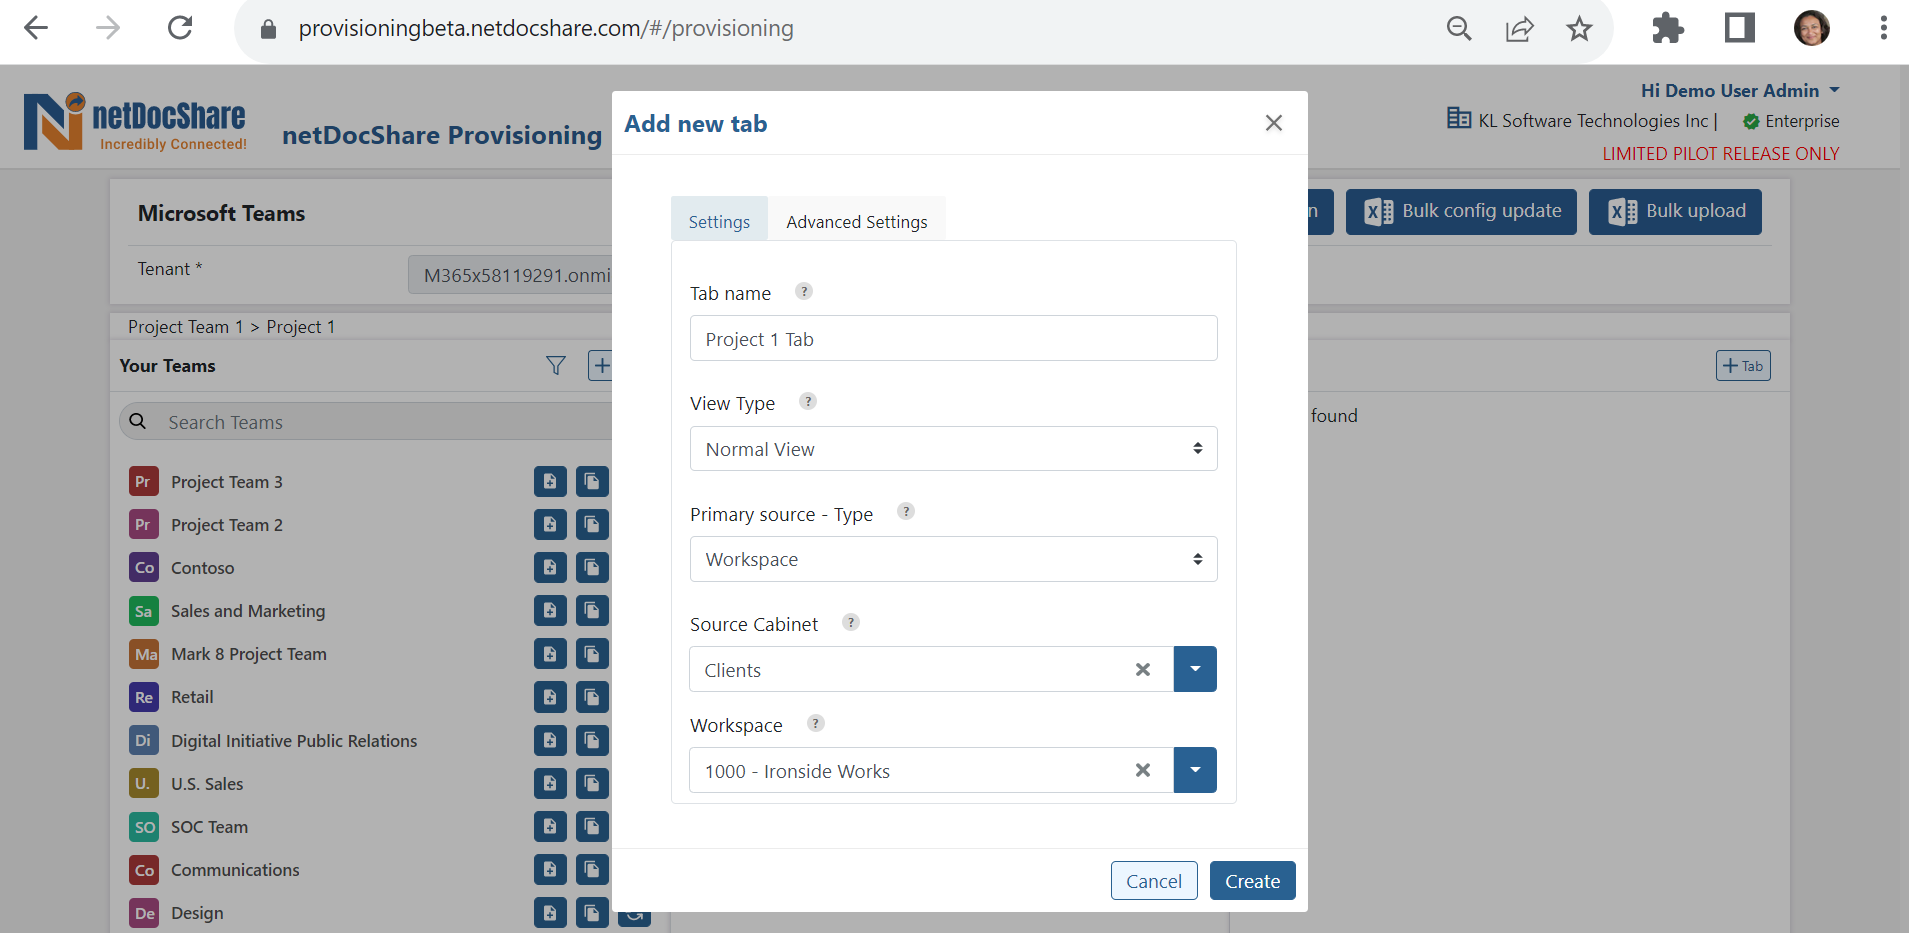
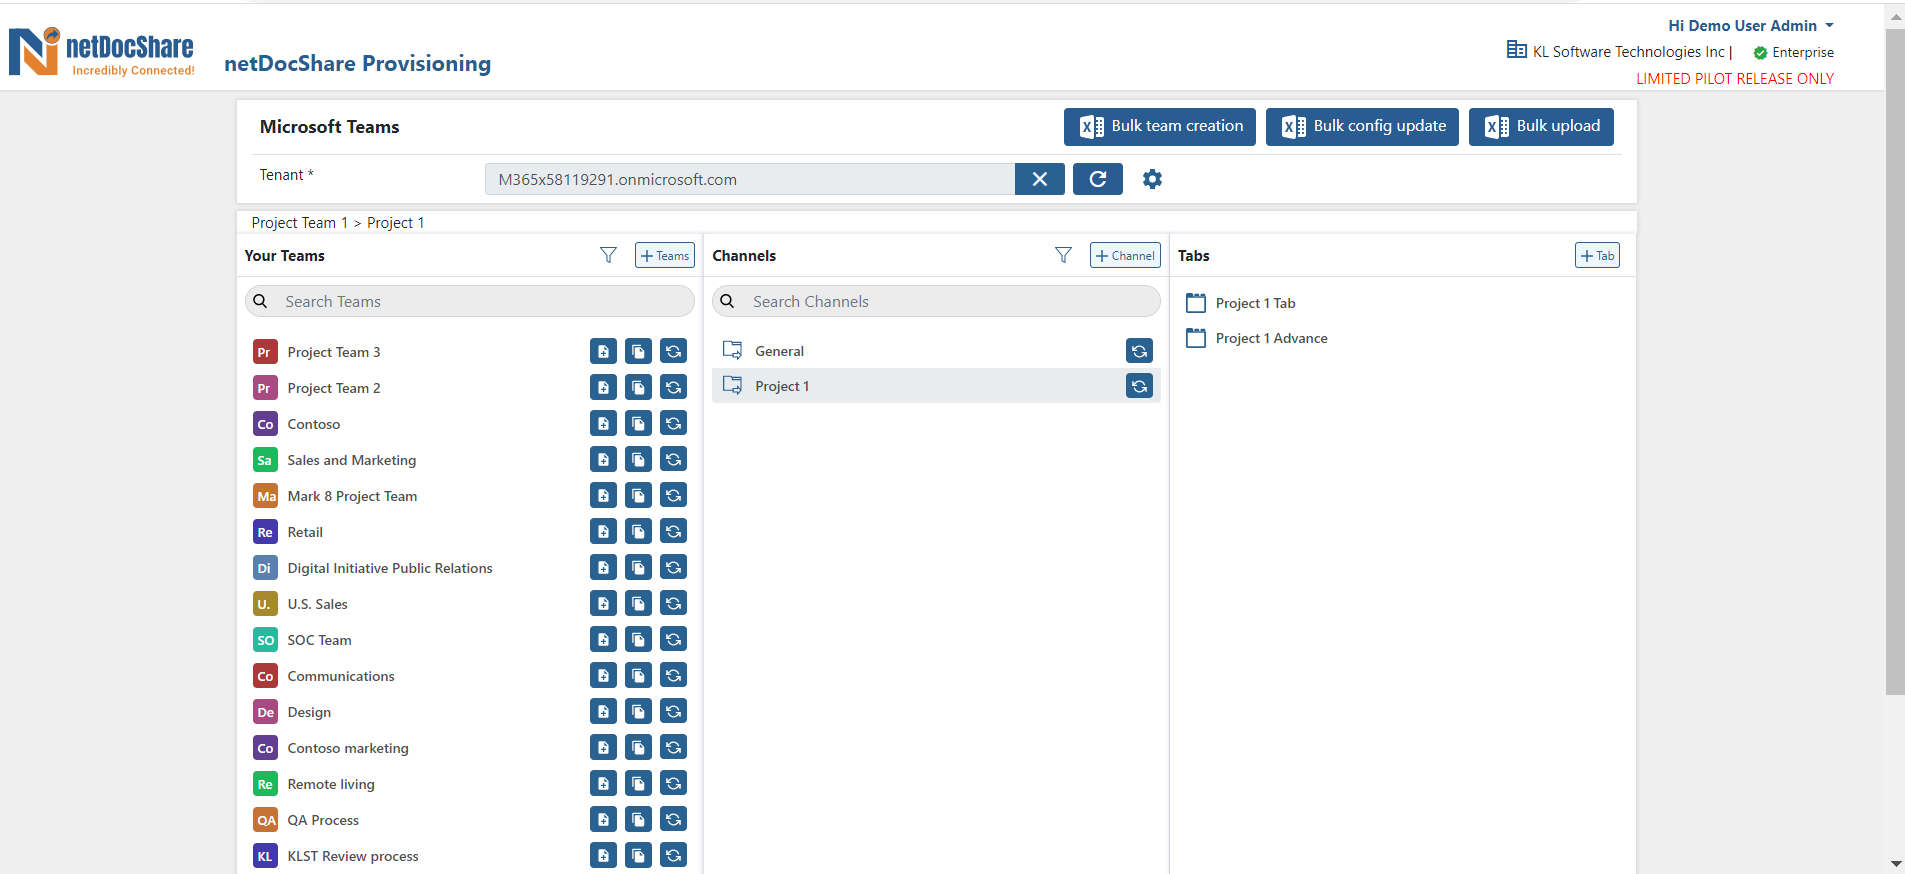
Create a Tab
A User can also add Tab to a Channel by selecting + Tab which opens up a popup where in Settings you can add a Tab name and View type
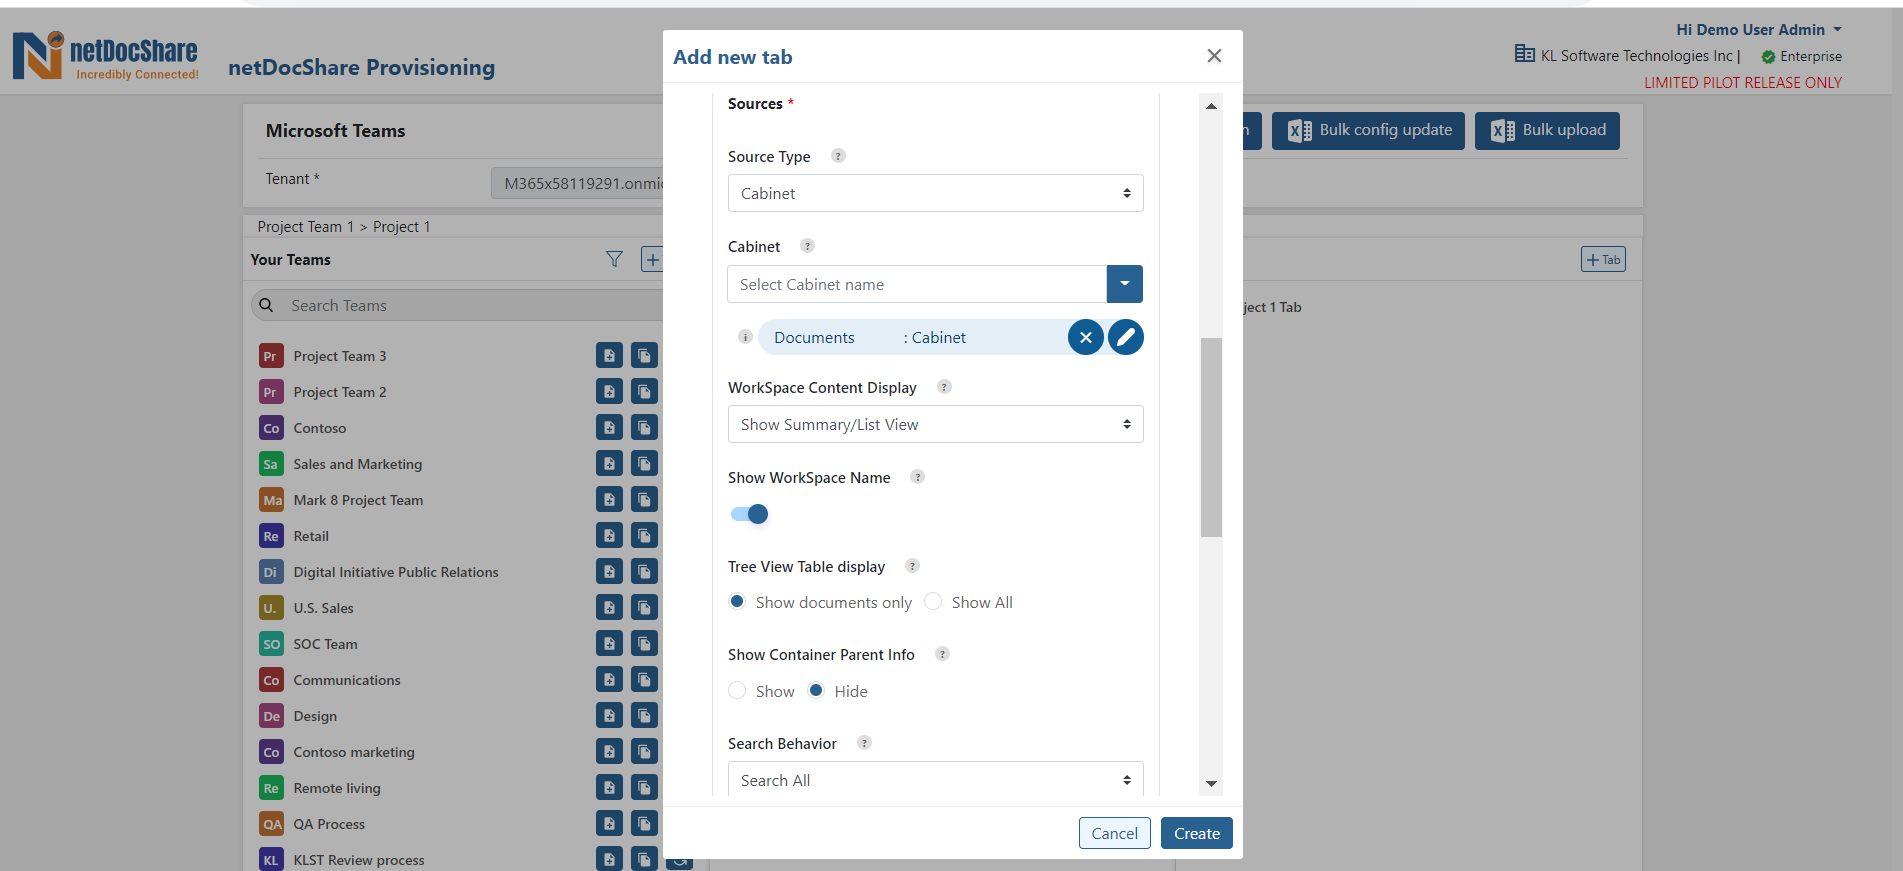
Depending on the View you select, you can add the Primary Source Type, Source Cabinet and WorkSpace and then click on Create to create a Tab.
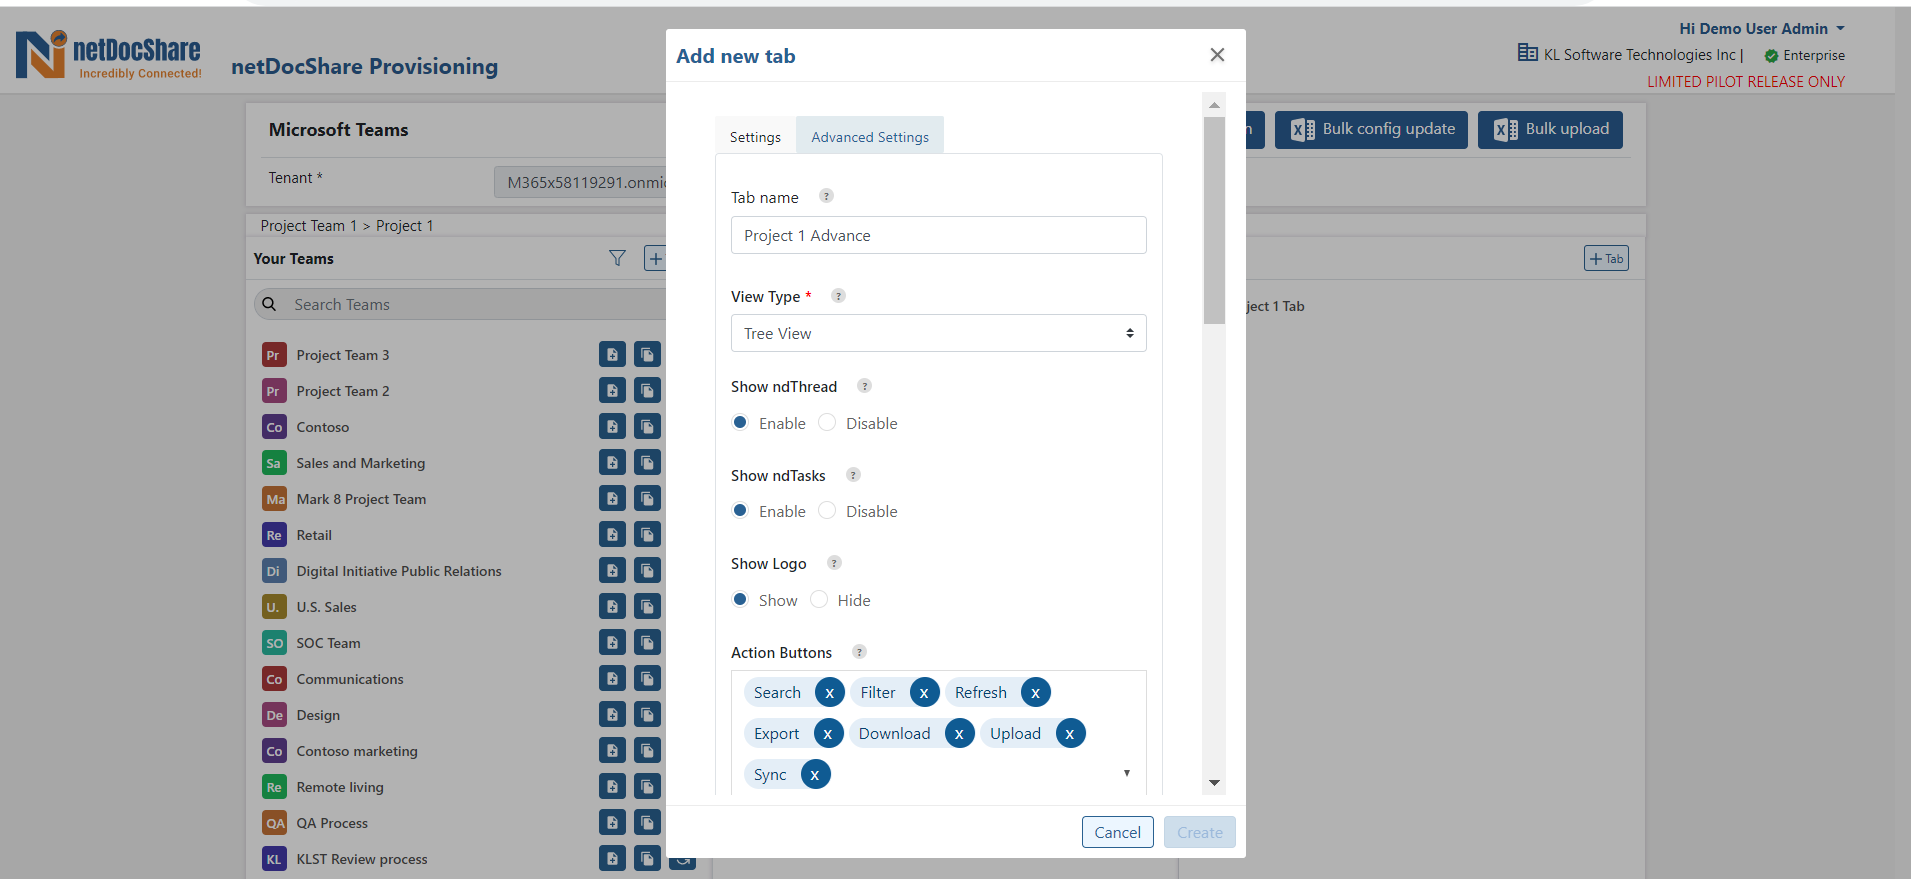
While creating a new tab you can also select Advance Settings for more options for the tab to be created
Here besides adding the Tab name and View Type a User can choose to enable or disable ndThread, ndTasks and also select/deselect from a dropdown menu a choice of action buttons
User can also select a Source Type and the name of the corresponding Cabinet and Workspace and Create a Tab
Create a Template
User can create a template of a team by clicking on the Create a Template icon ![]()
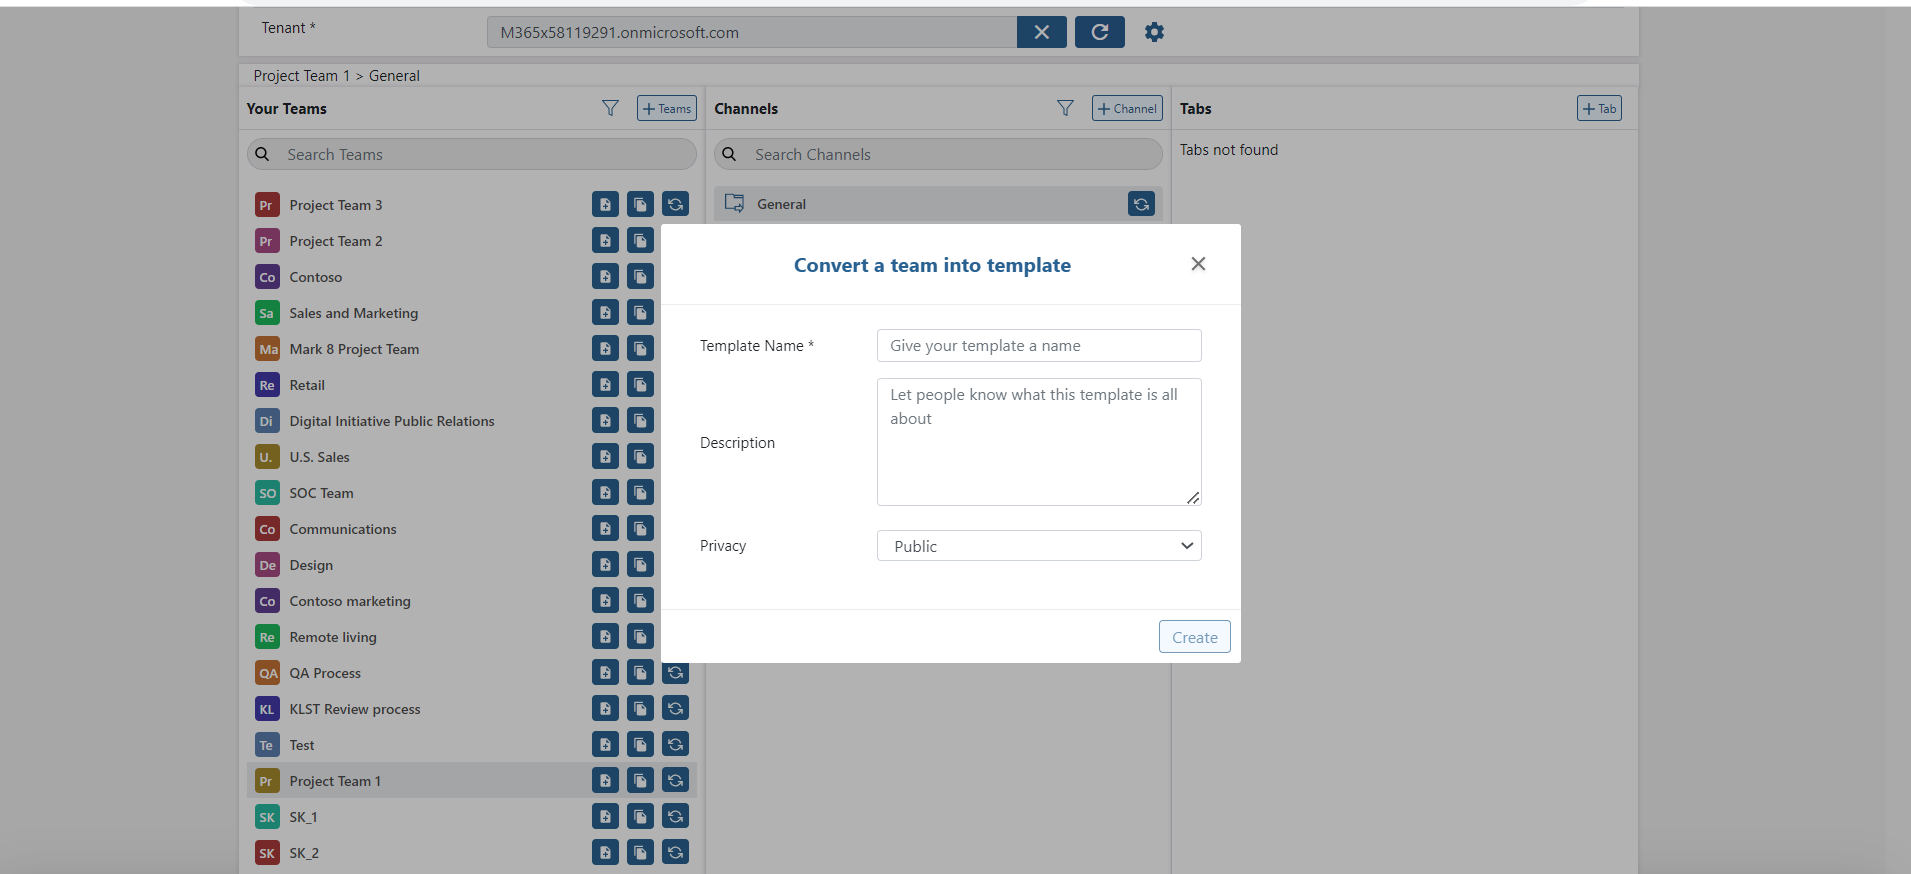
Give a name, description and select the Privacy settings to Private/ Public and click on Create button to Create a template.

This converts the selected Team into a template that you can select from to create a brand new team using all the features of the Team template that has been created.
Select your template here
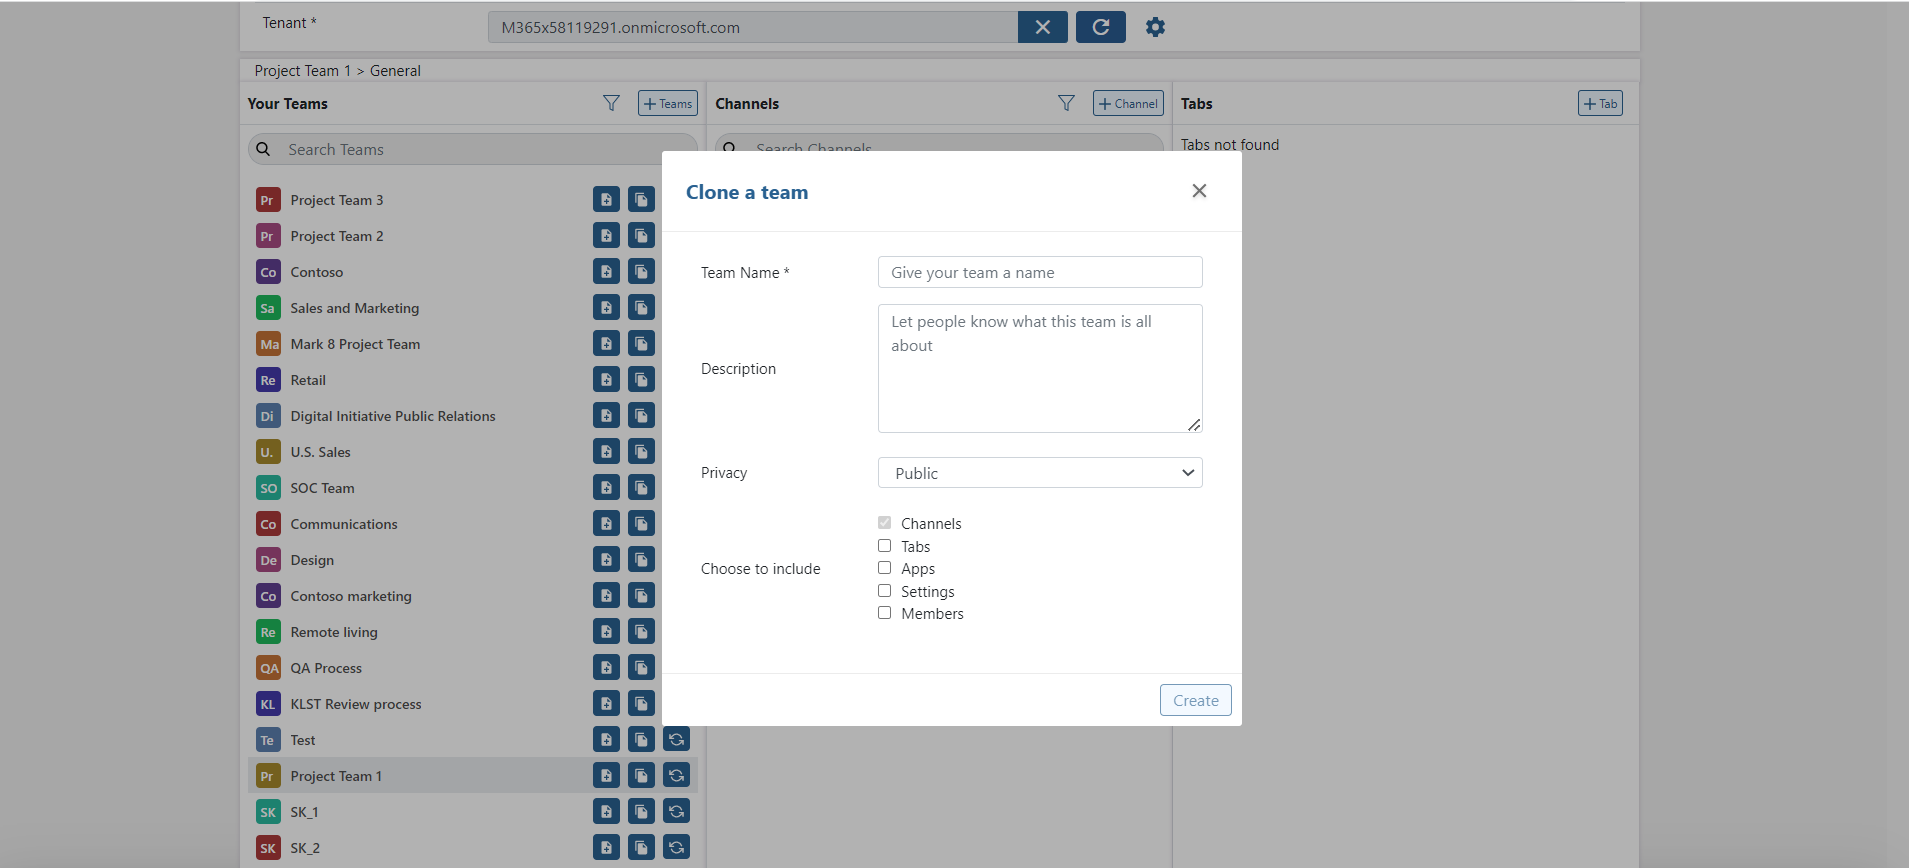
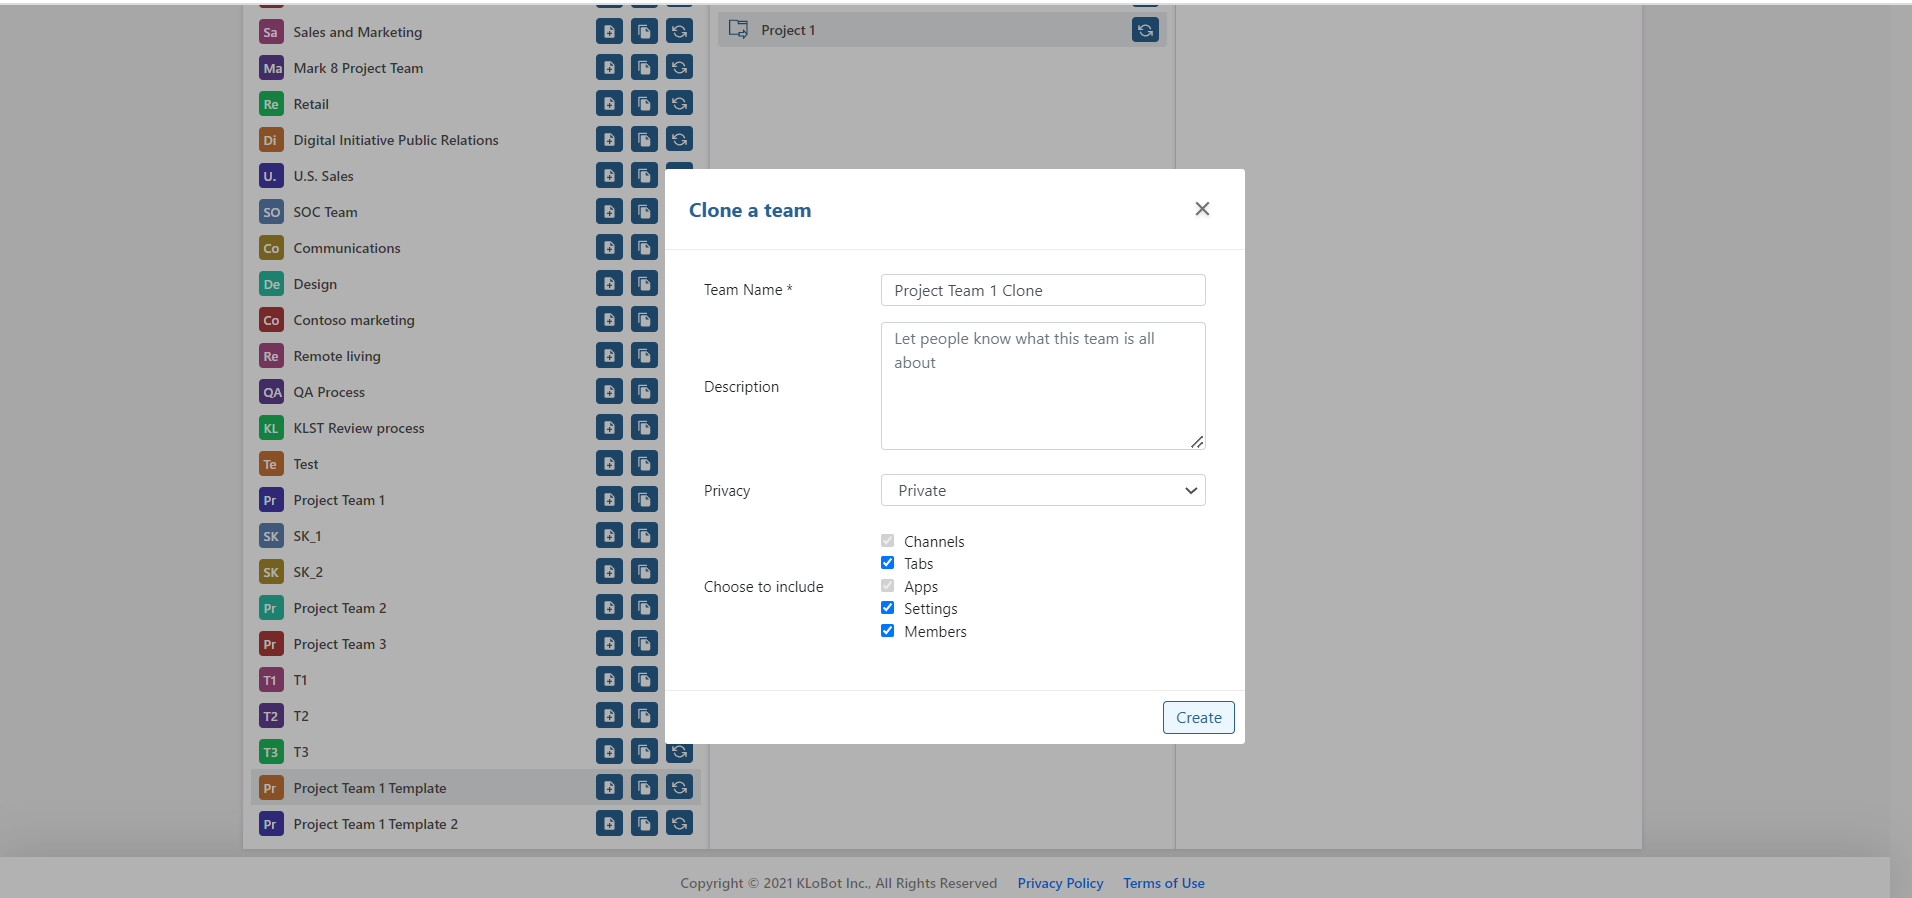
Cloning a Team to a New Team
User can clone a Team into a New Team by selecting the Clone a Team icon ![]()
Selecting the icon opens a popup to Clone a team
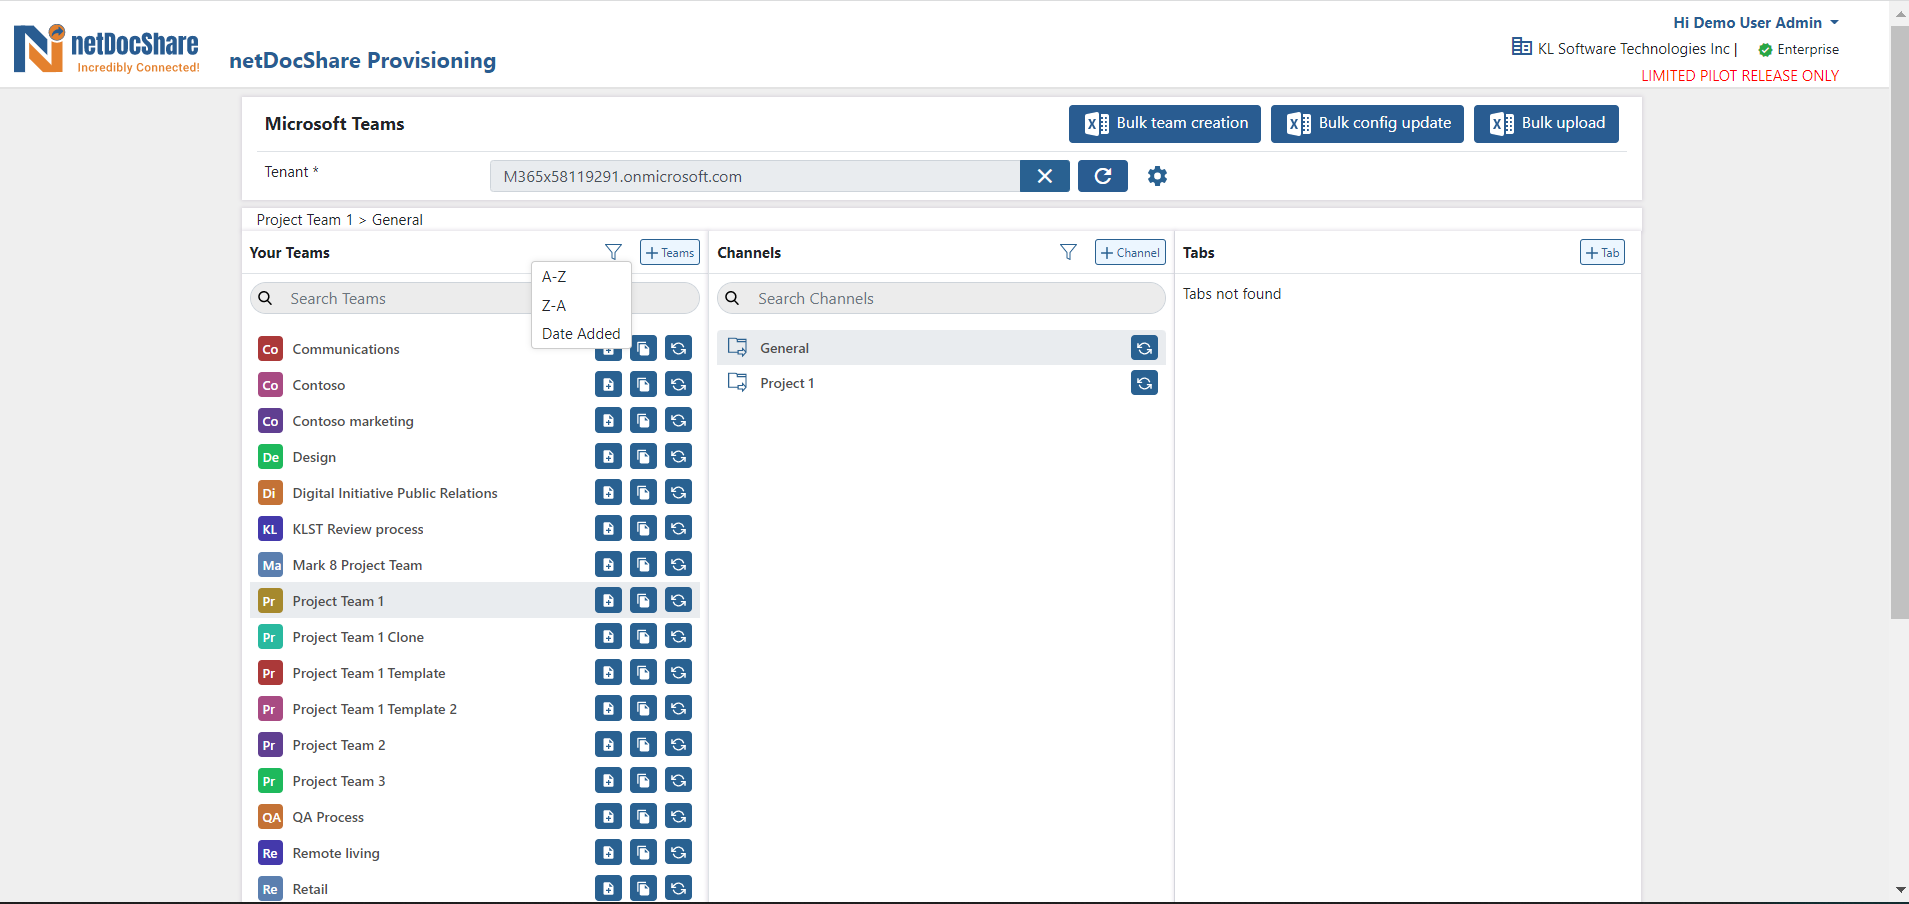
Ability to Filter
A User is able to filter Teams from A-Z , Z-A and by Date Added
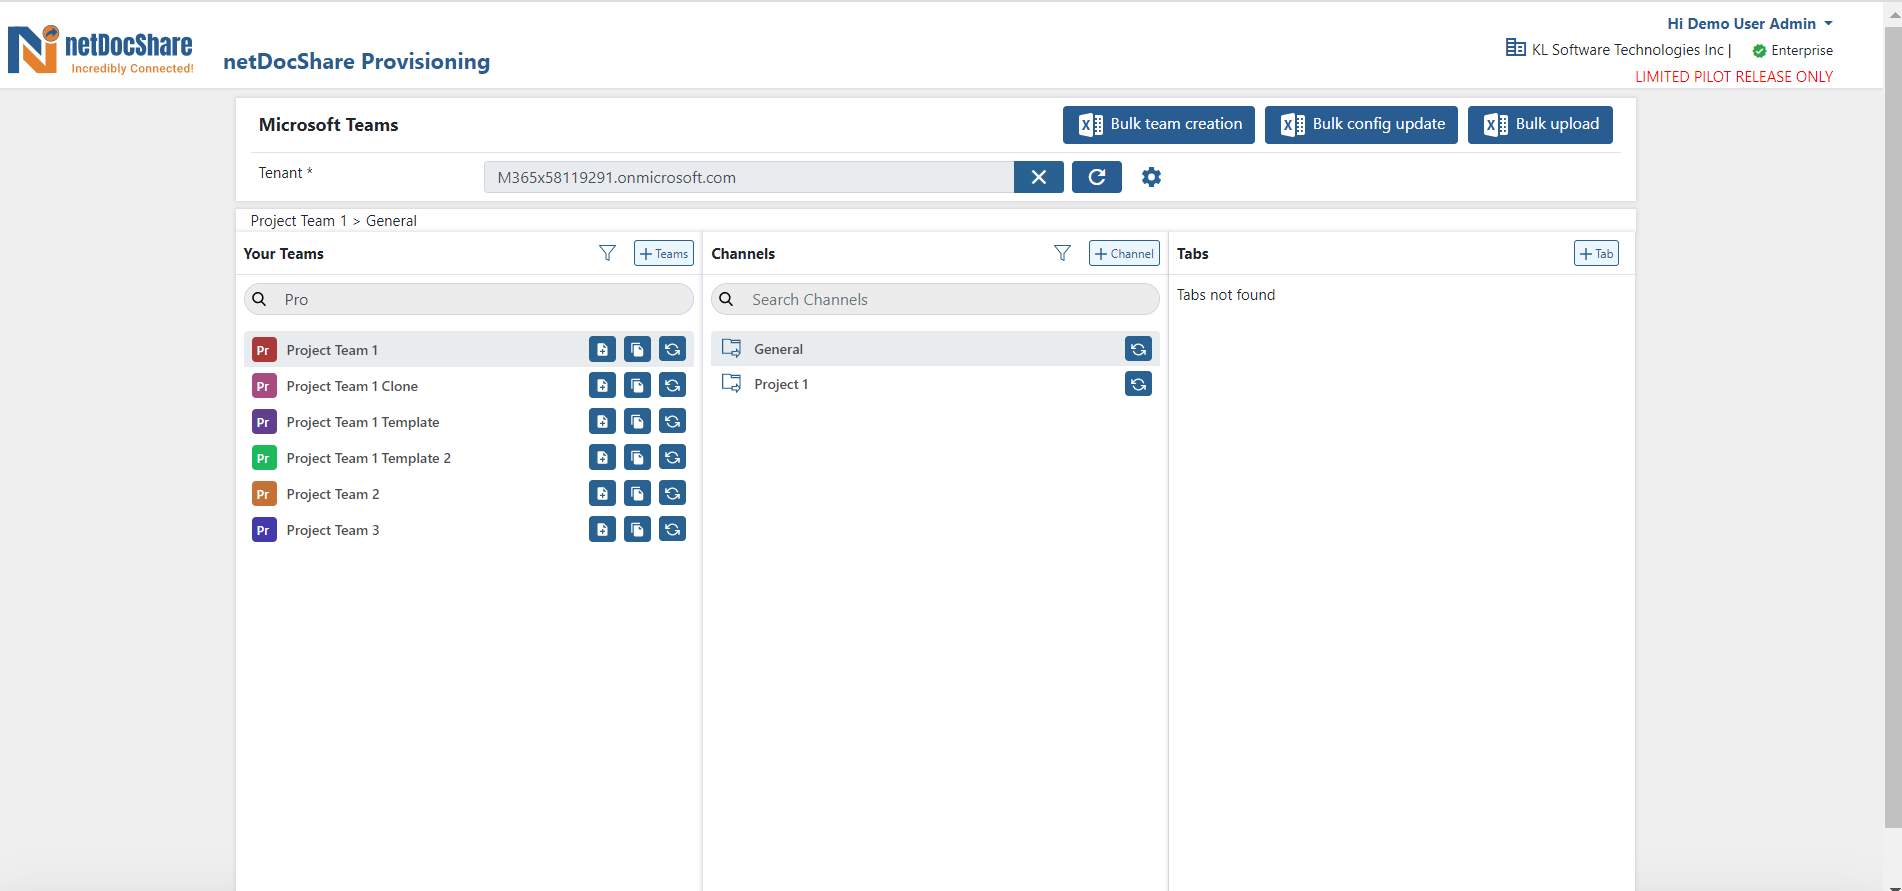
Ability to Search Teams List
A User is able to Search in Teams List
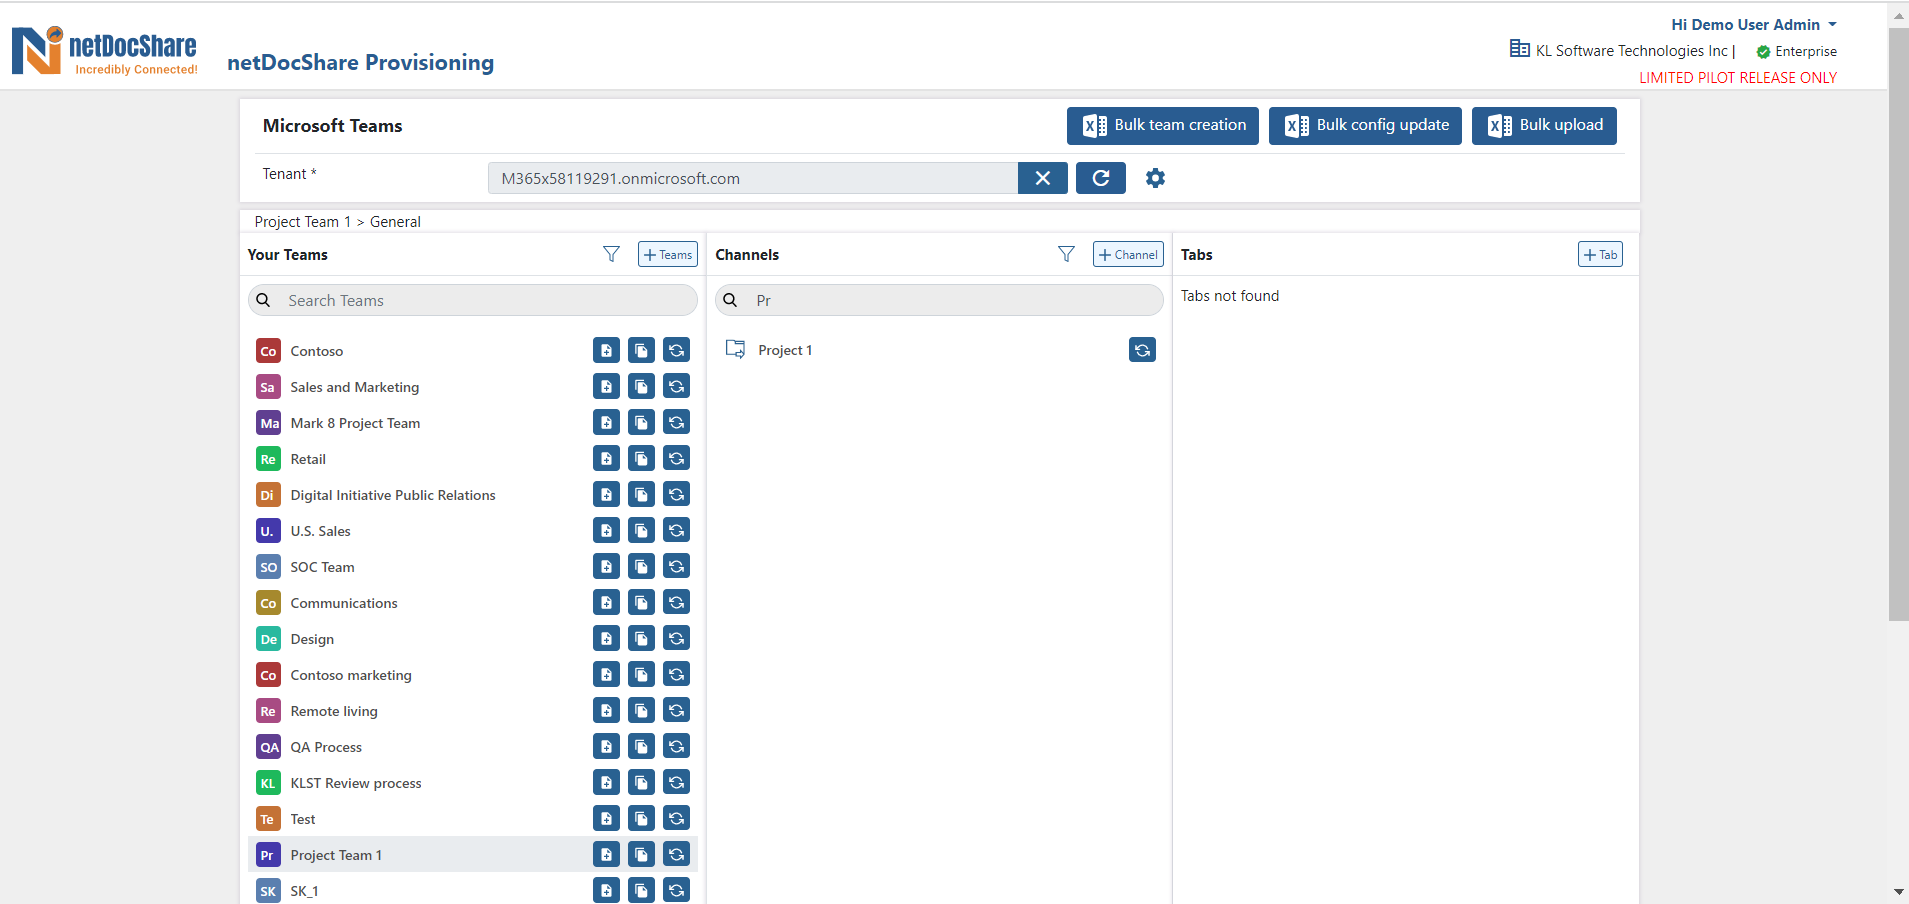
A User is able to Search in Channels List
Sync
Clicking on sync icon brings the user to the Save job page. Choose sync type and sync location to create a new sync job.
Adding a Team level Sync while creating a new Team
While creating a new Team you can add a Sync location. You have 3 choices:
- Bi-directional sync
- NetDocuments to Teams
- Teams to NetDocuments
Choose sync type and sync location to create a new sync job.
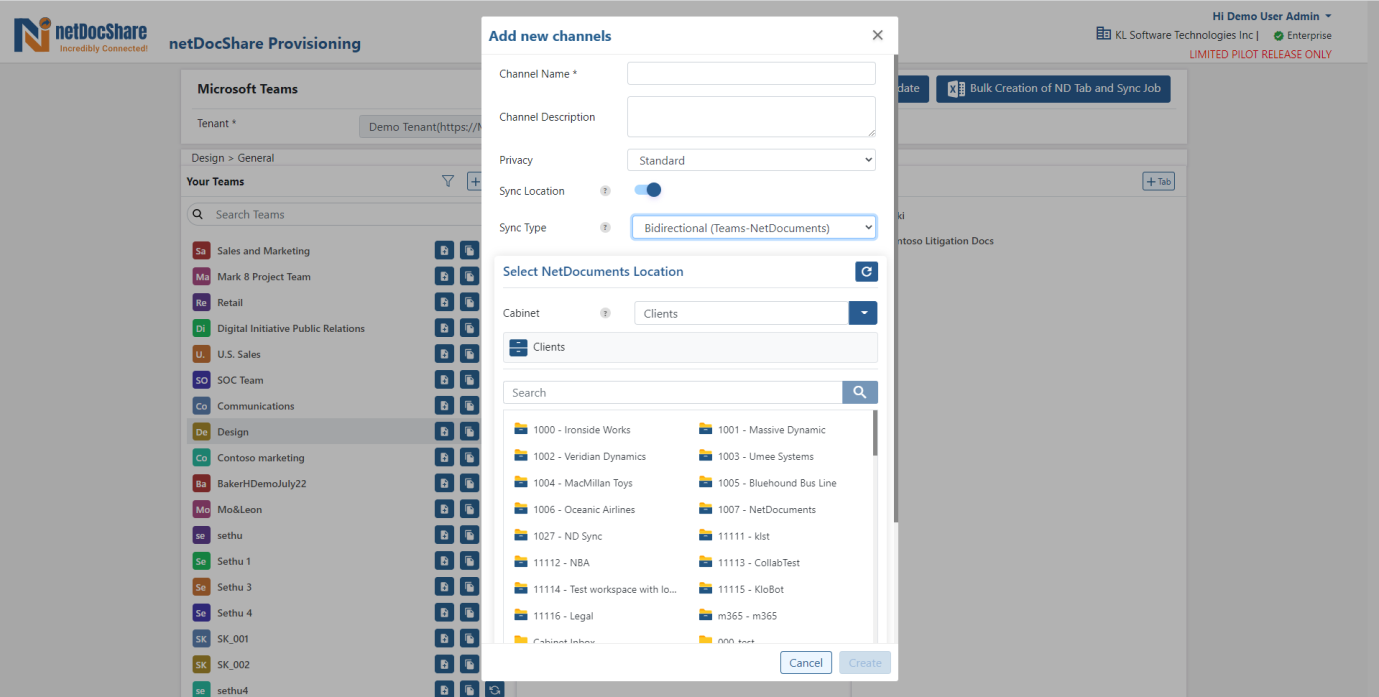
Adding a Channel level Sync while creating a new Channel
While creating a new Channel you can add a Sync location. You have 3 choices:
- Bi-directional sync
- NetDocuments to Teams
- Teams to NetDocuments
Choose sync type and sync location to create a new sync job.
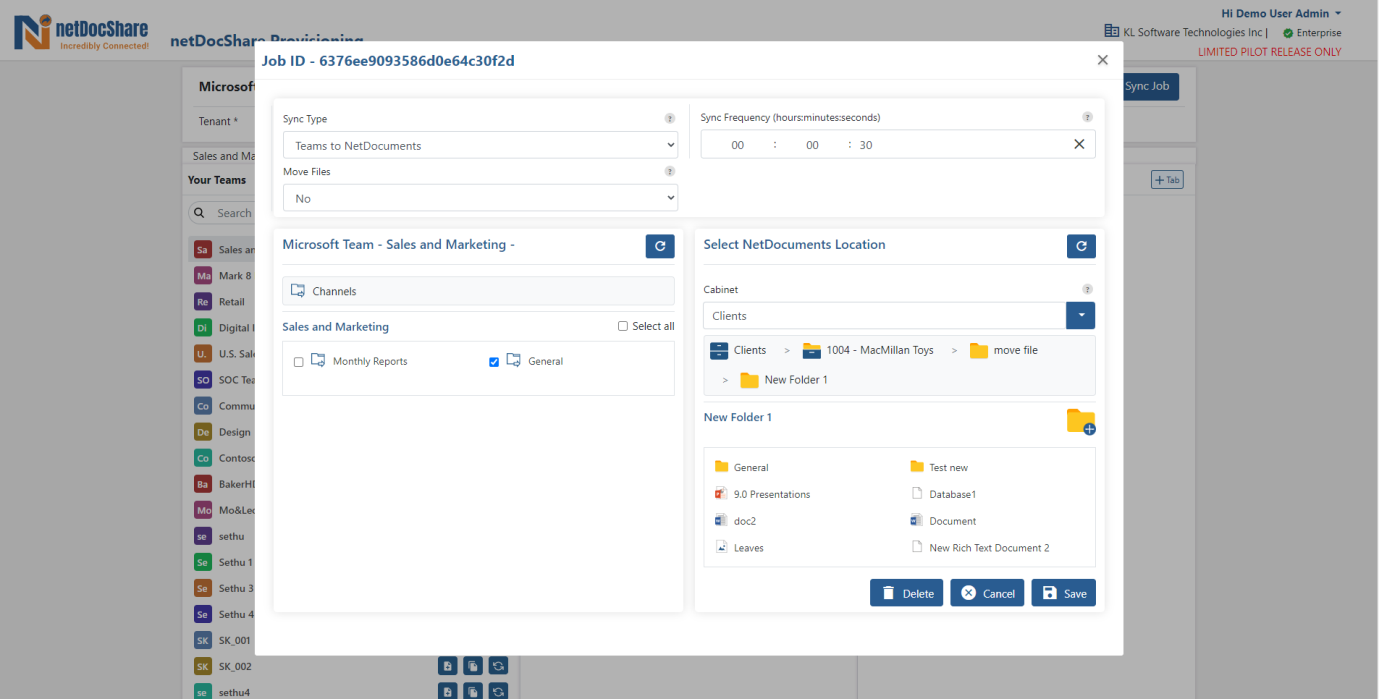
To delete a sync job, open the job popup by click on the icon ![]() in the team or channel. In the job popup, click on delete button to delete the job.
in the team or channel. In the job popup, click on delete button to delete the job.
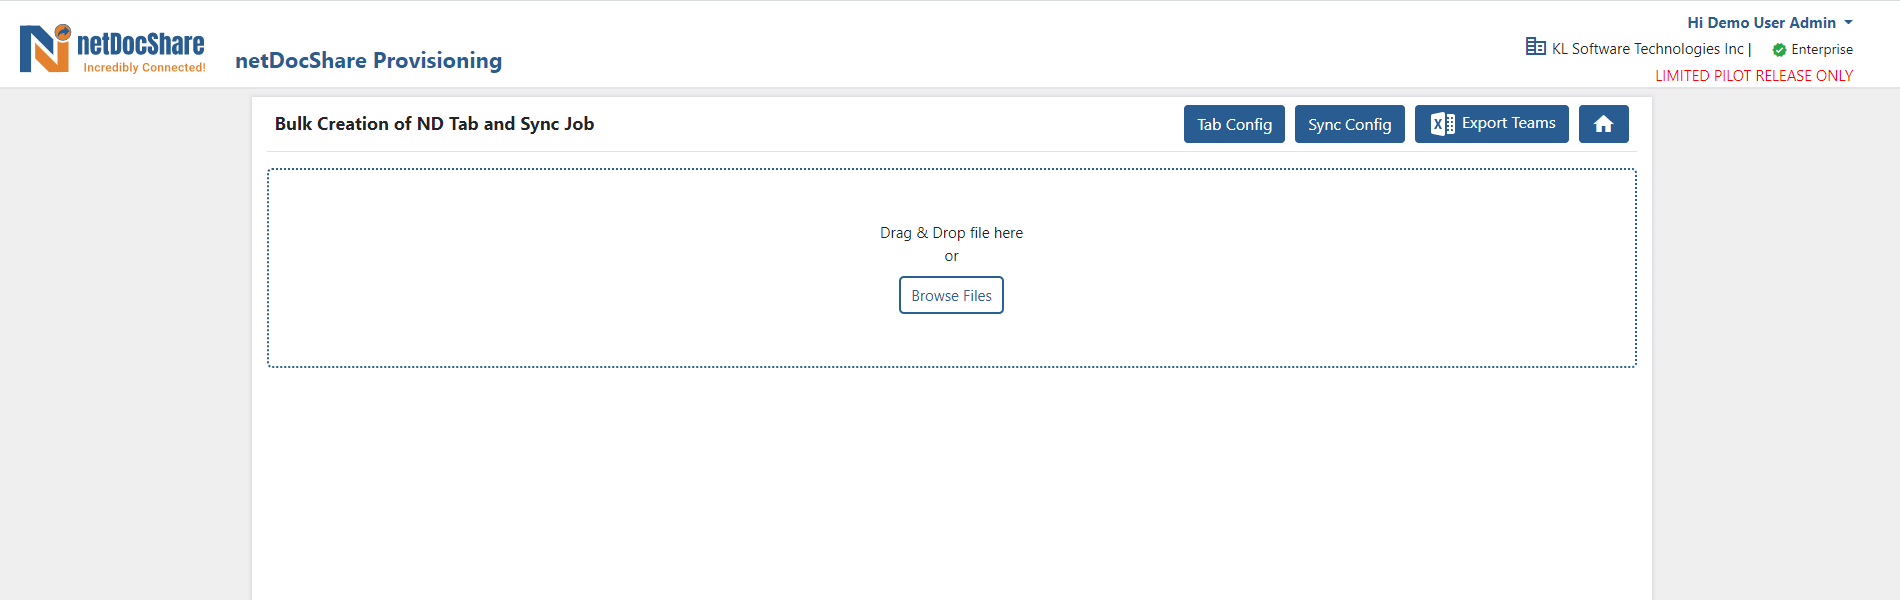
Bulk Creation of ND Tabs and Sync
Click on the button ![]() to open a page to upload bulk creation of ND Tab and Sync Job.
to open a page to upload bulk creation of ND Tab and Sync Job.

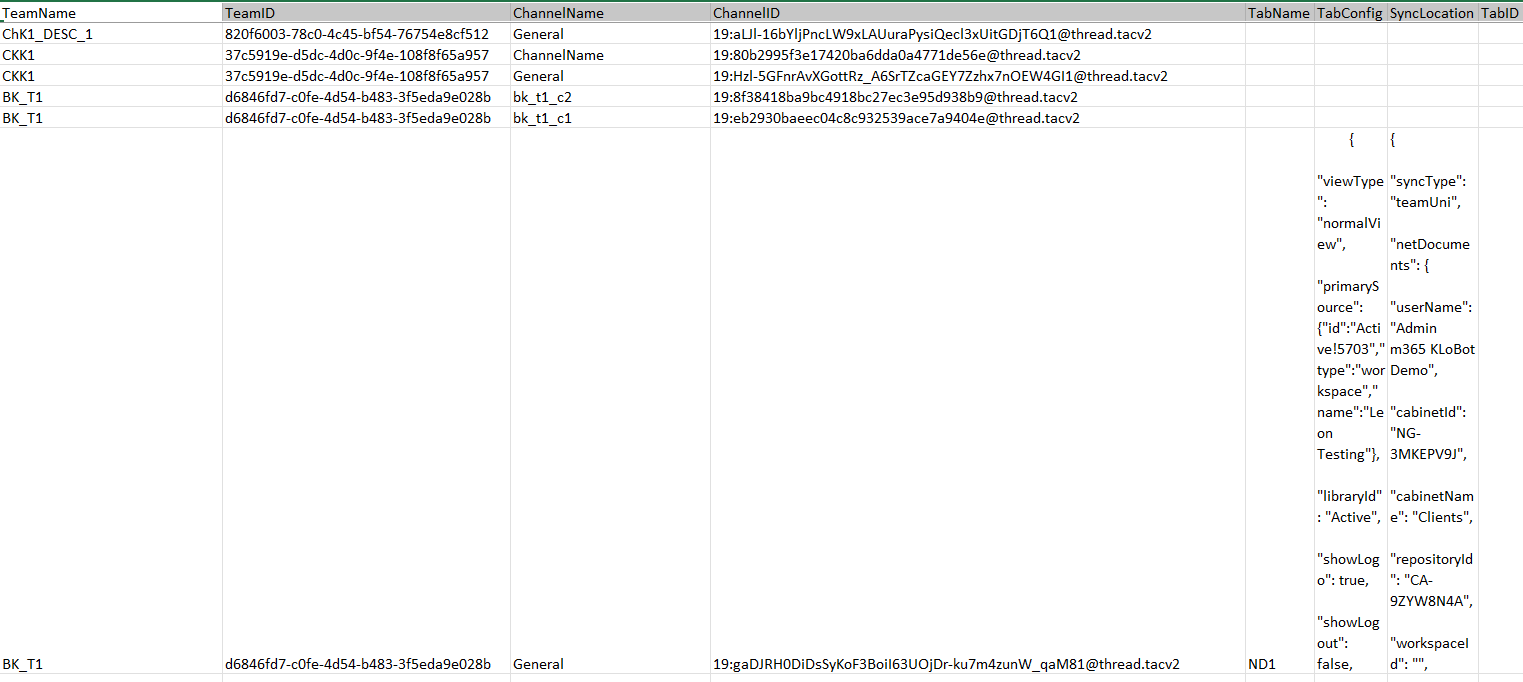
Click on the button “Export Teams” to download excel template. Sample config details can be reviewed by clicking on the buttons “Tab Config” and “Sync Config”.
The excel export will have the details of the team and channel with id. Add details of tab and sync configuration to the corresponding channel and upload this excel to create bulk ND Tabs and Sync.
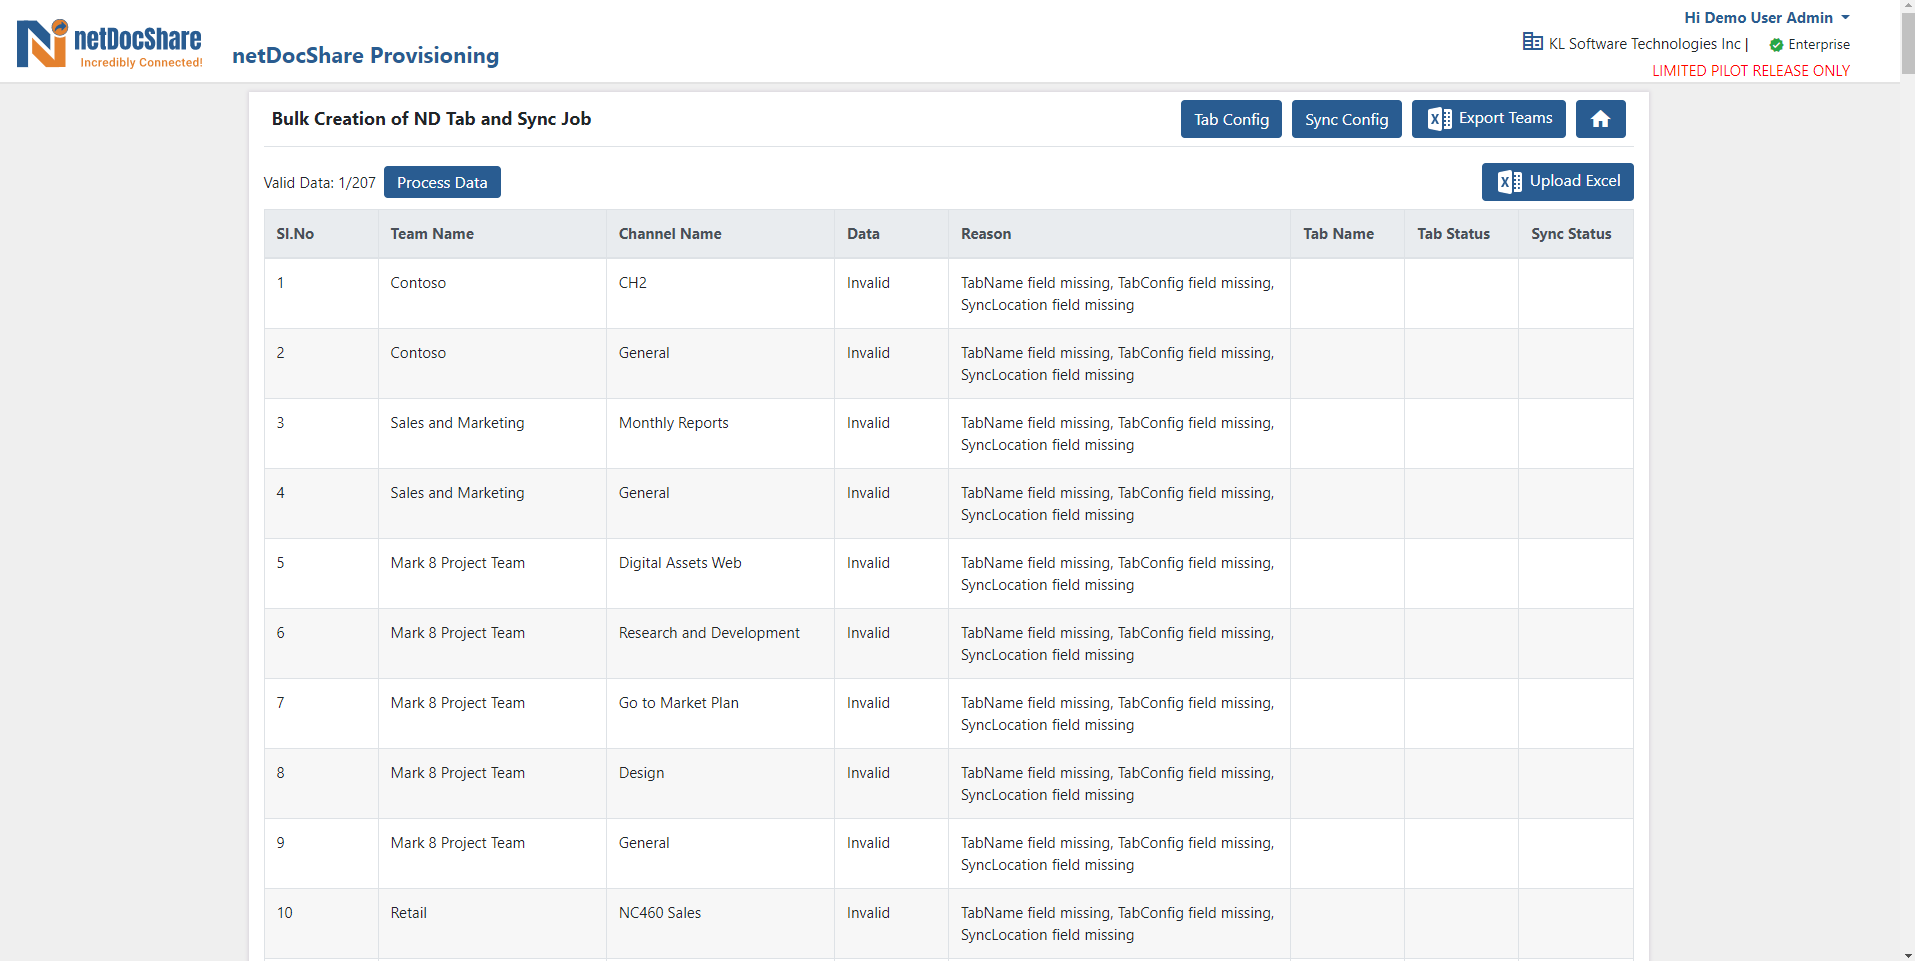
Click on “Process Data” button to process the uploaded excel data.
Bulk Config Update
This feature is used to update the configuration advance settings of the Tab Config.
Click on the button “Bulk Config Update” to reach the bulk config update page.
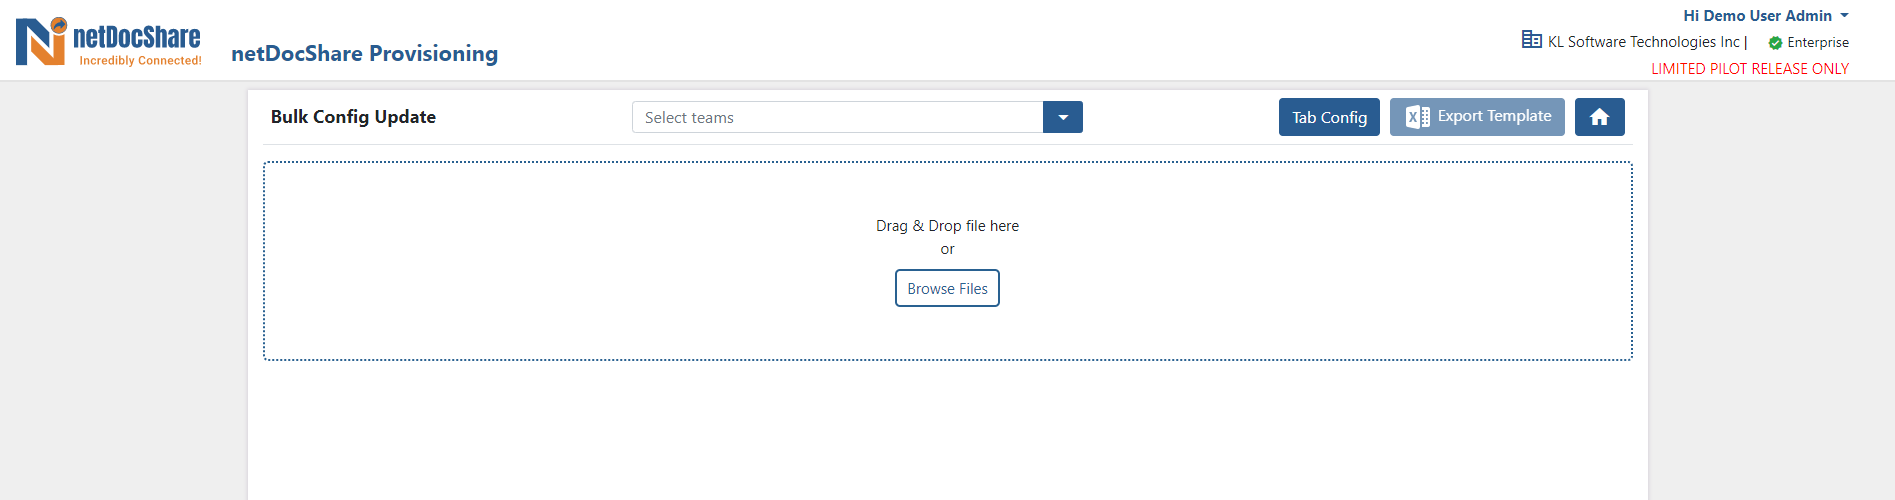
Select the Team and export the template as excel. Sample config details can be reviewed by clicking on the button “Tab Config”.
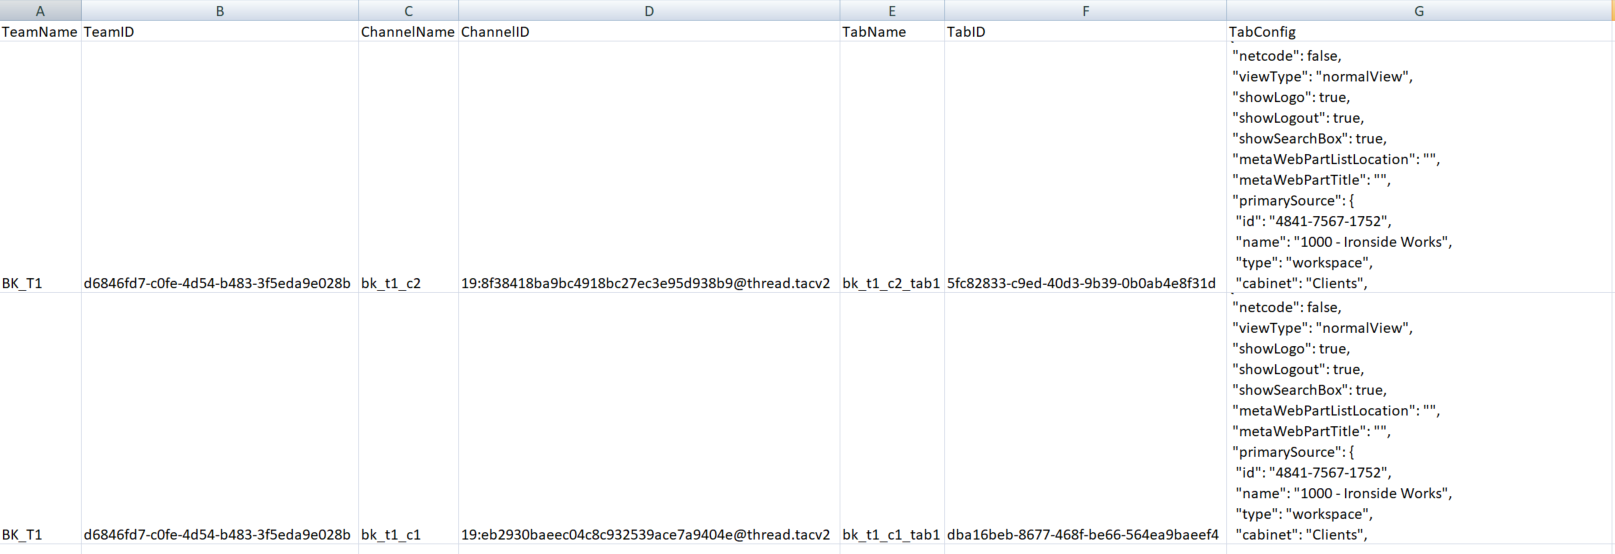
The Excel export will have the details of the Team, Channel and Tab with id. Add details of tab configuration to the corresponding tabs and upload this excel to update all selected Tab configuration.
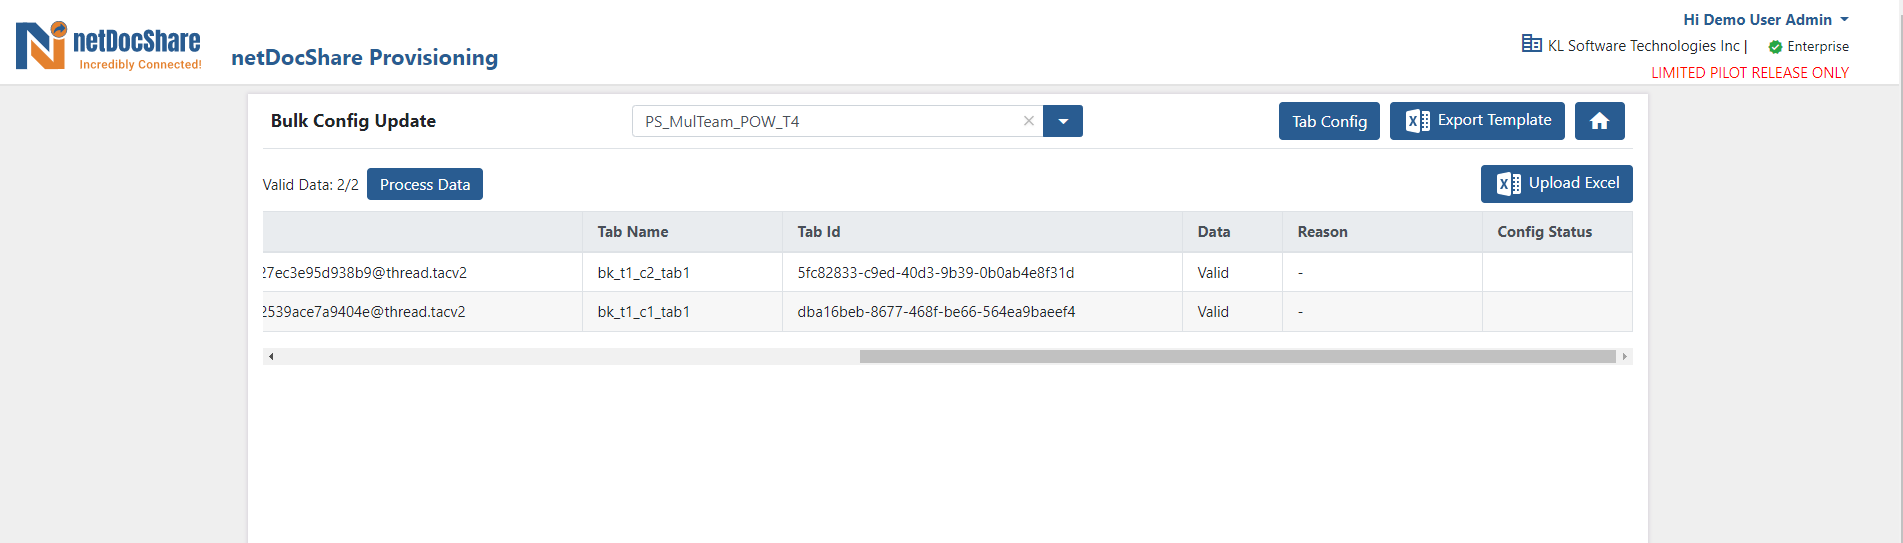
Click on “Process Data” button to process the uploaded Excel data.
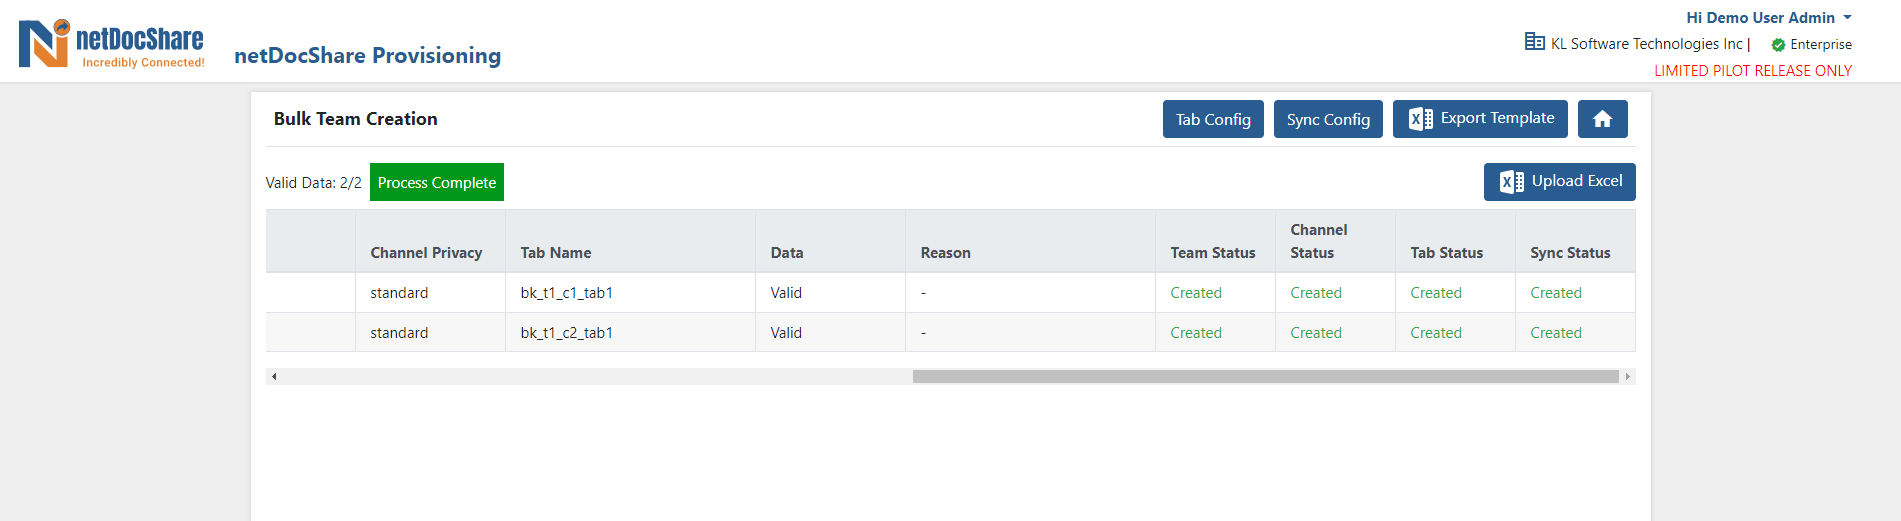
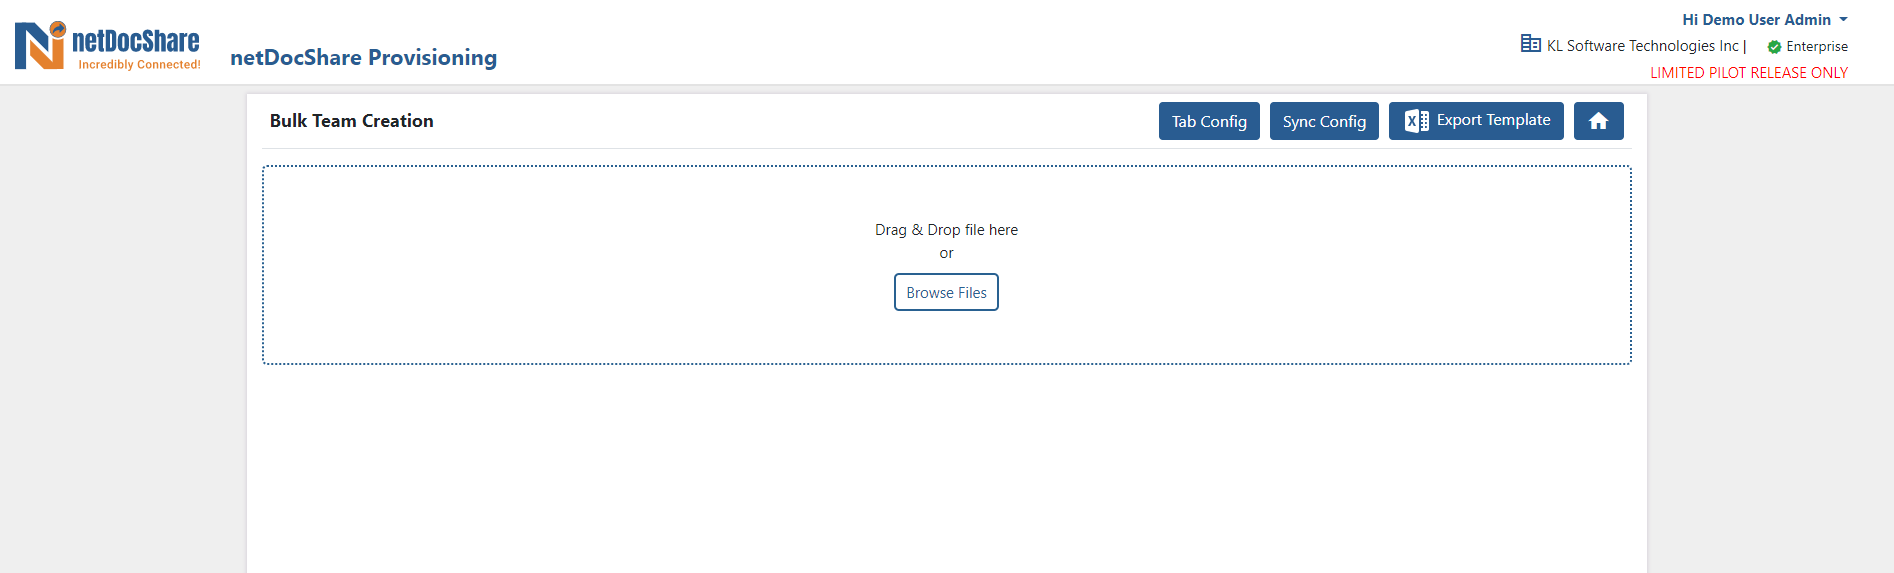
Bulk Team Creation
This feature is used for bulk creation of teams from Excel data.
Click on the button “Bulk Team Creation” to reach the Bulk Config update page.
Click on the button “Export Template” to download Excel template. Sample config details can be reviewed by clicking on the buttons “Tab Config” and “Sync Config”.
The Excel export will have the fields to add data. Add details of Team, Channel and Tab in the corresponding column and upload this excel to create a new team.
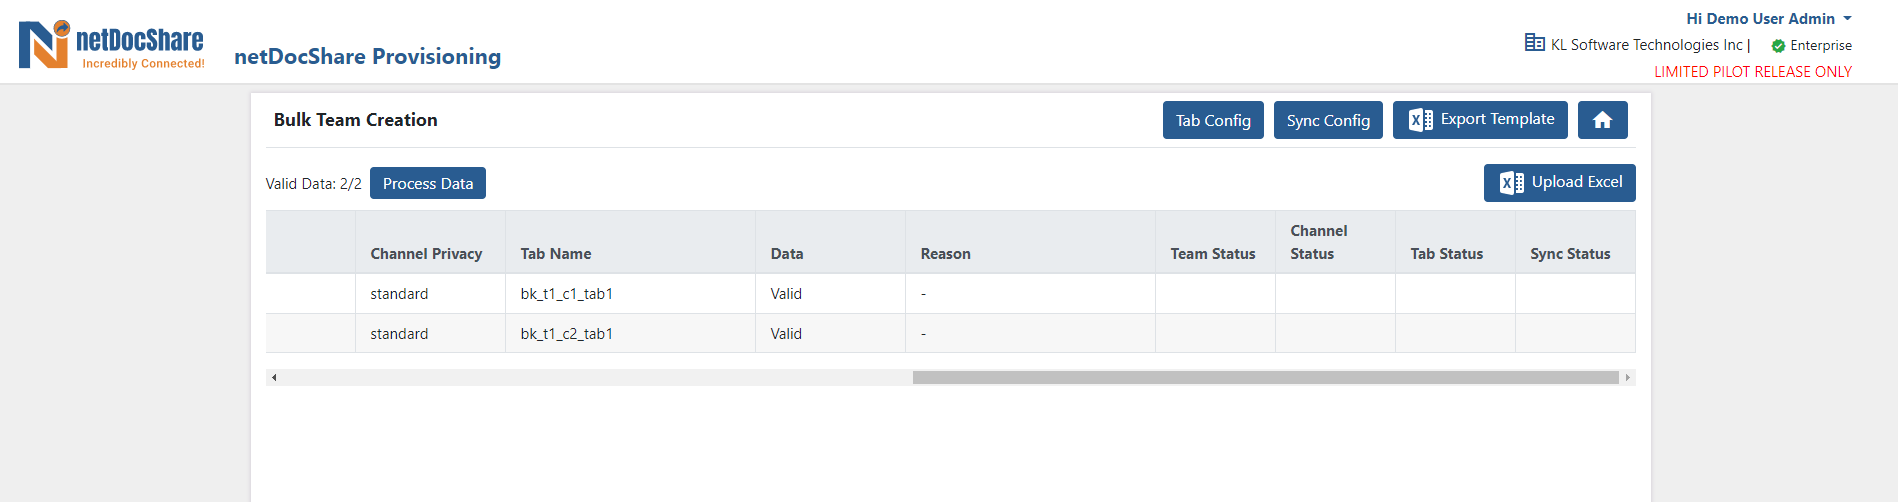
Click on “Process Data” button to process the uploaded Excel data.