Introduction
This guide is a general overview of how to use and configure the netDocShare Visual Web Parts designed for SharePoint 2013 on-Prem. We offer two different solutions: A Farm solution and a Sandbox solution. The functionality between these two different types should be the same for most cases, however, we list the major differences in a following section entitled “Farm vs Sandbox Differences”.
If you would like to use netDocShare WebParts for SharePoint Online, or on-Prem 2016 and later, we provide a different SPFx (SharePoint Framework) based solution that has the correct compatibilities to support newer environments.
netDocShare WebParts can be configured and customized in several ways to show the most appropriate documents and containers for a respective user or situation. These Web Parts include *:
- netDocShare Authenticator
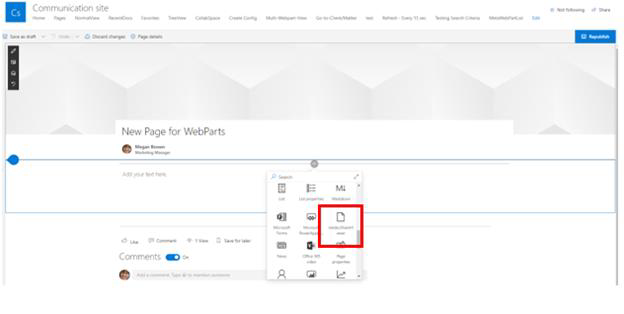
- netDocShare Document Viewer / ClientMatter
- SharePoint Config Builder
- Normal View
- RecentDocs View
- Saved Search View
- Favorites View
- Go to Client/Matter View
- netDocShare Tree View
- netDocShare Integrated Search
*Note: When choosing a Webpart to add from the Webparts list, Document Viewer and Client Matter are identical and can be used interchangeably. Integrated search is only available through extra license purchase.
This is not a guide for deploying the Visual WebParts solution to SharePoint. This documentation assumes that an Admin user has already deployed the solution in the Site Collection’s Site Settings. If you need help with initial deployment, please see our documentation entitled “netDocShare – Visual WebParts Deployment Guide for SP2013 on Prem”.
This guide also does NOT cover the how to use the netDocShare Admin App which focuses on storing global Configurations so that users can have defaults that are universally applied. Please see the “NetDocShare Admin App User Guide” for this information.
Note: Site Collection Libraries MUST be able to host JSON and js files or else deployment will fail. Any security measures that block Popups or iFrames must be turned off as our authentication uses these resources.
Supported Browsers
Supported Browsers:
- Microsoft Edge
- Google Chrome (latest released version)
- Mozilla Firefox (latest released version plus immediate previous version)
- Apple Safari (latest released version)
- Internet Explorer 11 (limited support only. IE11 Protected Mode is not supported)
Not Supported Browsers:
- Internet Explorer 10
- Internet Explorer 9
- Internet Explorer 8
- Internet Explorer 7
- Internet Explorer 6
netDocShare Licensing
netDocShare comes with a unique license ID which will be verified on load. Please note that netDocShare requires an internet connection to verify your license, which should not be an issue since it also requires internet to retrieve content from the NetDocuments API.
When receiving our netDocShare deployment materials, you should also have received a netDocShareLicenseKey.txt file. This file contains your unique key which will activate netDocShare and the specific features that you have requested. In order to activate, simply drop the key file, which we have provided, into the library where our assets were deployed. Neglecting this step will yield licensing errors and will not allow usage of the app. In our farm solution, the assets will deploy to a location on the file system. We have given an example path below:
AssetPath:
https://{your-SharePoint-Tenant}/_layouts/15/netDocShareFarm/assets/images/folderIcons/
File Path:
C:\Program Files\Common Files\Microsoft Shared\Web Server Extensions\15\TEMPLATE\LAYOUTS\netDocShareFarm\assets\images\folderIcons
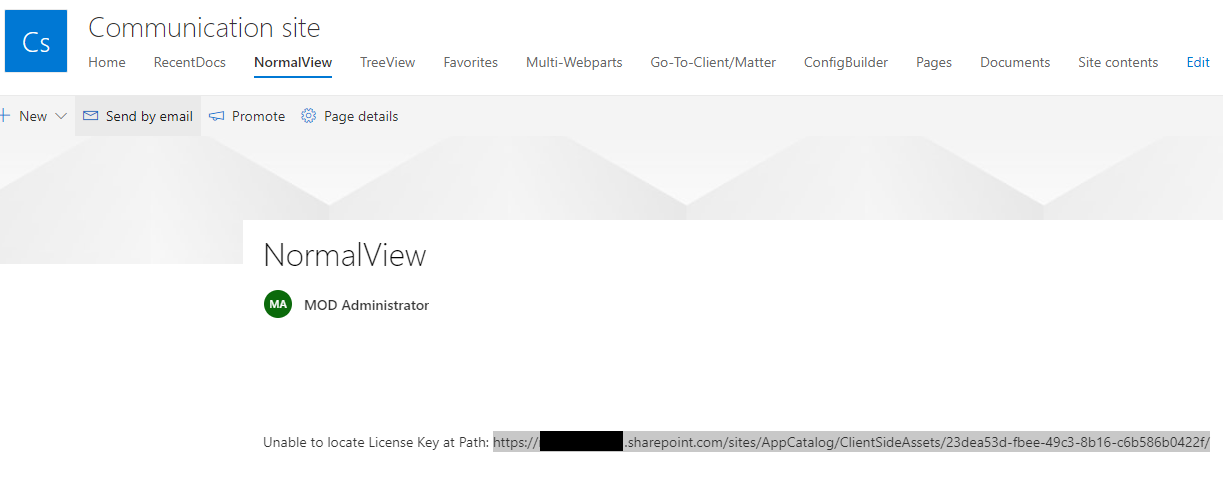
Attempting to use the app without putting in the license key will be able to yield the exact path in an error message similar to the one shown below:
Farm vs Sandbox differences
The instructions in this guide are mostly meant for our Sandbox solution deployment, however, as there are few differences between the two in terms of functionality, the same instructions can be applied to the Farm solution. All the significant differences are listed here:
Your sandbox solution assetPath will resemble this:
https://{your-SharePoint-Tenant}/_layouts/15/netDocShareFarm/assets/images/folderIcons
In contrast, you farm solution assetPath will resemble this:
https://{your-SharePoint-Tenant}/_layouts/15/netDocShareFarm/assets/images/folderIcons/
netDocShare WebParts Global Features
All the WebParts included in this project have a few global features that are common among components regardless of which view you are using:
The WebParts feature automatic authentication once a user has logged in once, in the same browser. This state will last for 24-48 hours upon active usage or 60 minutes when idle, unless the browser resets its local storage cache. Authenticated users can query any documents or source locations that they have permission to access on NetDocuments. Users are also able to execute actions that make changes to the documents, such as add/remove favorite or Uploading a new document to a location.
All components can receive “filter” values in the AppConfig Object that will filter the results returned by the REST API calls. Filter values are based on the Standard attributes of documents, folders or any other entity from NetDocuments. These case-sensitive attributes are listed further below.
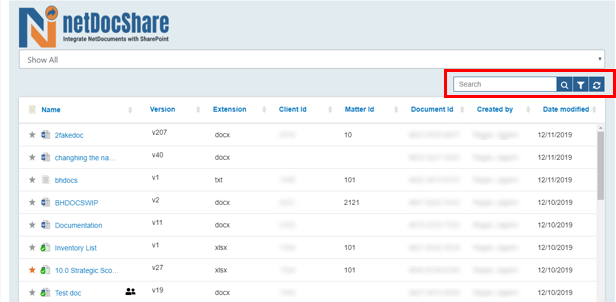
All WebParts feature a search bar in the top right corner, that can be used to filter through contents or search through all containers that are set as document sources. More about this feature can be found in the section on Search.
Each document has a corresponding “star” icon which will display an orange star if the document is favorited by the current user or a gray star if not. Clicking on these stars in any WebPart will toggle the “favorited” state of the document, which will be reflected in NetDocuments.com. All user favorites can be seen by using the “Favorites” view. More about this in the “Favorites” viewtype section.
All components have configurable table columns which you can include in the initial AppConfig Object. Column data is based on the standard attributes that exist on each NetDocuments entity. These attributes are listed further below.
Documents can be sorted and reverse-sorted by clicking or double-clicking on the column property-title by which you want to sort. Each WebPart also comes with a ‘defaultSortProperty’ that can be used to determine which data column the component will use to sort by default. These properties are based on the standard attributes that exist on each NetDocuments entity. These case-sensitive attributes are listed further below.
Every view will show an excel icon on the far right of the search box component. Users can click this button to immediately generate an excel spreadsheet of the current container’s contents.
The netDocShare logo on the top left of each WebPart view is customizable. Users can choose to display the logo or not using a config value called “mainLogoShow”, setting it to true will show a logo, false will hide it. Users can also replace the logo with a custom one: Navigate to the assets folders where the static assets are being retrieved. Here you will find a file called “mainLogo.png”. Users can replace this file with another image of their choice. On SharePoint Online, this will be in the CLIENTSIDEASSETS folder inside the App Catalog site collection. In SP on-Prem, this will be located in https://yourTenant/CDN/assets/images/folderIcons/. Replace “yourTenant” with the name of your SharePoint tenant.
All documents displayed in a WebPart, upon click, will (by default) open the document’s profile page on the NetDocuments site. This default click behavior is customizable using your config options. Please see our section on config options to customize this behavior. There are a few different behaviors that users can select:
This will execute the default click behavior and open a full screen preview of the document in a new window
This requires that the “Get Secure Link” option is turned on in the user’s NetDocuments cabinet administration options. It should be on by default. This will open a full-screen browser preview without navigating to NetDocuments.
This option will simply download the selected document on click
Search Features
Search is a global feature that exists on every WebPart. The search bar can be turned on or off in the configuration. By default, search will show the currently selected container as its search context in the placeholder field. Note that search functionality cannot be expanded beyond the original source container but it can be constricted by navigating into sub-containers. The placeholder text should update automatically, informing the user of the search context when navigation occurs.
Search functionality will vary depending on the type of content that is retrieved by the WebPart and also how it is configured. There are 2 main options for search configuration: “Search Current View” or “Search All”.
Will execute a search on NetDocuments with the current container as the search scope (including sub-containers). It will return all results matching the metadata columns of the existing view.
Will execute a search on NetDocuments with the current container as the search scope (including sub-containers). It will search across all metadata including keyword searching the content of the document. Note: Search All cannot expand the search scope beyond the original source container.
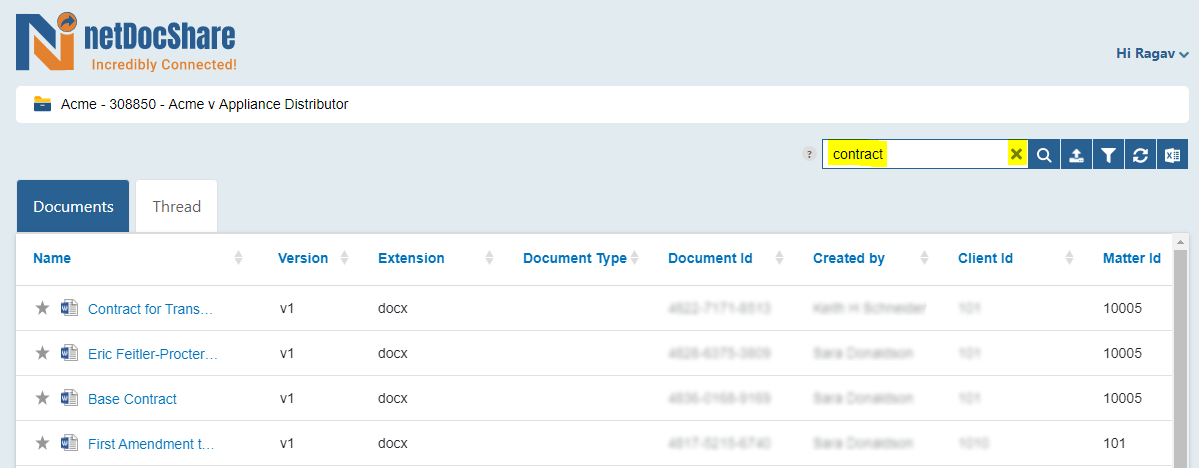
When the user clicks the search button or presses enter with a search term, the WebPart will execute a query to NetDocuments that searches through all containers and sub-containers that are contained within the primary source. The current contents of the display table will then be replaced by the search results. Users can revert to the previous view by pressing the “x” button inside the search box.
Integrated Search
With our 2020 update, we also have a new webpart dedicated to search integration between SharePoint and NetDocuments. This webpart is only available through an extra license feature purchase. Please see our section on the “Integrated Search” viewtype for more info.
Dynamic Data Columns
NetDocShare relies on the dynamic column and Profile Attributes system in NetDocuments to retrieve its data. In order to show custom columns, users must have set up profile attributes as a NetDocuments Administrator and enabled them as custom columns in the cabinet in use. Once this pre-requisite has been fulfilled, users can display any sort of custom column content from NetDocuments.
Choosing Columns
By default, our webpart will include the fields “name”, “version”, “id” and “extension” as default columns to include in a newly created view. However, users can customize this in various ways. Using the config Builder, users can dynamically retrieve columns that exist in their NetDocuments account and then add or remove any columns desired (Note: This excludes the Name and version fields which are mandatory). Users can also re-arrange columns as they wish
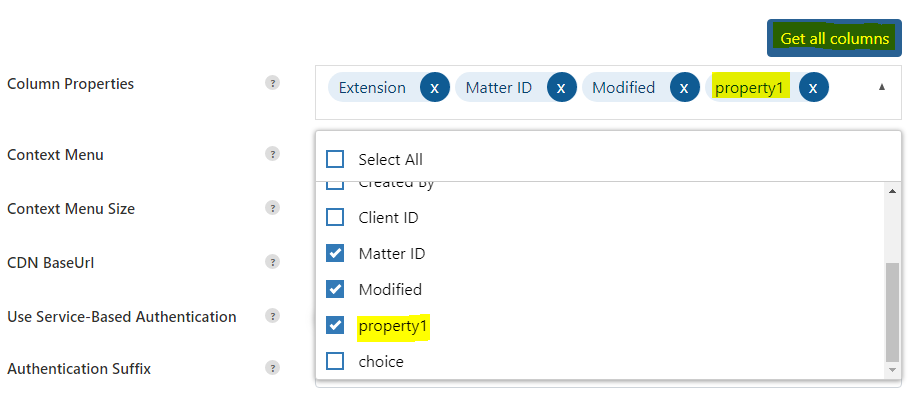
In the image above, you can see that custom columns “property1” and “choice” have been retrieved from the cabinet and “property1” has been added to the view. Please see the Config Builder section for more information about using custom columns.
Filtering Columns
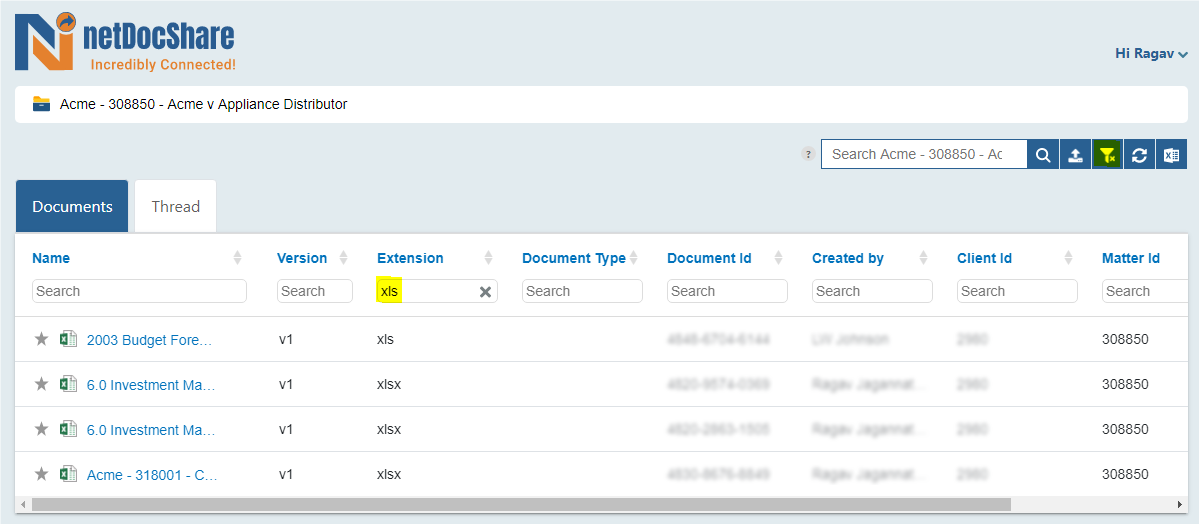
Clicking on the “Filter” icon beside the search bar (pictured in the screenshot below) will open filter fields for each column included in the view. Users can enter filter terms that will return results in the current container that match the provided term. Below you can see an example of filtering the document extension to only see Microsoft Excel files. Users can filter by any default or custom column that has been enabled for the cabinet in NetDocuments. Name and version will always be included as default columns, all other columns are customizable in the view.
Re-sizing and Re-arranging Columns
Columns can be re-sized directly on the webpart table. Simply hover over the edge of a column and the cursor should change into a resize icon with a tooltip reading “Resize Column”. Drag the dotted line to resize the column. After re-sizing occurs, the webpart will automatically save the new width that has been modified.

Re-Arranging columns can be done through the Config Builder mentioned earlier in the “Choosing Columns” section. On this page, after choosing the desired columns, users can drag & drop the column name bubbles to the desired order that will appear in the view. Please review the “Choosing Columns” section or please see the “Config builder” section for more info.
Note: When re-sizing columns on SharePoint, the change will only persist for the current view and current user. This is due to page edit & permission issues. If you would like column re-sizing to persist for all users, please re-size as a user who has edit permission on the page while the page is in “edit” mode and the webpart pane for the current webpart is open.
Upload & Download Feature
Users can upload a new document into any WebPart which has a specific source location that is a container. For example: folders and workspaces are valid containers that one can upload to. Whereas, views such as RecentDocs or Favorites or Saved Search View are not valid containers and therefore cannot be uploaded to.
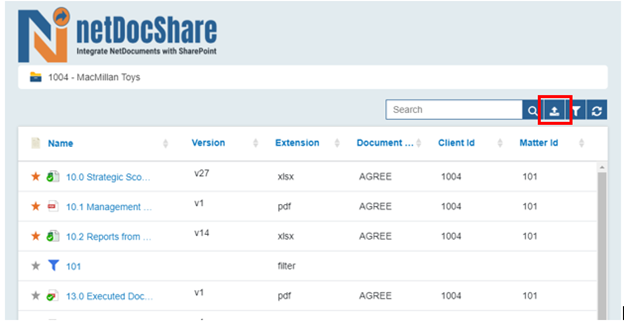
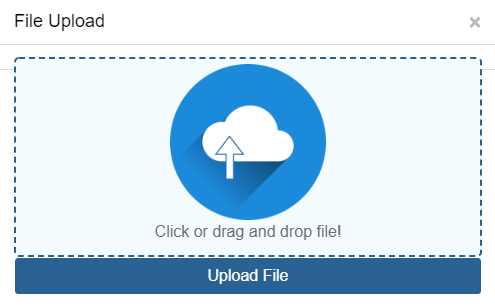
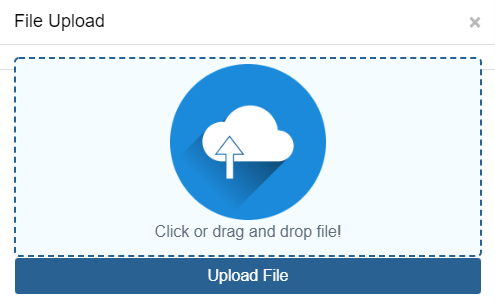
Simply click the upload button and it will open the upload dialog window (pictured below). In this window, users can drag & drop one or more files or click to browse their local directory to find a file for upload.
In TreeView, there are usually multiple sources displayed. In this case, the upload destination will be the latest cabinet/folder/sub-folder selected by the user.
The uploaded documents will immediately be sent to your NetDocuments repository barring any error happening. Users will be notified of any errors during upload. Please note: even after successful upload, in some limited cases, the user’s view on netDocShare may not immediately update to show the newest upload. This is due to the fact that NetDocuments processes and indexes the files in the background and the indexing priority tends to be lower for API uploads. This can be avoided by waiting a few minutes and refreshing the WebPart
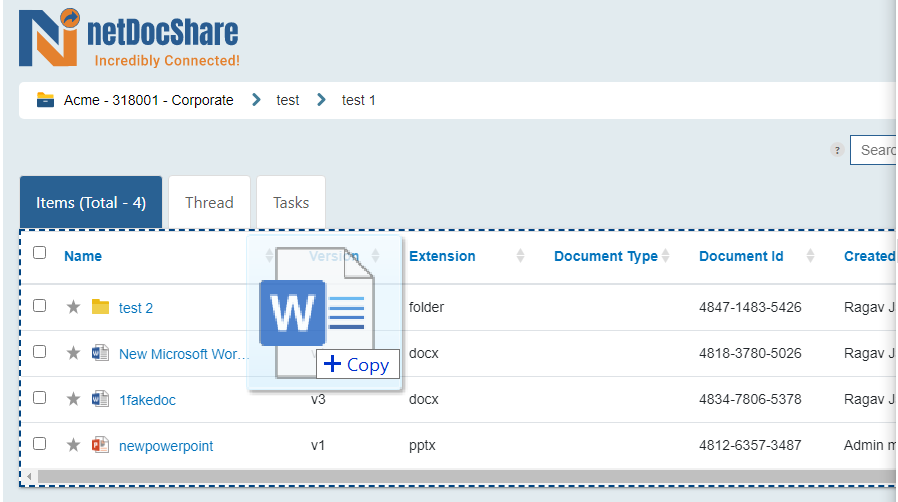
Note: Uploading files with no content results in an error. If a document is uploaded that has had its contents deleted, then it would not count as “no content.” As of version 3.3.0, users can now upload by directly dragging & dropping one or more files onto the content table itself.
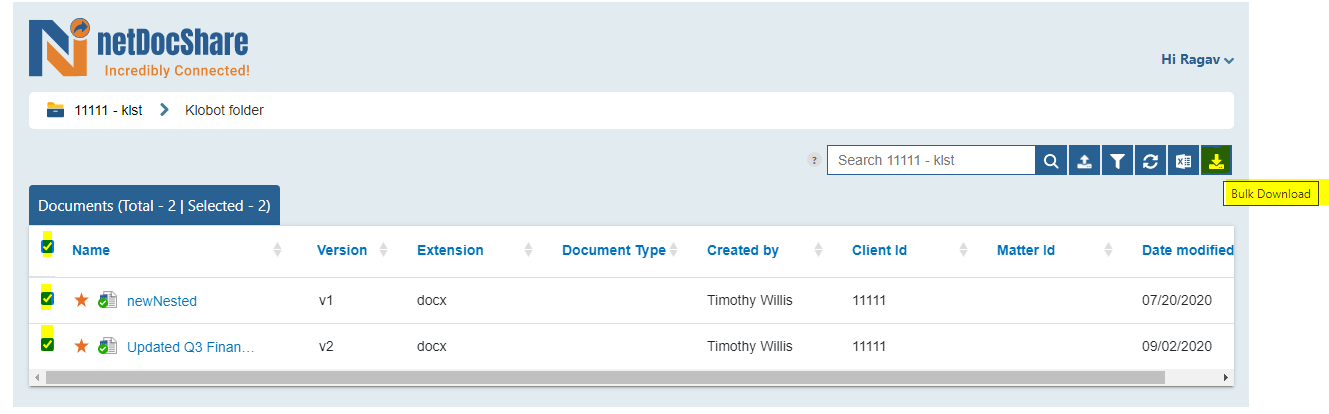
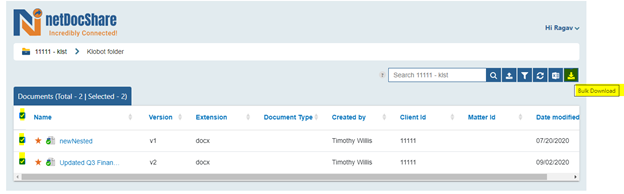
Users can also download documents in several ways. Firstly, there is a “download” option which can be turned on or off in the context menu. There is also a default click behavior which can be automatically set to download. Finally, users can select multiple documents using the selection tick boxes on the left and bulk download all selected files.
Enterprise Features
Our Enterprise level license contains a few more features that are provided only to enterprise customers. These features are automatically enabled if your license has been purchased or upgraded to enterprise level.
ndThread Integration
Our webparts have the ability to directly integrate ndThread views of containers or workspaces directly as additional tabbed views in either SharePoint or Microsoft Teams. To use this feature, simply check the “ndThread” checkbox when creating a new view with config Builder or editing an existing view. ndThread must already be activated on a tenant-level in your NetDocuments account, please contact your NetDocuments Administrator for more info on how to enable ndThread.
ndTasks Integration
Similar to ndThread, the new ndTasks feature will also appear as an additional tab when activated.
Open in Microsoft Word, Excel, PowerPoint Online
Support for directly opening documents in online office editors has been added. Note that this feature is only available for Office documents which include an ‘x’ in file format such as “xlsx” for excel files.
Integrated Search
SharePoint-NetDocuments Search Feature – ability to search and filter NetDocuments and SharePoint content right within SharePoint. This features allows users to customize a search webpart that can search across both SharePoint and NetDocuments. It also allows usage of share filters, even when column names and designations may differ. Please see our section on integrated search in order to learn how to create and configure this webpart.
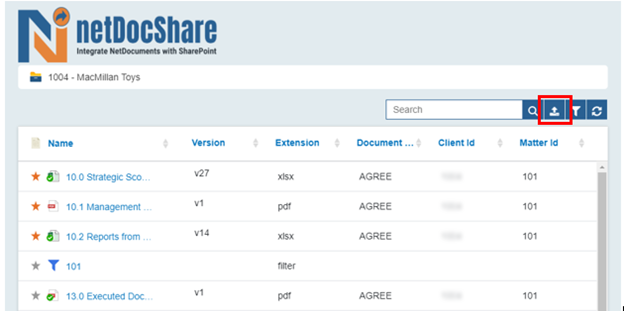
Simply click the upload button and it will open an upload dialog window. In this window, users can drag & drop or browse their local directory to choose single or multiple files for upload.
In TreeView, there are usually multiple sources displayed. In this case, the upload destination will be the latest cabinet/folder/sub-folder selected by the user.
The uploaded documents will immediately be sent to your NetDocuments repository barring any error happening. Users will be notified of any errors during upload. Please note that, even after successful upload, in some limited cases, the user’s view on netDocShare may not immediately update to show the newest upload. This is because NetDocuments processes and indexes the files in the background and the indexing priority tends to be lower for API uploads. This can be avoided by waiting a few minutes and refreshing the WebPart.
Note: Uploading files with no content results in an error. If a document is uploaded that has had its contents deleted, then it would not count as “no content.”
Users can also download documents in several ways. Firstly, there is a “download” option which can be turned on or off in the context menu. There is also a default click behavior which can be automatically set to download. Finally, users can select multiple documents using the selection tick boxes on the left and bulk download all selected files.
netDocShare SharePoint Configuration Builder
netDocShare Config Builder is one of our essential webparts when working with netDocShare for the first time. The Config Builder can be used by technical or non-technical staff to help create configurations for webparts that all other users will see.
Creating A Config Builder webpart
Create a new page or use existing Config Builder webpart.
After choosing the NetDocViewer webpart, click edit button and wait till right panel shows up. At this point, you will be able to tell whether the App has loaded successfully or not. If you see a message stating “Please input your NetDocuments Configuration Object”, the webpart is ready to configure and use. If you see any other message, some part of the deployment has gone wrong. Please ensure that netDocShare has been deployed properly by seeing our Deployment Guide. Create the Config Builder webpart by pasting the following into the webpart configuration window on the right side:
{ “viewType”: “createConfig”,
“assetPath”: “{your asset path here}” }
The assetPath determines where the webpart will load its code and assets from. Typically, this can be found during the deploy process. Here is an example of a typical path we usually see in Sharepoint Online:
https://{your-tenant}.sharepoint.com/sites/AppCatalog/ClientSideAssets/{webpartGUID}/
For Sharepoint On-Premises, Your assetPath might look like:
https://{yourSharepointTenant}/SiteAssets/netDocShare/CDN/assets/images/folderIcons/

More detailed information about the Config Builder can be found in “How to use SharePoint Config Builder.”
