Introduction
This guide is a general overview of how to install and configure the Teams App for netDocShare designed for use with the Microsoft Teams desktop application or the Microsoft Teams web app which can be reached at:
This document does not cover any SharePoint-related topics or the in-depth configuration details for netDocShare webparts. This information can be found in the general documentation for netDocShare entitled “netDocShare SPFx webparts Power User Guide” or “netDocShare Visual Webparts for SP2013 On Prem – Power User Guide” depending on which version you have purchased.
This guide also does not cover Admin Settings that can affect netDocShare Teams as well as netDocShare on SharePoint. For more information on how to set up and use Admin Settings, please see our “netDocShare Admin App User Guide”.
The netDocShare Teams App is a powerful application which can use almost all features that are included in our SharePoint implementation. Tab views can be configured and customized in several ways to show the most appropriate documents and containers for a respective user or situation. These Web Parts include:
- netDocShare Document Viewer
- Normal View (show contents of a single container or workspace)
- RecentDocs View (show user’s most recent documents)
- Saved Search View (show contents of a saved search)
- Favorites View (Show user’s favorited documents or containers)
- Go to Client/Matter View (Navigate to a specific workspace using Client/Matter ID information)
- netDocShare Tree View (Show multiple container sources which can be freely navigated in a tree-style view)
NOTE: Custom App tabs are currently supported in a limited capacity for viewing on mobile. Mobile experience may vary depending on device type. Please contact us at support@netdocshare.com to report any specific issue with Viewing your Teams tab content on a mobile device.
Installation
Initial installation is a very quick and easy process. It will be slightly different depending on whether you will be installing from the Microsoft Teams App Store or installing via “side-loading” the app with a standard zip file.
Install from Teams Store
Simply search for ‘netDocShare’ in the app search box and select netDocShare to install.
Install by side-loading App
Side-loading requires that you have received a zip file with the main app installation package inside.
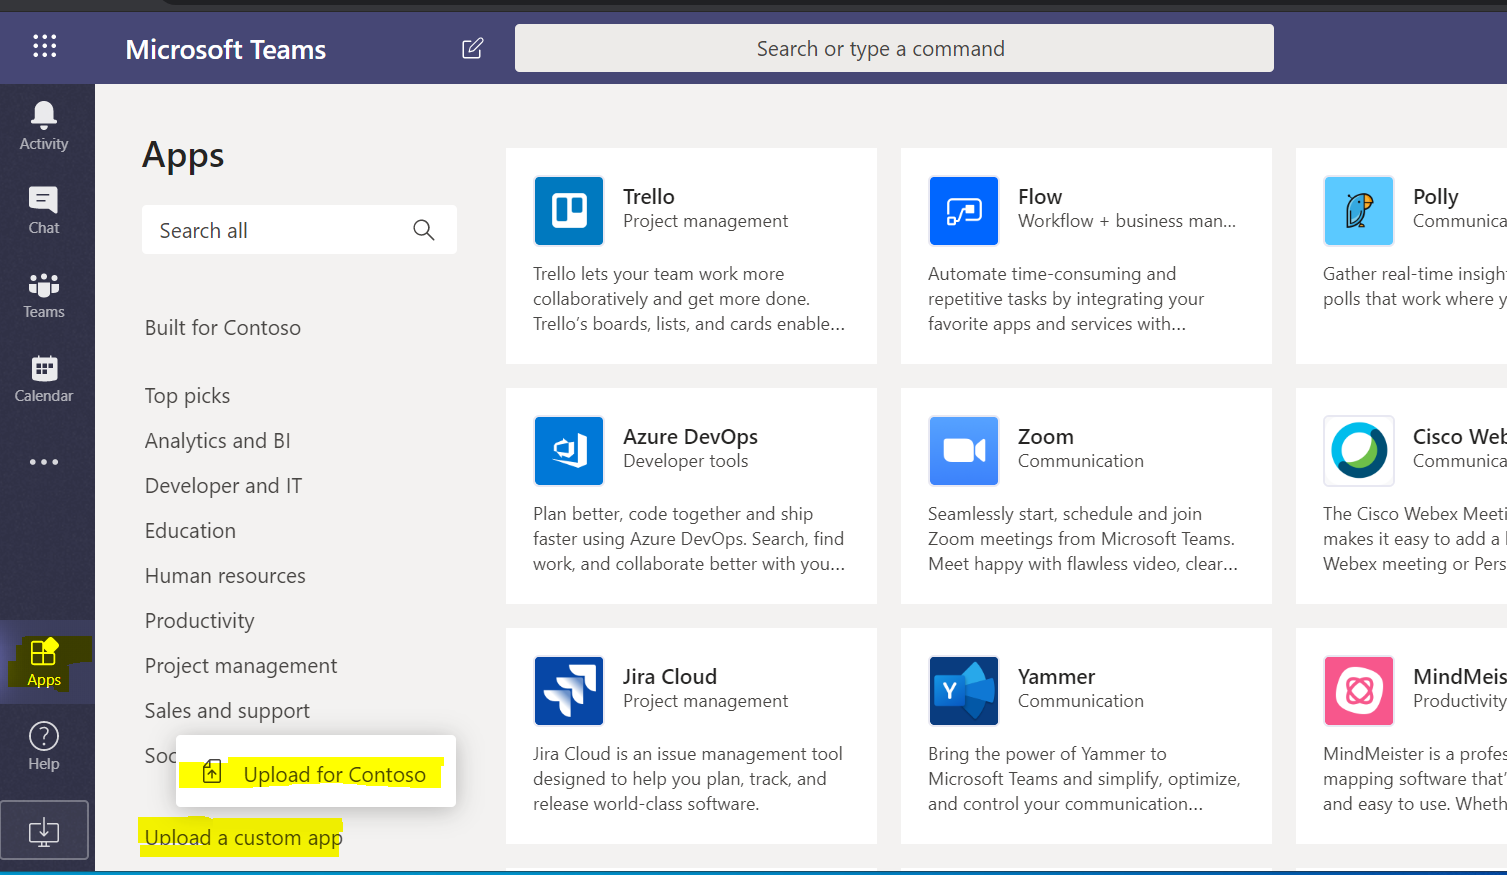
Navigate to Apps from the left side nav bar and select “Upload a custom app” > “Upload for {your tenant here}”. If the user who is installing it is NOT an administrator, they will simply install the personal app tab for themselves. If the user is an administrator, they will make the app available across the tenant for others to install.
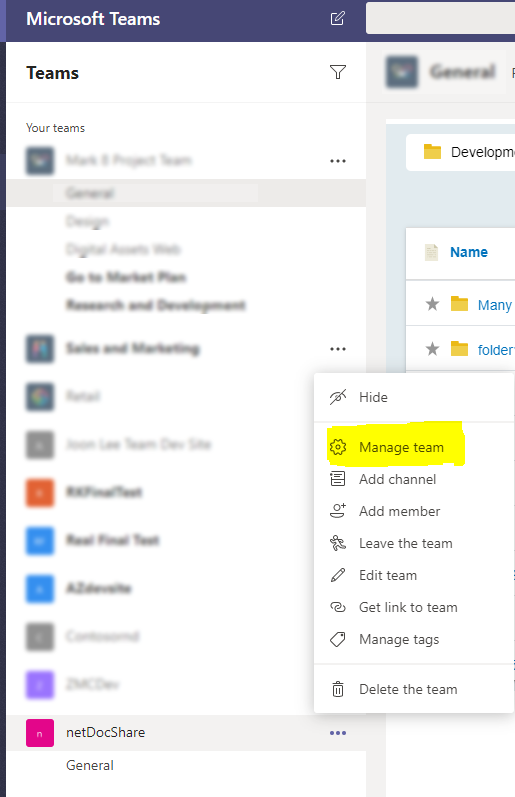
You may also install the app by adding it to a specific team or chat group: navigate to the Team tab that you are expecting to use and clicking the “Manage Team” option shown below:
From here, select the “App” tab and you can click the “Upload a custom app” link just like from the apps screen:

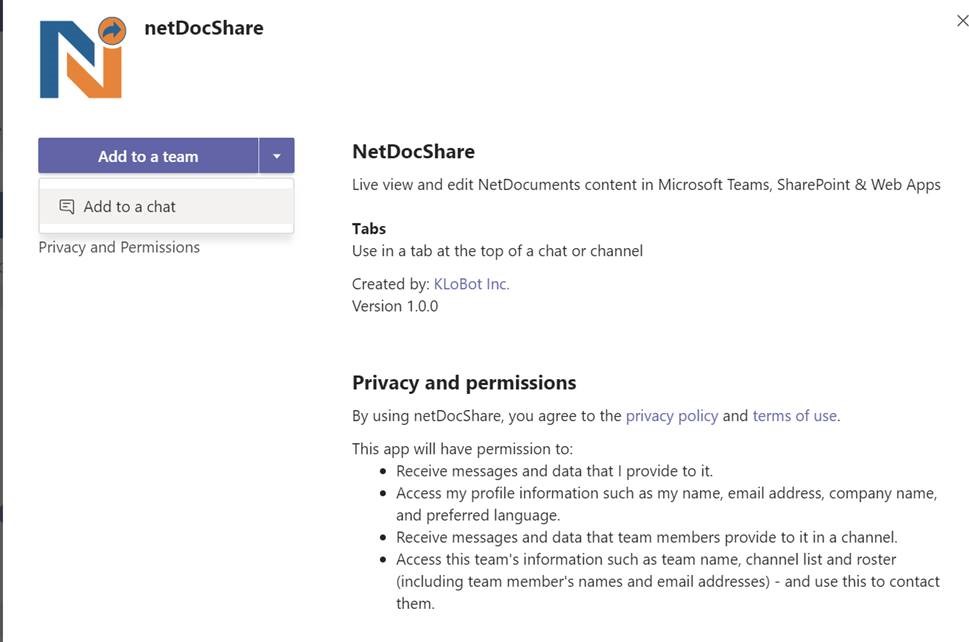
Installing using this method will NOT install the personal tabs nor will it make the app available for other users. Once install is complete, the following screen which lets users review the privacy and Terms of Usage before adding the app:
Once the app is successfully added, Inside the new team or chat group, click the “+” button on the middle nav bar and this will initiate the new install dialog window. For personal app, simply choose the “Add” option without adding to a specific team or chat group.
Personal App: New Install
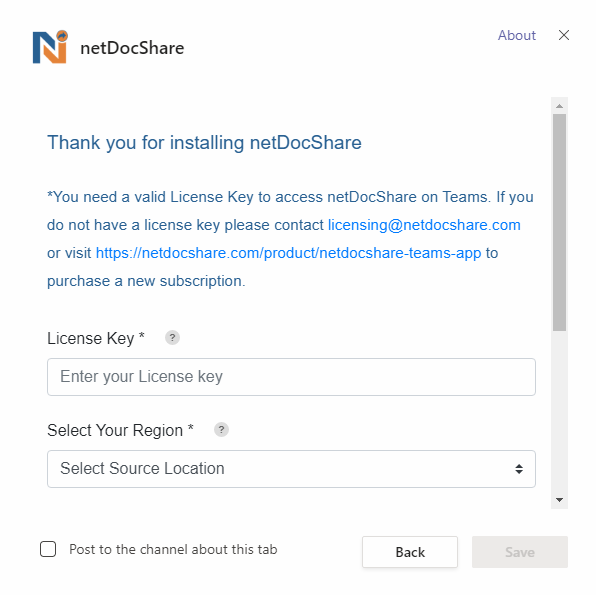
If you have installed as a personal app, you will automatically get 3 sample tabs after providing some licensing information. On the welcome screen, you will see that you need to fill in a few parameters:
This is a unique key provided to you by our company when purchasing netDocShare. If you would like to use netDocShare separately, please contact us at support@netDocShare.com. More info in the next section. This field will automatically validate the license key and show a warning if an invalid key is detected.
The regional source of your NetDocuments account. Currently we support US, EU (UK), and DE with plans to support other regions in the future.
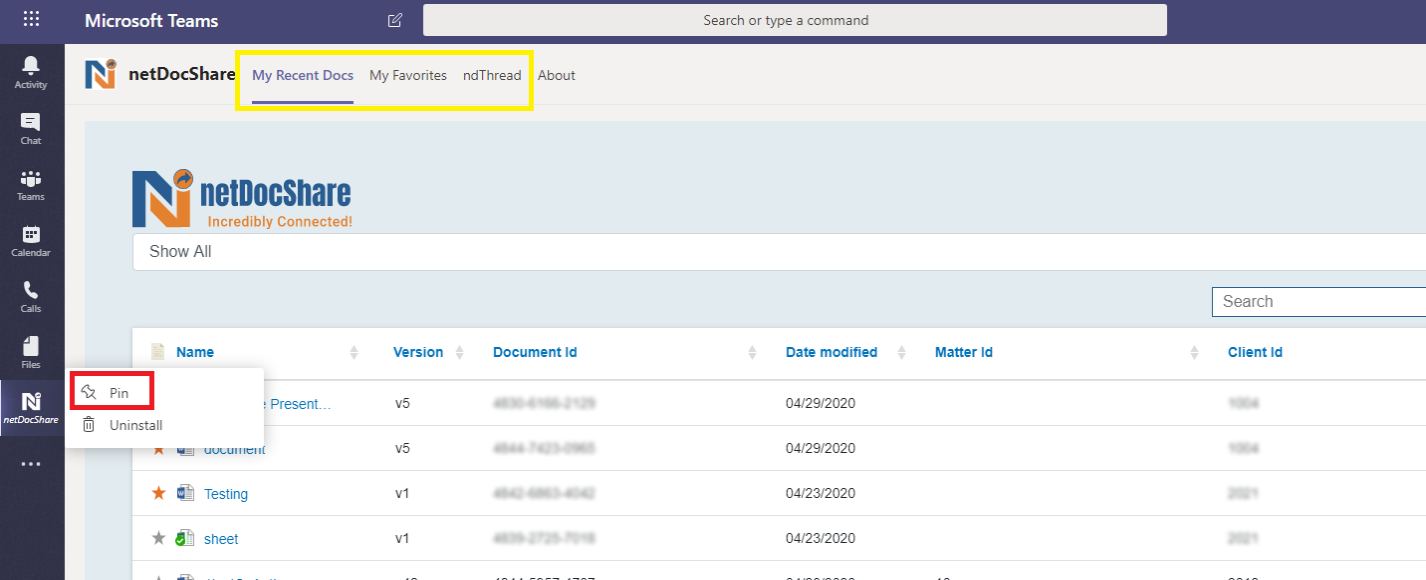
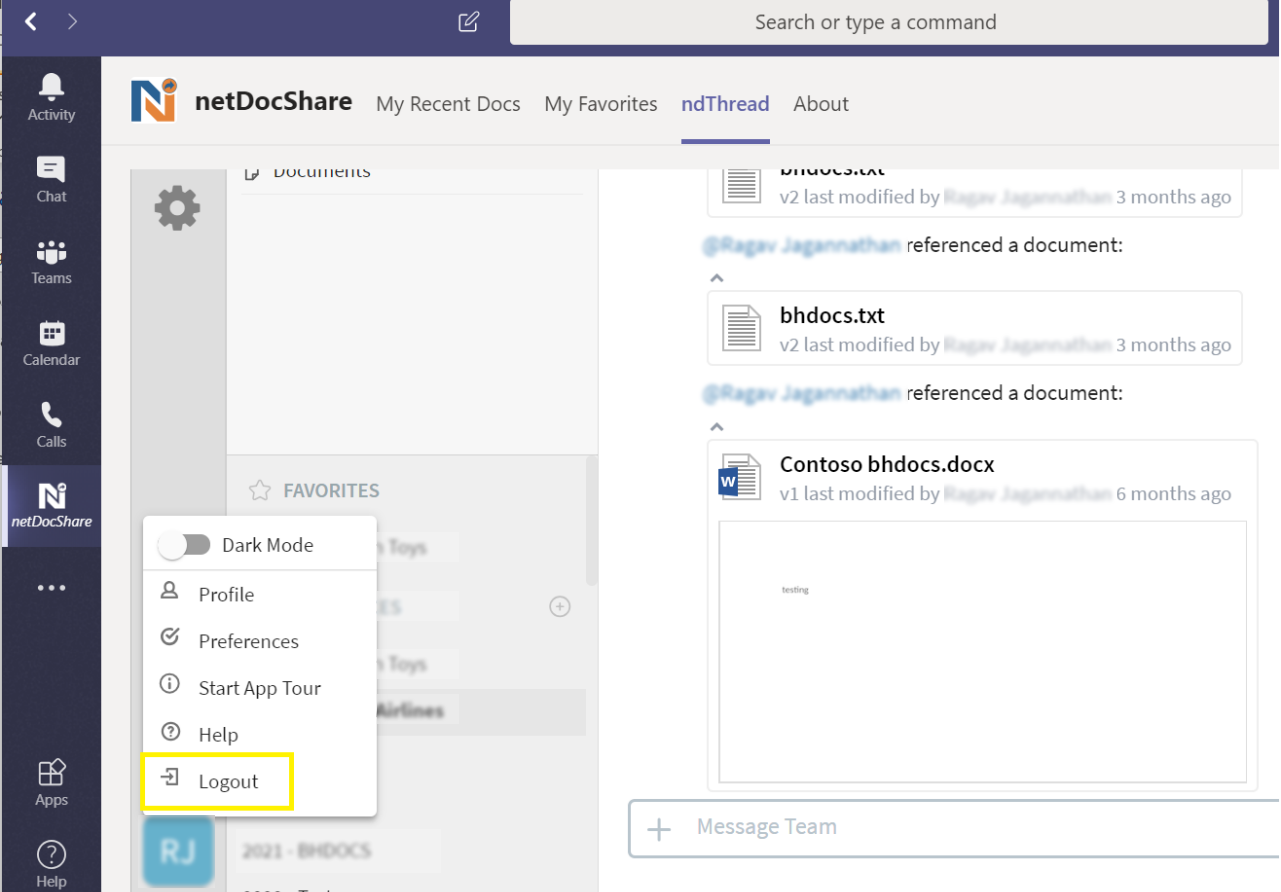
Once you have entered the settings above, the app will require login to continue. Please see the login and authorization section for more info about this. Once authentication has been established, the app will create three default views for you: Recent Documents, My Favorites and ndThread highlighted in yellow below. Note: ndThread integration is only available for Enterprise clients. When the app is being used, it will appear on your left-side navigation bar, you may also pin the personal app to your left-side navigation bar by using the “pin” option highlighted in red below:
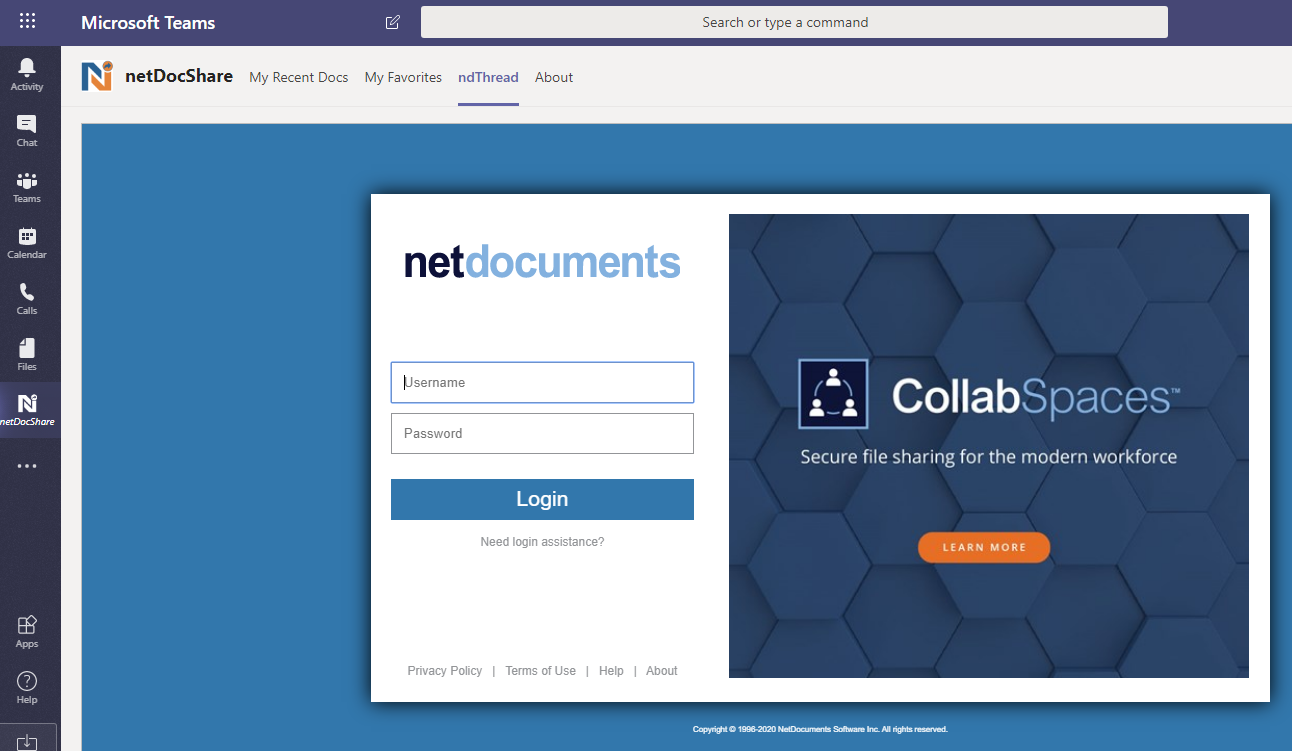
You will be asked to provide NetDocuments login credentials before any content can be accessed. These Personal Tab views are non-configurable and will always show your personalized content from NetDocuments. If you would like to configure views like this, you may add additional views (using “recent” or “favorite” view) in a team or Chat group with customized settings.
ndThread
Note: Ndthread is only available for Enterprise clients.
The ndThread tab will open a view which will connect to the ndThread site. You may use the same NetDocuments credentials if ndThread is enabled for your NetDocuments account.
Add to Team or Chat group: New Install Dialog
On this screen, you must provide some important details to initialize your application in our service database.
Note: This screen will not appear if the personal app install has already been completed. Since your License key has already been registered through the “New personal app” form, instead of this screen, you will directly see the “Create new Tab” screen or authentication screen if required.
Here are the fields that must be filled out in order to begin the process:
This is a unique key provided to you by our company when purchasing netDocShare. If you would like to use netDocShare separately, please contact us at support@netDocShare.com. More info in the next section. This field will automatically validate the license key and show a warning if an invalid key is detected.
The regional source of your NetDocuments account. Currently we support US, EU (UK), and DE with plans to support other regions in the future.
Once this is complete, you will be asked to authenticate with NetDocuments using the settings you have provided in conjunction with your NetDocuments user credentials.
Once this is complete, you will be ready to create your first tab. Please see the “Creating a new Tab” section for more details.
Note: Usage of the “basic” configuration option requires a “masterConfig” to exist. Therefore, the first tab that you create will be very important since it will be used to supplement future ‘basic’ configuration views. If you have installed personal tabs, the masterConfig will default to use the configuration that is used for the “recent Documents’ personal tab. This is a default configuration provided by netDocShare.
netDocShare Licensing
If you are using our SharePoint implementations, you will recognize that netDocShare comes with a unique license ID which will be verified on load. For the Teams App, this license key will only be checked once during initial installation of Personal tabs or Teams tab. Once it has been verified, the Teams App will no longer ask for the license key and instead rely on using your Microsoft Teams Tenant ID to retrieve and persist info in our database.
The service database is only used for the following tasks:
SharePoint Clients
When receiving our netDocShare deployment materials, you should also have received a netDocShareLicenseKey.txt file. This file contains your unique key which will activate netDocShare and the specific features that you have requested. Simply copy the key and use in the “License Key” field. Initial installation cannot move forward without providing this value.
Non-SharePoint Clients
Please visit https://netdocshare.com/product/netdocshare-teams-app to purchase a new subscription.
If you are experiencing any licensing issues, please contact licensing@netdocshare.com
First Time Configuration
As mentioned in the previous section, first time configuration is done by configuring your first tab in the Teams tab implementation OR by completing the Initial install screen for personal tabs. This will create your “Master” config. The “Master” config will be used to supplement future tab configuration editing when using the “basic” or non-advanced editing option. The “Master” configuration cannot be changed so please be careful when adding this for the first time. Note: Personal Tabs cannot be configured. If you would like configurable tabs, you can create them using the view type “Recent Docs” and “Favorite” and configure using the advanced settings editor.
NEW: Administrator App
With the release of our 3.2.0 version, netDocShare now supports a new globalConfig setting by using our newly released Admin App. This feature allows admin users to set configurations which will apply as defaults globally in SharePoint and Teams across their entire tenant.
Example: If you would like to remove the ability for users to add the “delete” option in the context menu across all SharePoint and Teams configurations, then it is possible to do this in the Admin App. Once an administrator and sets the override for Teams to off, users will no longer be able to see or select this option in Teams.
When determining the override priority, Admin App will ALWAYS override the initial Master config that was created on installation.
Creating a new Tab view
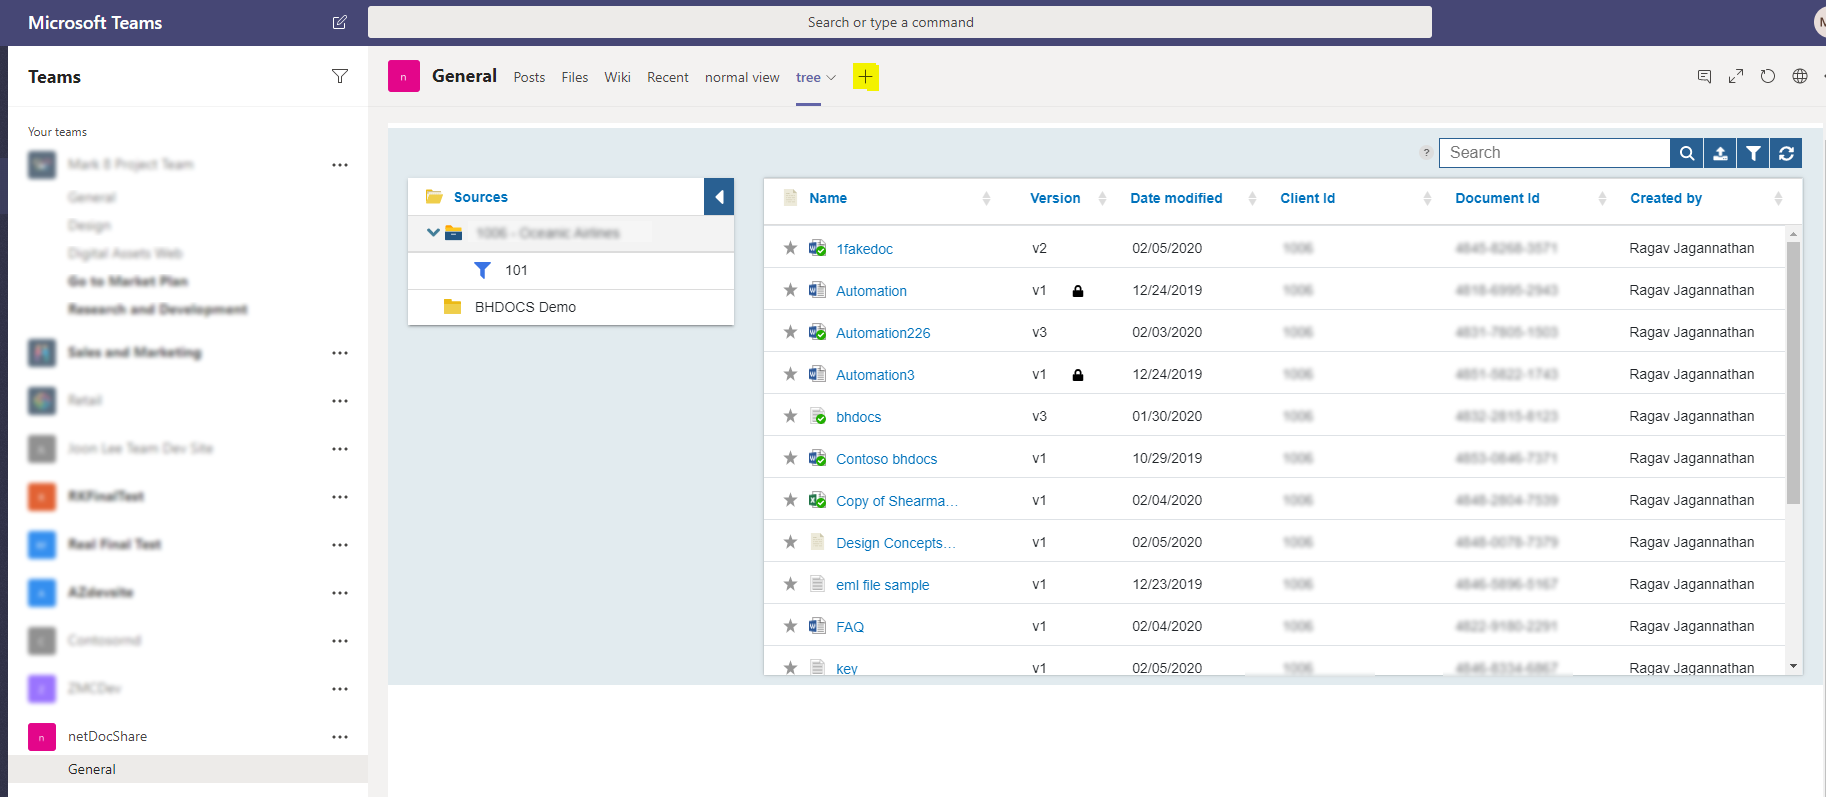
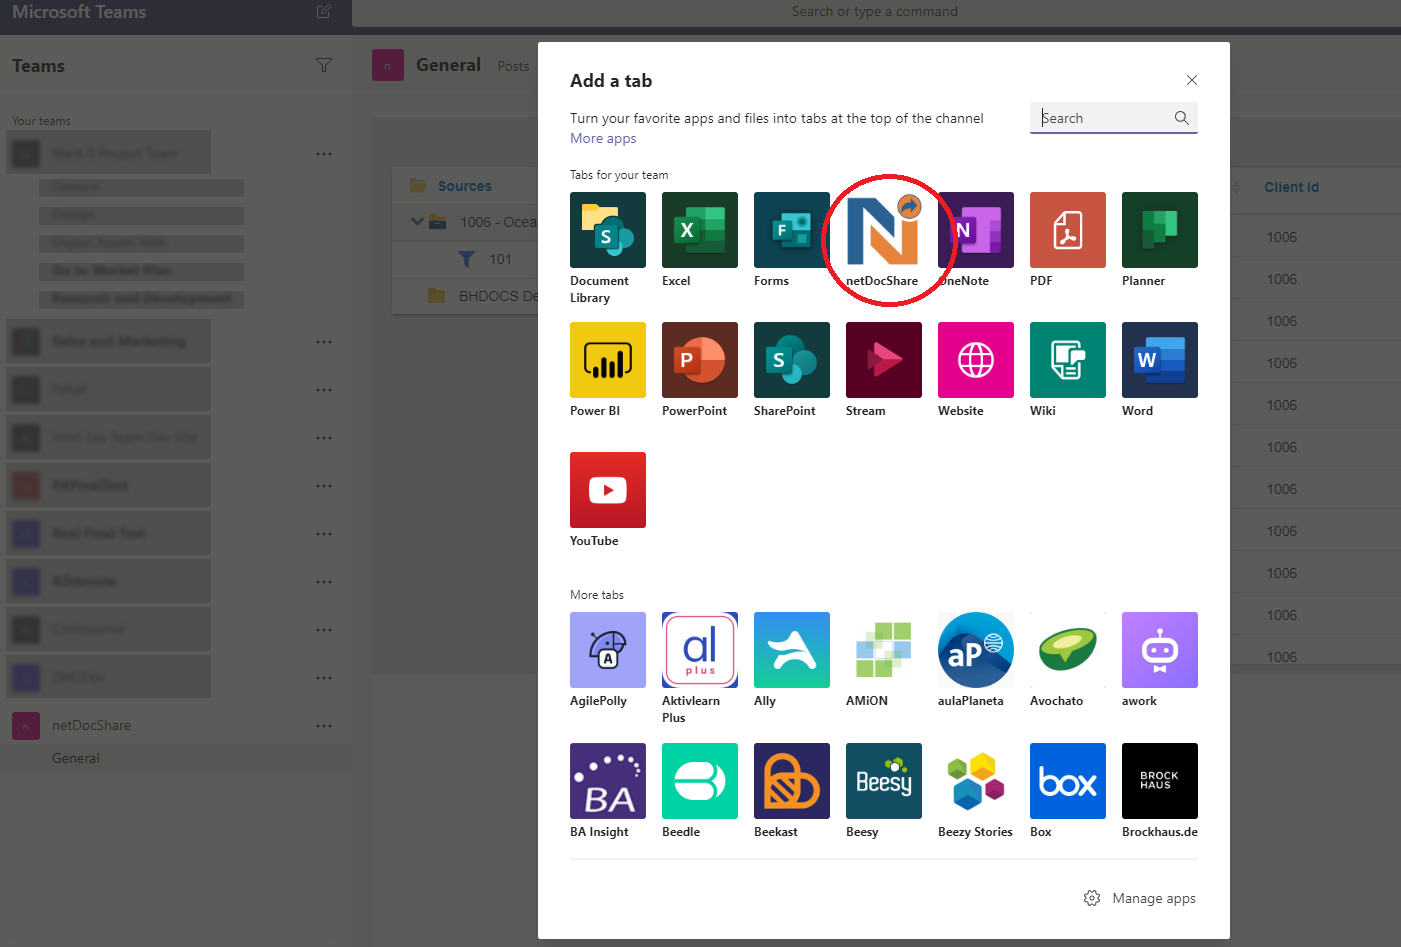
Completing the “New Install” dialog and authentication will bring you to the “create new tab” screen. Users can continue to create additional tab views by clicking the “+” button found in the middle nav highlighted below:

Select “netDocShare” from the list of apps shown:
This will take you to our “Create new Tab” dialog. Here, you will see two different tabs labeled “Settings” and “Advanced Settings”. These are two alternative ways to create a new tab.
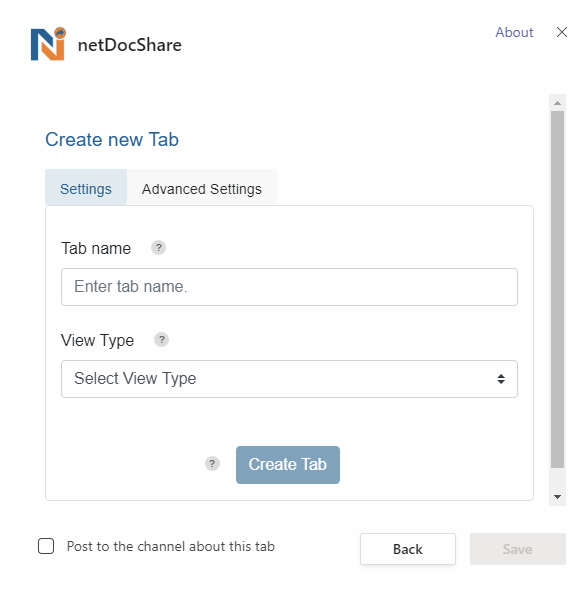
Settings
Give your tab a name that is relevant to the content that will be shown
Choose a view type. Some views such as Recent Documents and Favorites require no additional configuration. Views such as normal View and Tree view will require 2 additional fields
Choose the type of container that will be displayed. Once this option has been selected, users will see additional field options to filter and/or select sources queried directly from NetDocuments
The standard 12-digit identification for a NetDocuments document or container. Once source type is selected, users can filter by containers such as cabinet and workspace to look for the container they want.

*Note: Editing a view using the basic “settings” option will revert any config changes that were previously made using the “Advanced Configuration” screen. It will revert your settings to use your “Master” configuration.
Advanced Configuration

Clicking this button should automatically retrieve Profile Attribute columns associated to the specific source and fill the Column Properties dropdown with these additional values. Users can then add, remove or re-arrange the columns as desired.
Please consult our netDocShare Power User Guide to see more information about configs such as what each property does and what settings can be applied to each property.
*Note: Editing a view using the basic “settings” option will revert any config changes that were previously made using the “Advanced Configuration” screen. It will revert your settings to use your “Master” configuration. If you would like to preserve “Advanced” configurations on an individual webpart, please continue editing it using only “Advanced Configuration”.
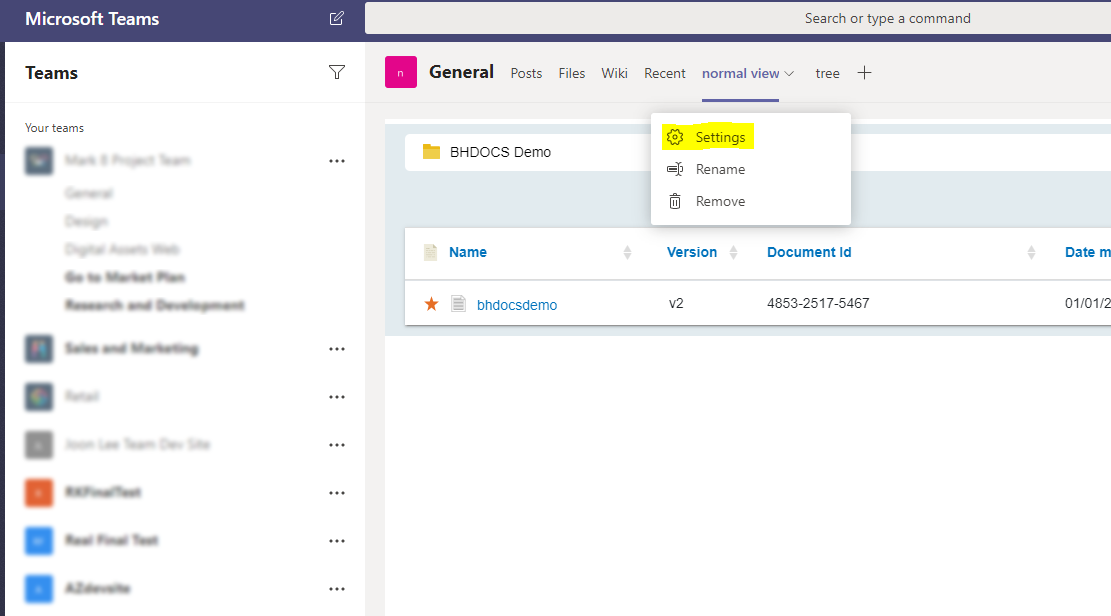
Edit an existing tab view
Clicking on the arrow button (shown below) beside each tab will show 3 options: settings, rename and delete. Note: Personal Tabs are not configurable. If you would like to configure your “recent” or “favorite” views, please create a team tab with that view and configure as shown below.
Delete will remove the configured tab. This does not delete any content on SharePoint or NetDocuments. It will, however, delete the associated tab information from our service database and you will no longer be able to retrieve the config settings for that tab.
Rename will simply rename the tab that you can see on Teams. This does not edit any names on SharePoint or NetDocuments
Using the “Settings” option will open a dialog that can be used to edit the configuration of your netDocShare tab view. Similar to the “Create new Tab” dialog, there will be 2 main options to change the tab configuration: “Settings” is used for basic configuration and “Advanced Configuration” will use the netDocShare config builder
Clicking the “Advanced Configuration” tab during a tab edit session will automatically import the currently existing settings into the config builder form where you can update them
Makes changes to the settings then click “Update Settings” to validate your current changes. Then you may click “save” in order to see the newly configured view
Please consult our netDocShare Power User Guide to see more information about configs such as what each property does and what settings can be applied to each property.
*Note: Editing a view using the basic “settings” option will revert any config changes that were previously made using the “Advanced Configuration” screen. It will revert your settings to use your “Master” configuration. If you would like to preserve “Advanced” configurations on an individual webpart, please continue editing it using only “Advanced Configuration”.
Controlling your NetDocuments Login
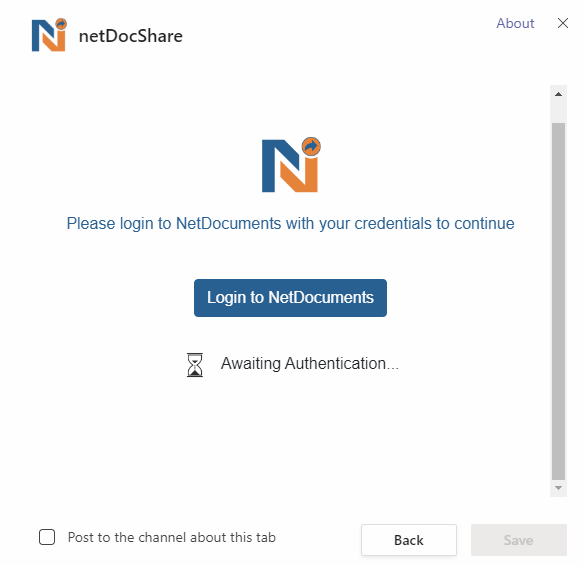
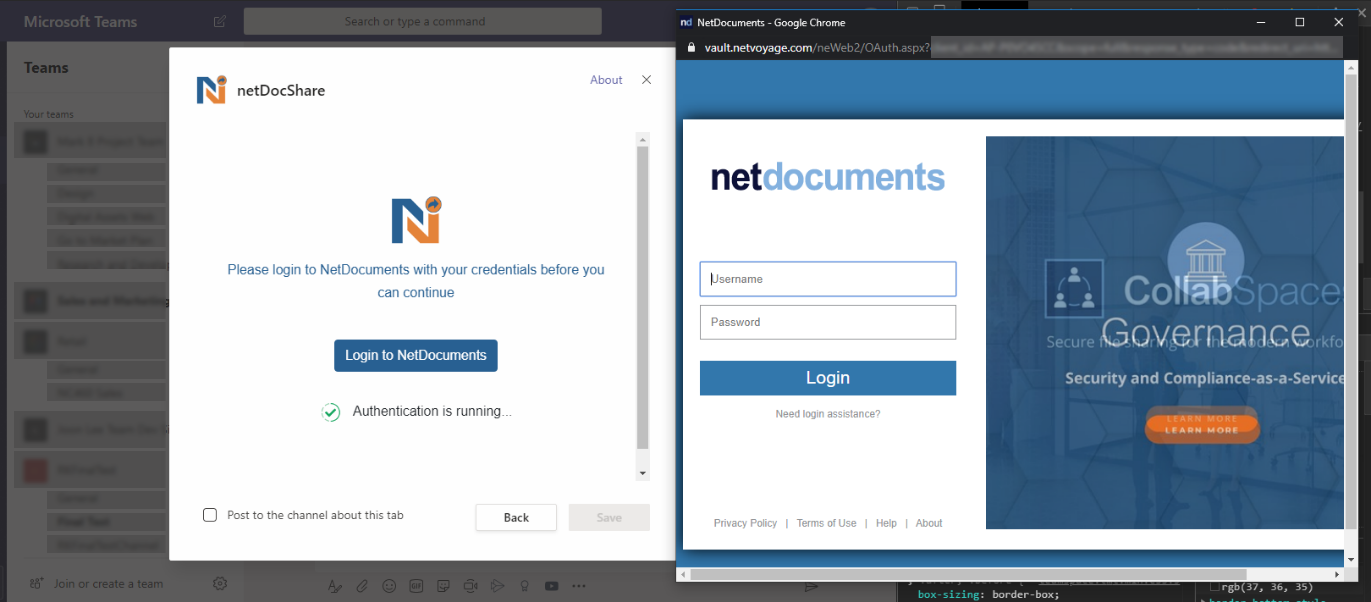
As our app is focused on accessing protected content from NetDocuments, login is required before the user can create or edit any views. Immediately after installation and license check, the user will be prompted to login on a screen like below:
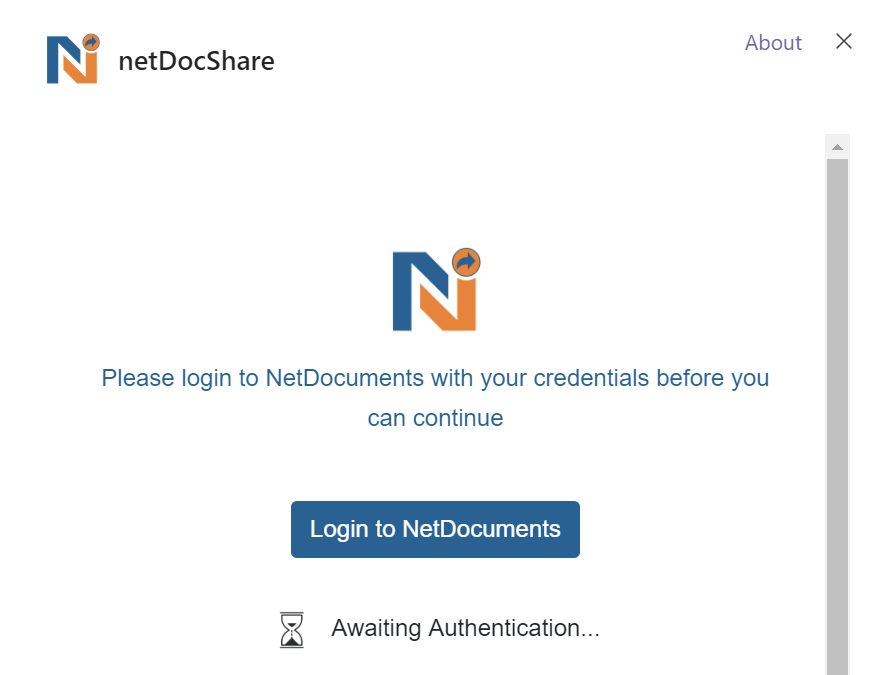
Upon clicking the button, users should see a separate popup screen containing the NetDocuments login form.
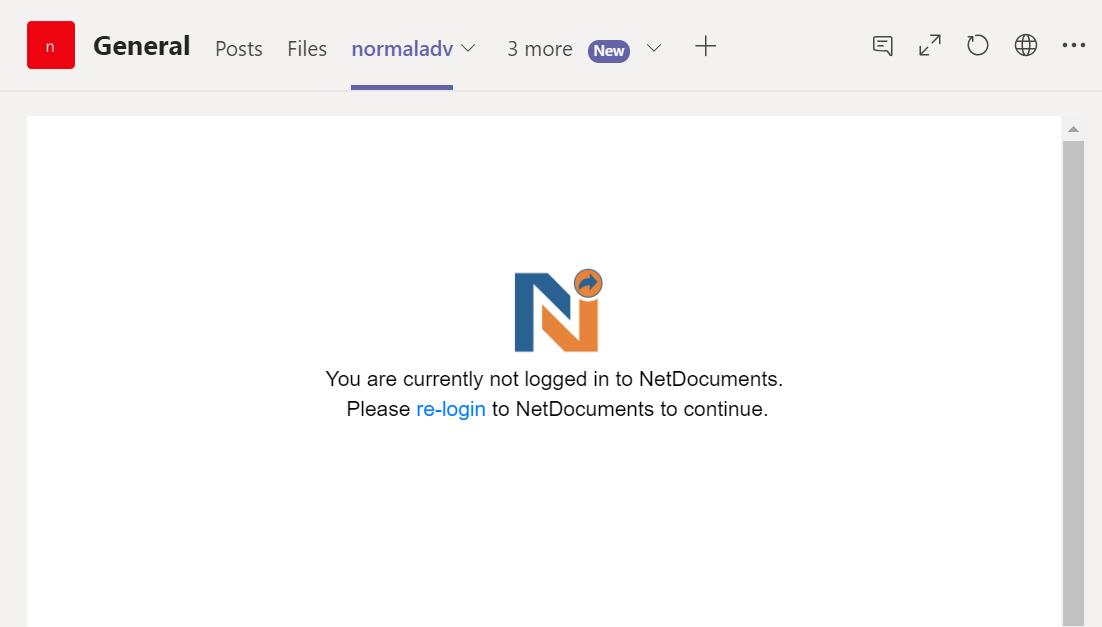
When viewing tabs that have already been created, users will also be prompted to login if the login session is expired or doesn’t exist.
Each view loaded in netDocShare should come with a “Log out” command that should reset your NetDocuments login session. In our SharePoint environments, showing the logout menu is optional and can be turned on using the Config Builder or by editing the JSON config. In Teams, it is mandatory.
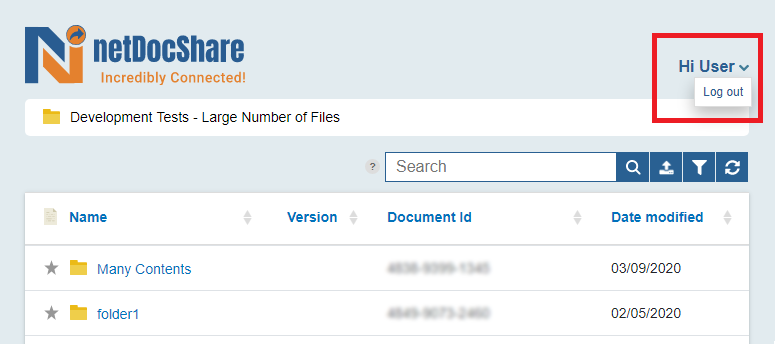
In each view, on the top right corner, you should be able to see a message stating “Hi (your username)”. Clicking on this will open a menu that will provide the option to “Log out” of your current NetDocuments account and refresh the view automatically. Once refreshed, you should be prompted to re-login to NetDocuments using your preferred account name and password. This session will be saved until you execute the logout command again. NetDocuments login is required to view contents in any view.
ndThread
Note: NdThread is only available for enterprise clients.
ndThread is accessible as a sub-tab in individual tabs, this implementation of ndThread should connect directly to the source container of the tab. Alternative ndThread is also available as a full screen tab through personal tabs. Users may also login and logout of ndThread. This is a complete separate session from your general NetDocuments login so your ndThread session should not affect your NetDocuments session and vice-versa. Users may logout of ndThread using the built-in logout functionality in the ndThread tab.
Un-installing
The netDocShare Teams app is an application can be installed to a user’s specific Teams application for “Personal” tabs or to specific Teams or group chat instances. A user with administrative privileges over the organization is also able to install the app across the tenant for everyone’s usage. There are 3 methods of un-install:
In order to fully uninstall netDocShare, please follow the procedure below:
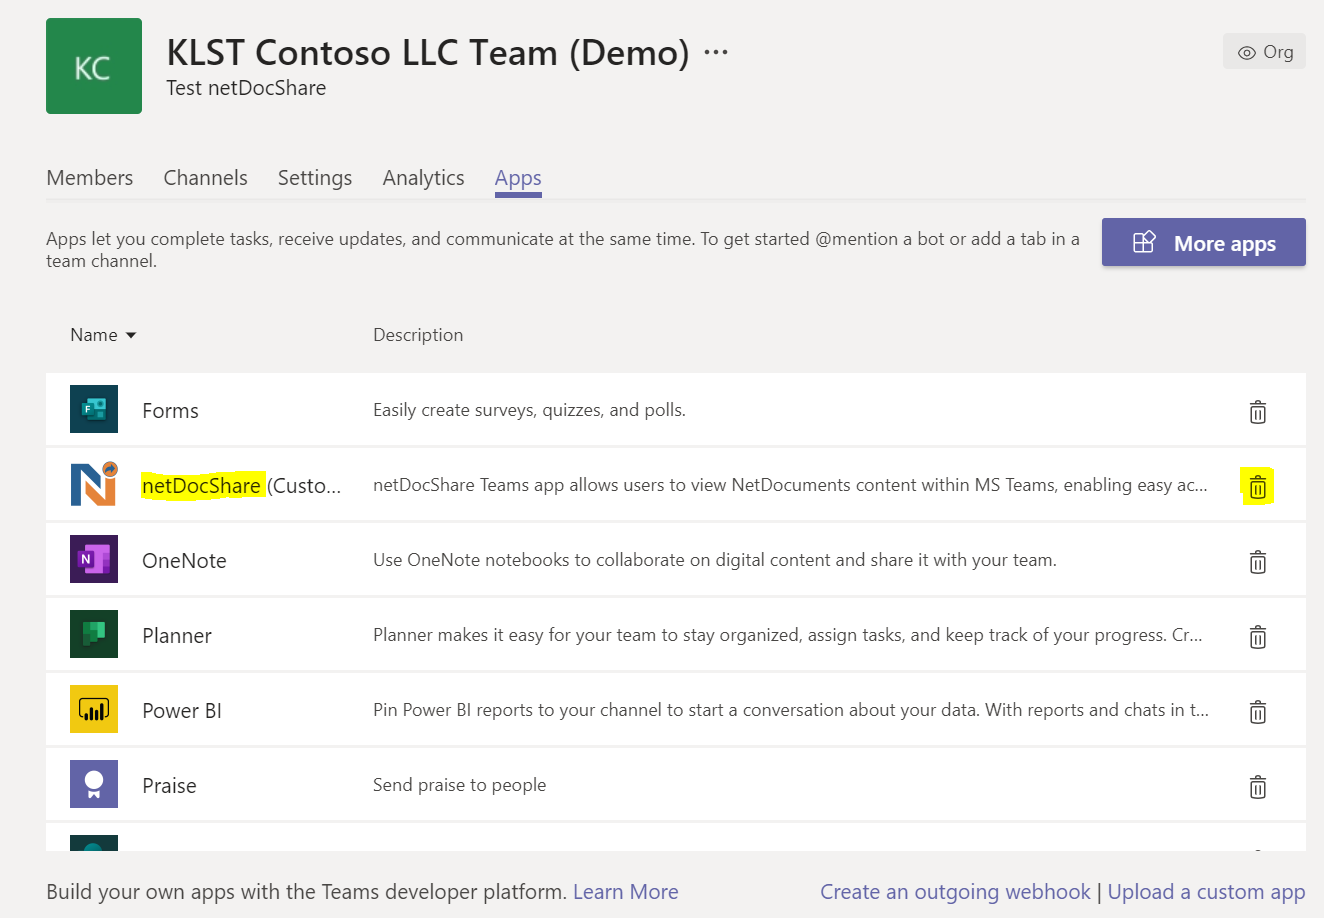
Specific Team/Chat Group
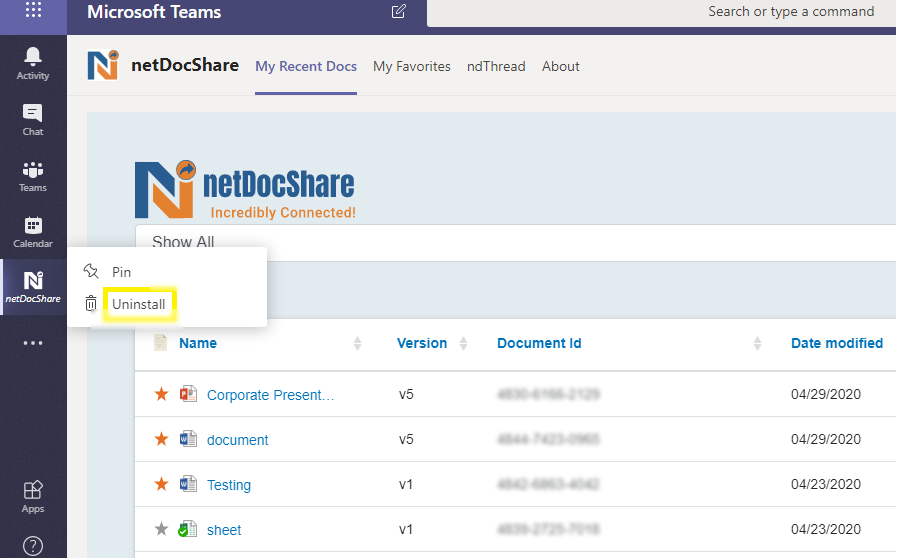
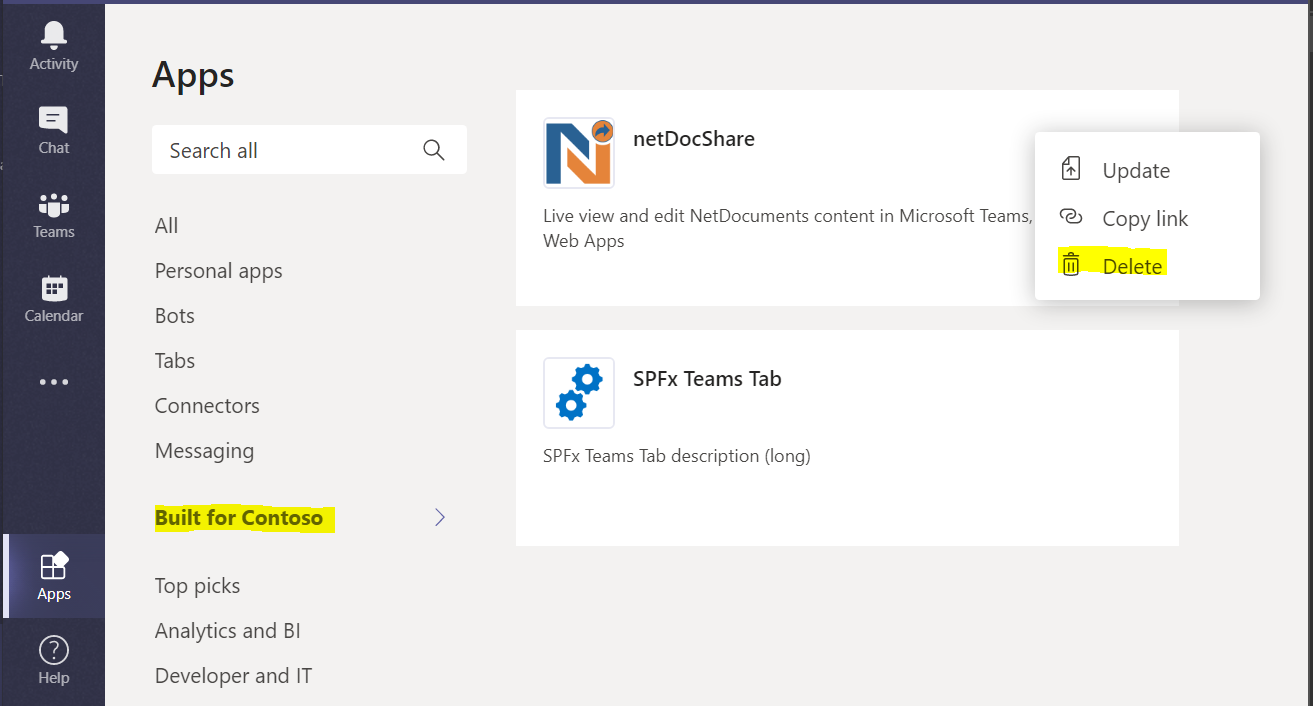
Personal / Admin
Troubleshooting and FAQs
Install / Uninstall
In order to resolve any issues regarding install / uninstall, we recommend exiting teams and restarting it again. This tends to resolve many of the most common issues in which Teams does not properly update whether the app exists or not. If the issue persists after several restarts, please contact support at support@netdocshare.com
Known Issues
The Teams App includes almost all functionalities that are available in the SharePoint and Web App versions. However, there are small differences and restrictions due to the limitations of the technology. These differences are listed below.